Zum Hauptinhalt wechseln

Insignia NS-DS9PDVD15 Latch Replacement

Was du brauchst

  1. Insignia NS-DS9PDVD15 Latch Replacement, Bottom Cover: Schritt 1, Bild 1 von 2 Insignia NS-DS9PDVD15 Latch Replacement, Bottom Cover: Schritt 1, Bild 2 von 2
    • Turn the power off. Slide the power button to OFF.

  2. Insignia NS-DS9PDVD15 Latch Replacement: Schritt 2, Bild 1 von 2 Insignia NS-DS9PDVD15 Latch Replacement: Schritt 2, Bild 2 von 2
    • Unplug AC adapter from car cigarette lighter.

  3. Insignia NS-DS9PDVD15 Latch Replacement: Schritt 3, Bild 1 von 1
    • Make sure there is no DVD or CD in the disc tray

  4. Insignia NS-DS9PDVD15 Latch Replacement: Schritt 4, Bild 1 von 2 Insignia NS-DS9PDVD15 Latch Replacement: Schritt 4, Bild 2 von 2
    • Unscrew the nine 9mm screws with a JIS #000 screwdriver.

  5. Insignia NS-DS9PDVD15 Latch Replacement: Schritt 5, Bild 1 von 3 Insignia NS-DS9PDVD15 Latch Replacement: Schritt 5, Bild 2 von 3 Insignia NS-DS9PDVD15 Latch Replacement: Schritt 5, Bild 3 von 3
    • Pry off back panel with prying tool, then remove by hand.

  6. Insignia NS-DS9PDVD15 Latch Replacement, Latch: Schritt 6, Bild 1 von 1
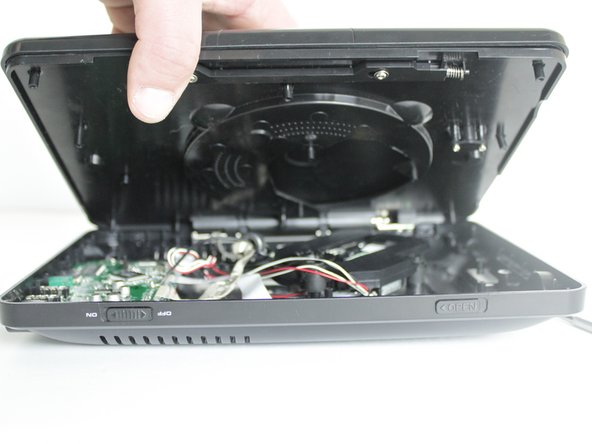
    • After the back is removed and you can see the interior of the device, push the old latch out.

  7. Insignia NS-DS9PDVD15 Latch Replacement: Schritt 7, Bild 1 von 2 Insignia NS-DS9PDVD15 Latch Replacement: Schritt 7, Bild 2 von 2
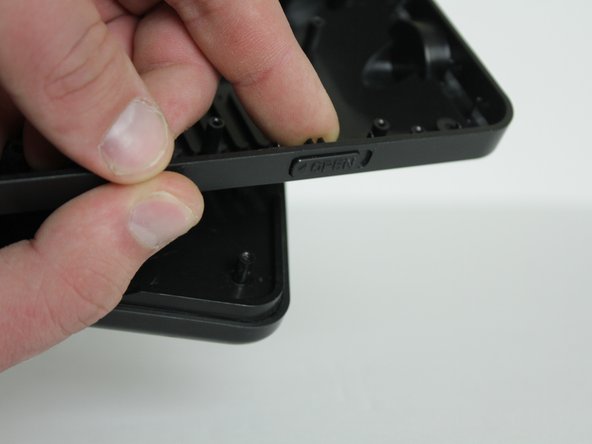
    • Push the new latch in where the old latch was previously held

    • You can lightly tap it from the inside to make sure the new latch is sliding left and right.

Abschluss

To reassemble your device, follow these instructions in reverse order.

Trenton

Mitglied seit: 04/04/18

85 Reputation

1 Anleitung geschrieben

0 Kommentare

Kommentar hinzufügen

Seitenaufrufe:

Letzte 24 Stunden: 0

Letzte 7 Tage: 0

Letzte 30 Tage: 0

Insgesamt: 309