Zum Hauptinhalt wechseln

Insignia NS-DS9PDVD15 Speaker Replacement

Was du brauchst

  1. Insignia NS-DS9PDVD15 Speaker Replacement, Bottom Cover: Schritt 1, Bild 1 von 2 Insignia NS-DS9PDVD15 Speaker Replacement, Bottom Cover: Schritt 1, Bild 2 von 2
    • Turn the power off. Slide the power button to OFF.

  2. Insignia NS-DS9PDVD15 Speaker Replacement: Schritt 2, Bild 1 von 2 Insignia NS-DS9PDVD15 Speaker Replacement: Schritt 2, Bild 2 von 2
    • Unplug AC adapter from car cigarette lighter.

  3. Insignia NS-DS9PDVD15 Speaker Replacement: Schritt 3, Bild 1 von 1
    • Make sure there is no DVD or CD in the disc tray

  4. Insignia NS-DS9PDVD15 Speaker Replacement: Schritt 4, Bild 1 von 2 Insignia NS-DS9PDVD15 Speaker Replacement: Schritt 4, Bild 2 von 2
    • Unscrew the nine 9mm screws with a JIS #000 screwdriver.

  5. Insignia NS-DS9PDVD15 Speaker Replacement: Schritt 5, Bild 1 von 3 Insignia NS-DS9PDVD15 Speaker Replacement: Schritt 5, Bild 2 von 3 Insignia NS-DS9PDVD15 Speaker Replacement: Schritt 5, Bild 3 von 3
    • Pry off back panel with prying tool, then remove by hand.

  6. Insignia NS-DS9PDVD15 Speaker Replacement, Disc Tray: Schritt 6, Bild 1 von 2 Insignia NS-DS9PDVD15 Speaker Replacement, Disc Tray: Schritt 6, Bild 2 von 2
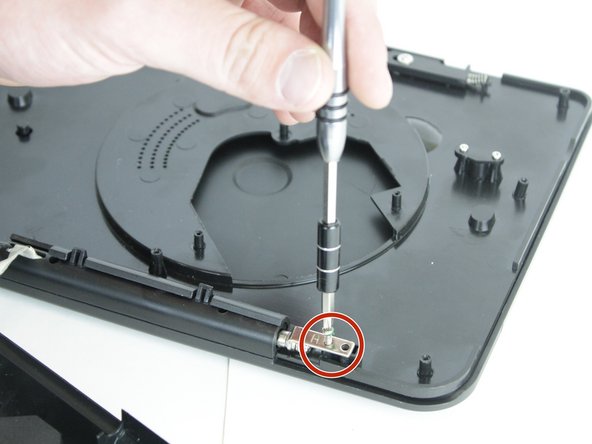
    • After the back is removed and the disk tray is loose from the bottom, locate the two, 3 mm screws that hold the tray to the hinge.

    • Unscrew them with the JIS #000 screwdriver.

  7. Insignia NS-DS9PDVD15 Speaker Replacement: Schritt 7, Bild 1 von 1
    • Slide the tray up and off of the hinge completely.

  8. Insignia NS-DS9PDVD15 Speaker Replacement, Speakers: Schritt 8, Bild 1 von 1
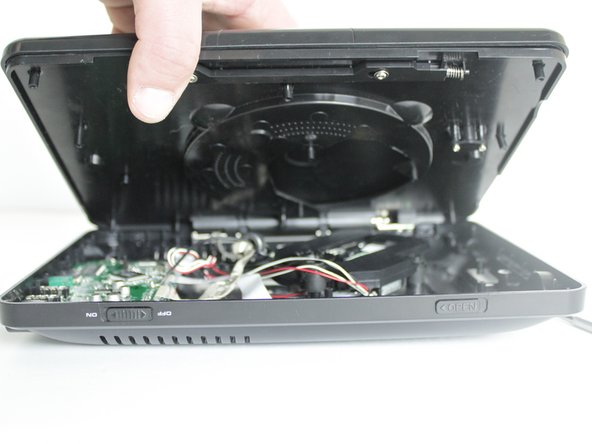
    • After the bottom cover and disk tray have been removed, remove the back panel from the top half.

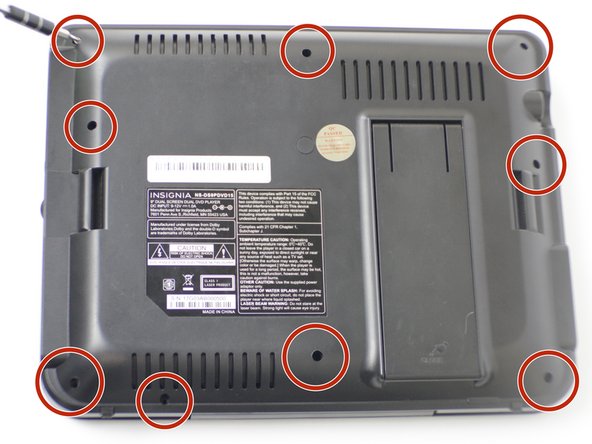
    • There are six, 9mm screws on the bottom cover and 2 screws on the hinge. Remove them with the JIS #000 screwdriver.

  9. Insignia NS-DS9PDVD15 Speaker Replacement: Schritt 9, Bild 1 von 2 Insignia NS-DS9PDVD15 Speaker Replacement: Schritt 9, Bild 2 von 2
    • Once all the screws are removed, pry off the cover with the pry tool.

    • You'll see the PC board, back of the speakers, and the back of the screen.

  10. Insignia NS-DS9PDVD15 Speaker Replacement: Schritt 10, Bild 1 von 2 Insignia NS-DS9PDVD15 Speaker Replacement: Schritt 10, Bild 2 von 2
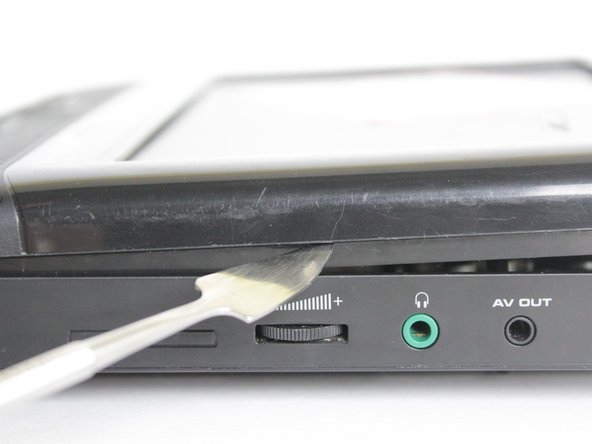
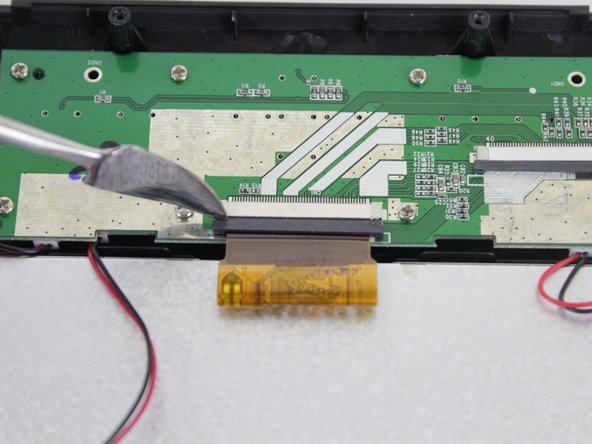
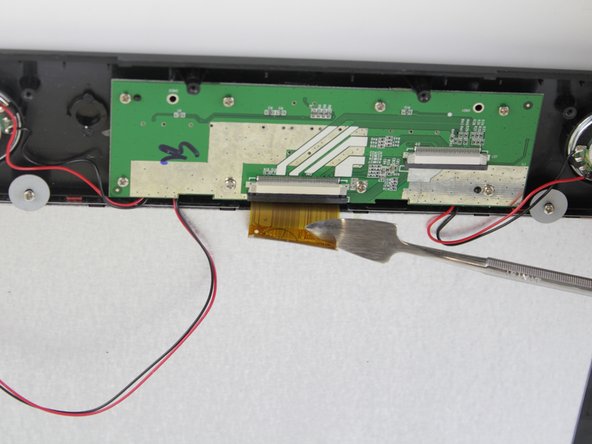
    • Remove the ribbon cable carefully with the pry tool.

    • First, push out the black portion.

  11. Insignia NS-DS9PDVD15 Speaker Replacement: Schritt 11, Bild 1 von 2 Insignia NS-DS9PDVD15 Speaker Replacement: Schritt 11, Bild 2 von 2
    • Then, push out the 'ribbon' with the pry tool.

  12. Insignia NS-DS9PDVD15 Speaker Replacement: Schritt 12, Bild 1 von 2 Insignia NS-DS9PDVD15 Speaker Replacement: Schritt 12, Bild 2 von 2
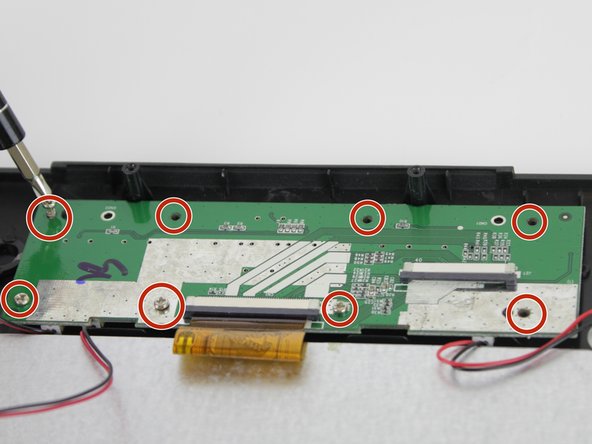
    • After the ribbon cable is removed, unscrew the eight, 9 mm screws from the PC board

  13. Insignia NS-DS9PDVD15 Speaker Replacement: Schritt 13, Bild 1 von 2 Insignia NS-DS9PDVD15 Speaker Replacement: Schritt 13, Bild 2 von 2
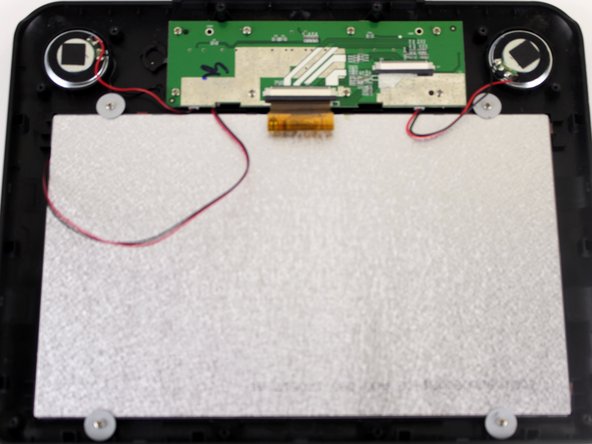
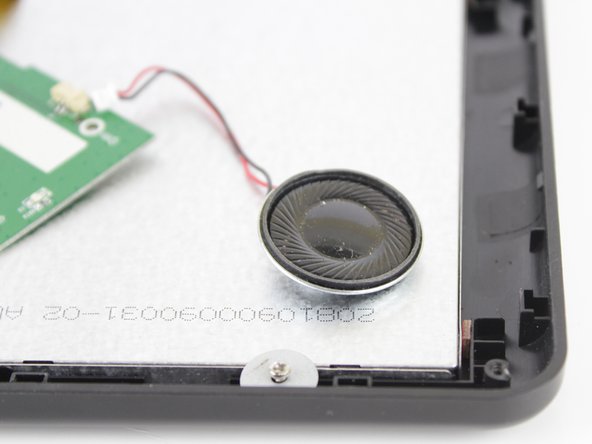
    • Flip over the PC board. Remove the two sets of red and black wires which connect to the speakers.

    • Use the pry tool at the white clip, to remove the wires. Then you can remove the speakers.

    • The wire second to left connects to the screen. Remove the far left wire--circled in the first picture-- to remove the left speaker.

Abschluss

To reassemble your device, follow these instructions in reverse order.

0 Kommentare

Kommentar hinzufügen

Seitenaufrufe:

Letzte 24 Stunden: 0

Letzte 7 Tage: 0

Letzte 30 Tage: 4

Insgesamt: 285