Diese Version enthält möglicherweise inkorrekte Änderungen. Wechsle zur letzten geprüften Version.
Was du brauchst
-
Dieser Schritt ist noch nicht übersetzt. Hilf mit, ihn zu übersetzen!
-
Remove the rubber screw caps using the pointed tip of the Spudger.
-
-
Dieser Schritt ist noch nicht übersetzt. Hilf mit, ihn zu übersetzen!
-
Remove the four 6.0 mm Phillips screws located below the rubber caps using the PH00 bit installed in the driver.
-
-
-
Dieser Schritt ist noch nicht übersetzt. Hilf mit, ihn zu übersetzen!
-
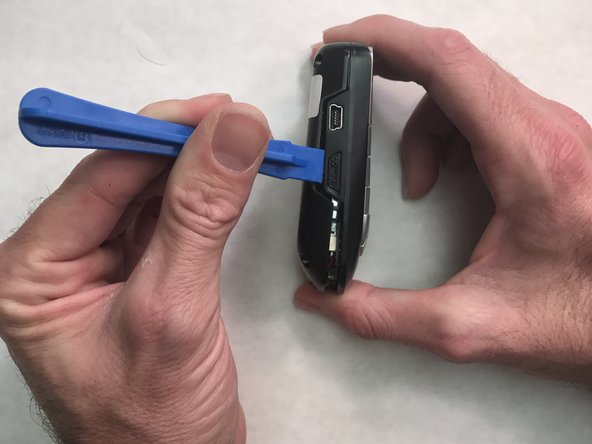
Use the plastic opening tool to pry open the back cover.
-
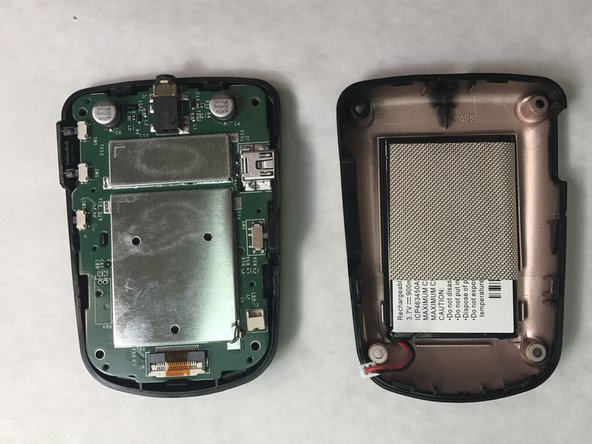
Slide the tool around the sides of the radio to gradually pry the back cover off. Do not remove the cover completely as there is still a cable connecting it to radio.
-
-
Dieser Schritt ist noch nicht übersetzt. Hilf mit, ihn zu übersetzen!
-
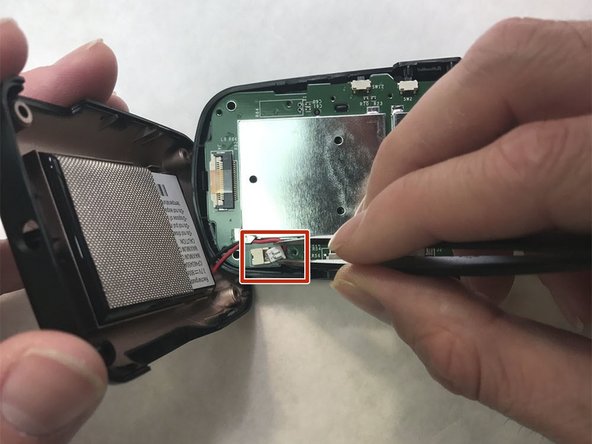
Use the blunt tweezers to unplug the battery cable from the PCB board. Grab the battery cable plug from the sides.
-
-
Dieser Schritt ist noch nicht übersetzt. Hilf mit, ihn zu übersetzen!
-
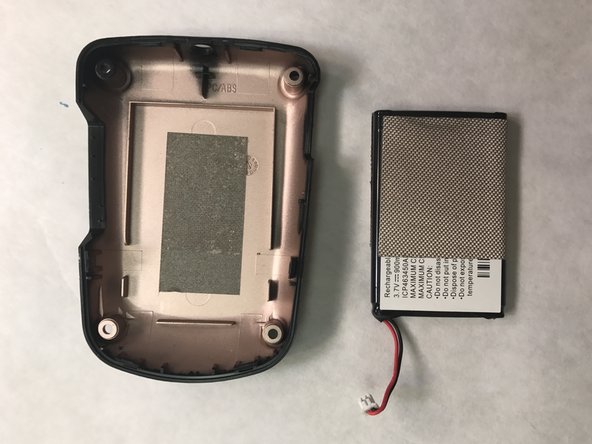
Use the flat side of the Spudger to pry the battery out of the back cover.
-
Insert the replacement battery into the back cover.
-
Reassemble the radio, making sure to reconnect the battery cable.
-


Rückgängig: Ich habe diese Anleitung nicht absolviert.
2 weitere Nutzer:innen haben diese Anleitung absolviert.
Team

IUPUI, Team 2-2, Wilson Fall 2016 Mitglied von IUPUI, Team 2-2, Wilson Fall 2016
IUPUI-WILSON-F16S2G2
5 Mitglieder
1 Anleitung geschrieben