Zum Hauptinhalt wechseln

Insignia NS-HDRAD Circuit Board Replacement

Was du brauchst

  1. Insignia NS-HDRAD Circuit Board Replacement, Battery: Schritt 1, Bild 1 von 2 Insignia NS-HDRAD Circuit Board Replacement, Battery: Schritt 1, Bild 2 von 2
    • Be sure the radio is turned off by pressing the red power button.

    • Or, if using the charger, remove the power cord.

  2. Insignia NS-HDRAD Circuit Board Replacement: Schritt 2, Bild 1 von 3 Insignia NS-HDRAD Circuit Board Replacement: Schritt 2, Bild 2 von 3 Insignia NS-HDRAD Circuit Board Replacement: Schritt 2, Bild 3 von 3
    • Remove the panel on the back side of the radio by pressing the arrow in a downward motion.

  3. Insignia NS-HDRAD Circuit Board Replacement: Schritt 3, Bild 1 von 3 Insignia NS-HDRAD Circuit Board Replacement: Schritt 3, Bild 2 von 3 Insignia NS-HDRAD Circuit Board Replacement: Schritt 3, Bild 3 von 3
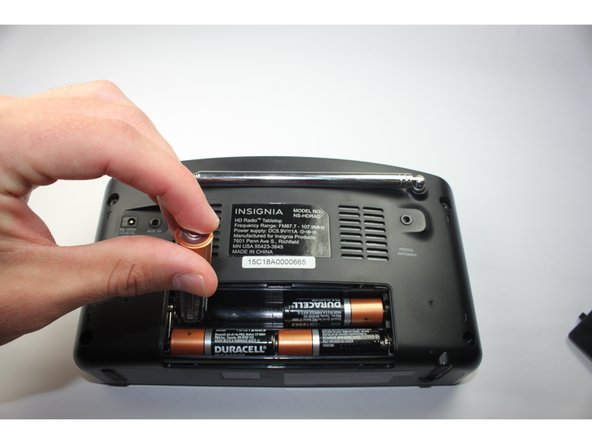
    • Remove the batteries one-by-one by pulling from the positive terminal of the top left battery.

    • The battery's positive terminal is indicated by a "+" on the side.

    • Remove the adjacent battery by simply pulling it out of the holder.

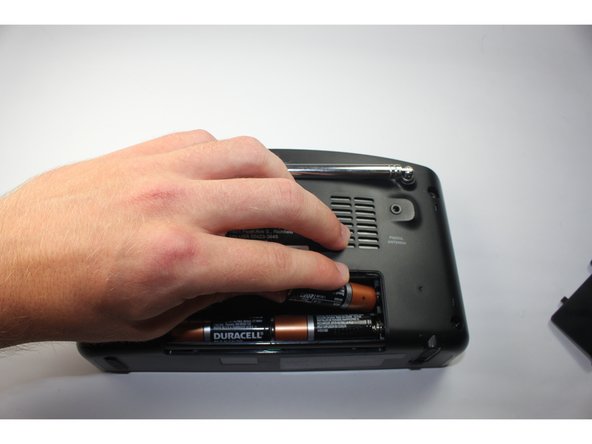
    • Repeat for the bottom row of batteries.

  4. Insignia NS-HDRAD Circuit Board Replacement, Rear Panel: Schritt 4, Bild 1 von 2 Insignia NS-HDRAD Circuit Board Replacement, Rear Panel: Schritt 4, Bild 2 von 2
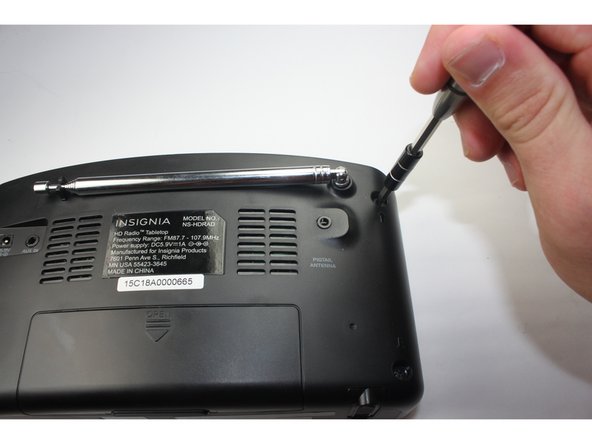
    • Using the J1 Philip's head screwdriver, remove the 4 screws from the back side of the radio.

    • The 2 bottom screws are difficult to remove. Once unscrewed, either use a spudger to pull it out or knock on the front side of the radio to pop it out.

  5. Insignia NS-HDRAD Circuit Board Replacement: Schritt 5, Bild 1 von 3 Insignia NS-HDRAD Circuit Board Replacement: Schritt 5, Bild 2 von 3 Insignia NS-HDRAD Circuit Board Replacement: Schritt 5, Bild 3 von 3
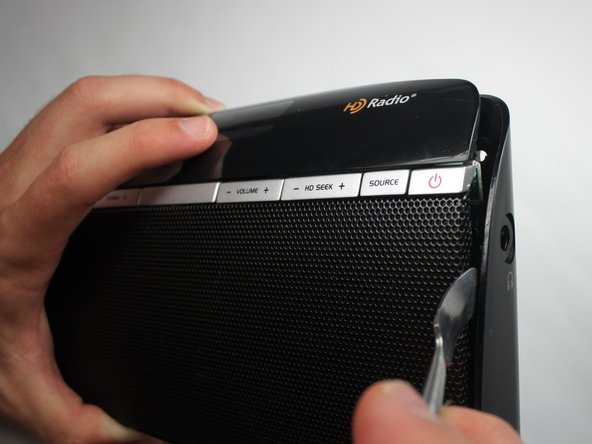
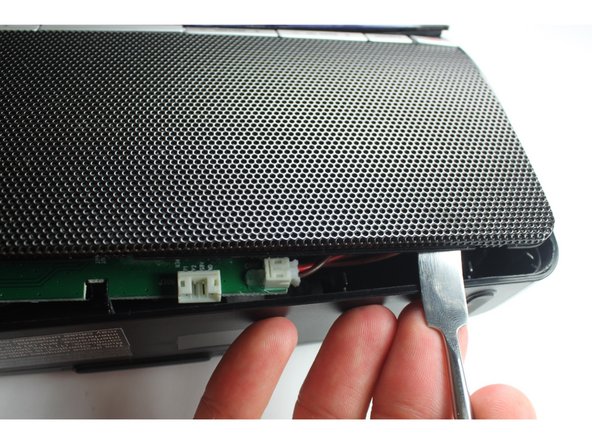
    • Using the metal spudger, pry open the panel with the metal spudger. Work you way around the whole device.

    • The headphone jack is flush with the paneling so the panel must be moved away from the jack completely to remove.

    • When reassembling, the ports don't fit into their respective holes in the back panel. Use the sharp metal end of the spudger and pull the ports to their slots.

  6. Insignia NS-HDRAD Circuit Board Replacement: Schritt 6, Bild 1 von 1
    • Using the pliers, separate the wire connector above the left speaker.

    • If this is the first time removing the wire connector, there may be glue holding the wires flush against the panel. Remove this glue with a finger or the plastic spudger.

    • Using regular pliers or needle nose pliers are fine for this tasks. They are interchangeable.

  7. Insignia NS-HDRAD Circuit Board Replacement: Schritt 7, Bild 1 von 1
    • Using the J1 Philip's head screwdriver, unscrew the bolt attaching the antenna to the back panel.

  8. Insignia NS-HDRAD Circuit Board Replacement, Circuit Board: Schritt 8, Bild 1 von 3 Insignia NS-HDRAD Circuit Board Replacement, Circuit Board: Schritt 8, Bild 2 von 3 Insignia NS-HDRAD Circuit Board Replacement, Circuit Board: Schritt 8, Bild 3 von 3
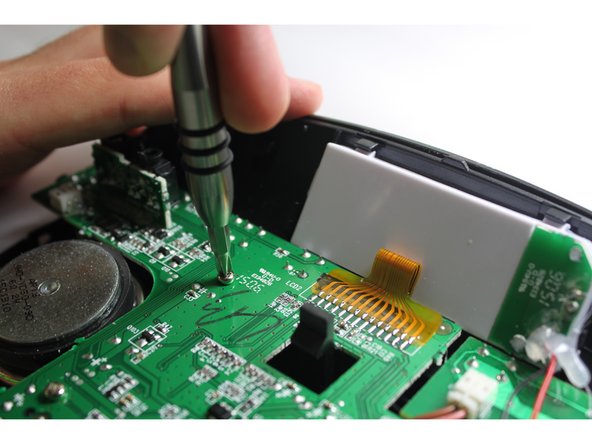
    • Using the J1 Philip's head screwdriver, remove the 6 screws holding the central circuit board and the upper right circuit board to the panel.

    • Because the two circuit boards are soldered together, we are going to treat them as one circuit board and leave them connected.

  9. Insignia NS-HDRAD Circuit Board Replacement: Schritt 9, Bild 1 von 2 Insignia NS-HDRAD Circuit Board Replacement: Schritt 9, Bild 2 von 2
    • The speakers are magnetic and will attract metal objects. Try to avoid get your tools stuck.

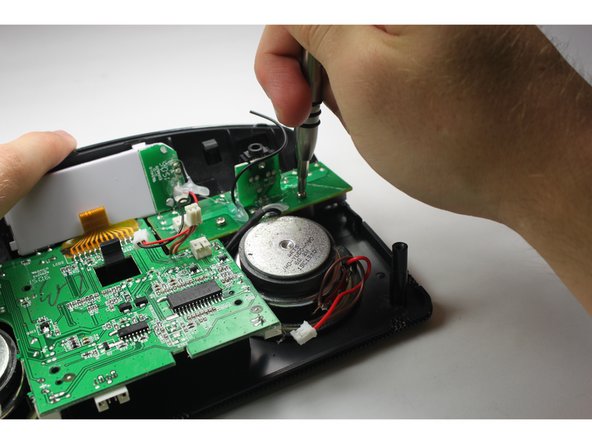
    • Using needle nose pliers or regular pliers, disconnect the wire connector with the red and black wires on the mother board by grabbing the end of the wires.

  10. Insignia NS-HDRAD Circuit Board Replacement: Schritt 10, Bild 1 von 1
    • Using the needle nose pliers or regular pliers, separate the wire connectors attaching the speakers to the circuit board on its right and left side.

  11. Insignia NS-HDRAD Circuit Board Replacement: Schritt 11, Bild 1 von 1
    • This step is completely optional. Leaving the wire connector alone will not cause a problem.

    • Using the needle nose pliers or regular pliers, remove the wire connector with the brown and pink wires to separate the small circuit board from the larger circuit board.

  12. Insignia NS-HDRAD Circuit Board Replacement: Schritt 12, Bild 1 von 1
    • Do not lift up the board too fast or too high. This may cause the copper ribbon to break and disconnect the LCD screen permanently.

    • Loosen the circuit board by lifting it up.

    • If this is the first time removing the circuit board, there will be a weak adhesive holding the circuit board to the front panel. Remove this with a metal spudger or sharp tool.

    • The power button may fall out of place. This is fine and you haven't broken anything, but be sure to place it back before inserting the circuit board.

  13. Insignia NS-HDRAD Circuit Board Replacement: Schritt 13, Bild 1 von 2 Insignia NS-HDRAD Circuit Board Replacement: Schritt 13, Bild 2 von 2
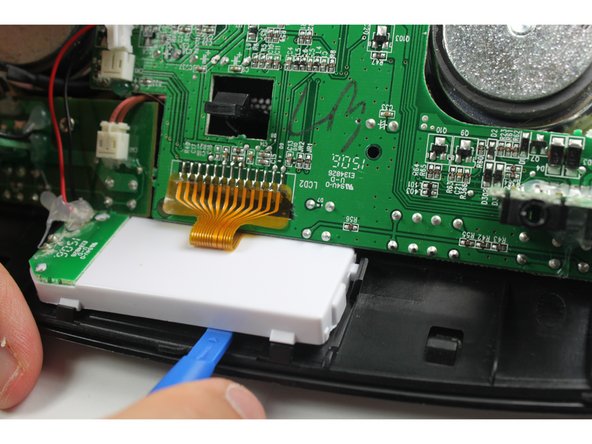
    • Remove the LCD Screen by pulling the black guard away from the LCD screen with a plastic spudger.

    • Use the plastic spudger to lift up the top side of the LCD screen.

  14. Insignia NS-HDRAD Circuit Board Replacement: Schritt 14, Bild 1 von 1
    • This step is important to ensure that the copper ribbon wire connecting the circuit board and the LCD screen is not damaged.

    • Lift the LCD screen up together with the circuit board.

Abschluss

To reassemble your device, follow these instructions in reverse order.

3 weitere Nutzer:innen haben diese Anleitung absolviert.

Joshua Miller

Mitglied seit: 09/22/15

433 Reputation

3 Anleitungen geschrieben

Team

Baylor, Team 4-3, Williams Fall 2015 Mitglied von Baylor, Team 4-3, Williams Fall 2015

BU-WILLIAMS-F15S4G3

4 Mitglieder

4 Anleitungen geschrieben

Ein Kommentar

Hi Josh, It seems like the nut attached to the small bolt holding the antenna has come loose. I’ve tried my best to remove the panel, but to no avail. My Insignia HD has a little different configuration then the one you posted, and has only TWO phillips screws near the top. Any suggestions on how to remove the panel? Thanks, <michaelk29@hotmail.com>

Michael K. - Antwort

Kommentar hinzufügen

Seitenaufrufe:

Letzte 24 Stunden: 0

Letzte 7 Tage: 3

Letzte 30 Tage: 4

Insgesamt: 804