Einleitung
Hello, this is Sarah. Welcome to my space.
The following steps will guide you on how to disassemble itel 2163 without ruining any part of the phone or the motherboard in less than 10mins.
Step 1: Switch off the mobile phone
First switch off the phone by longpressing the power button.
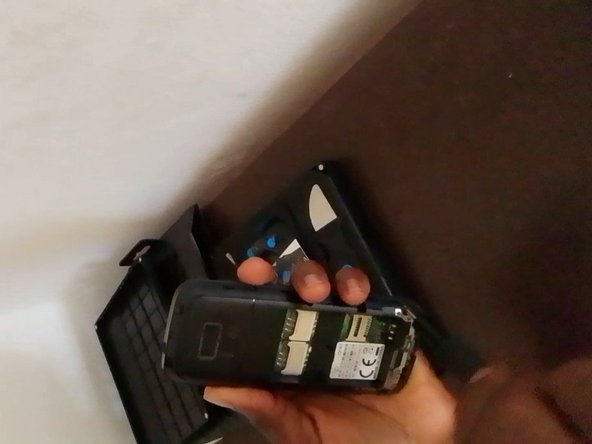
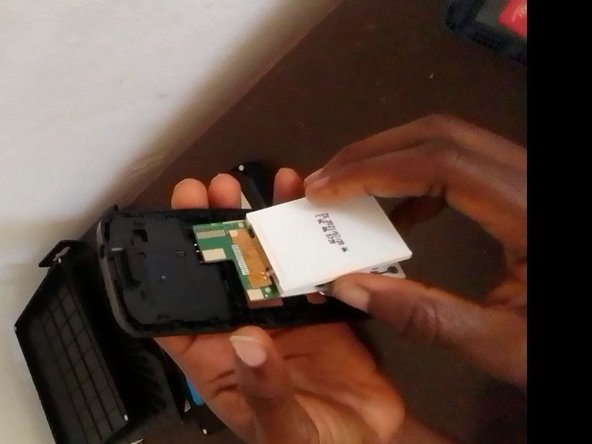
Step 2: Remove Back Cover and Battery
Remove the back cover of the phone and the battery, then check for any available sim card(s), and eject the sim card(s) from the sim bed(s).
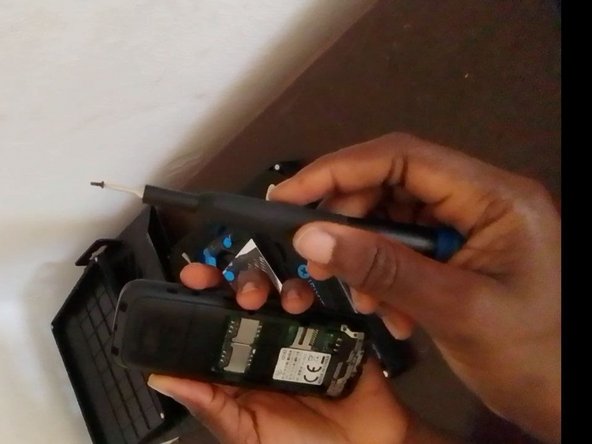
Step 3: Unscrew the Nuts/Screws
Get the phillips #00 screwdriver and check for the available four (4) nuts/screws attaching the front and middle case together.
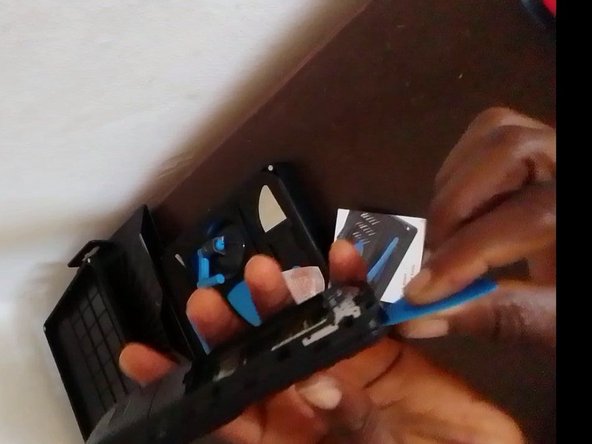
Step 4: Pry the Phone open
Get a plastic card and slice open the phone at the rear end towards the charging port in order to separate the middle case (sim bed case) from the front case (screen case). Note: do not pry the phone open with your finger, it is not safe and ethical as you can injure your finger nail in the process.
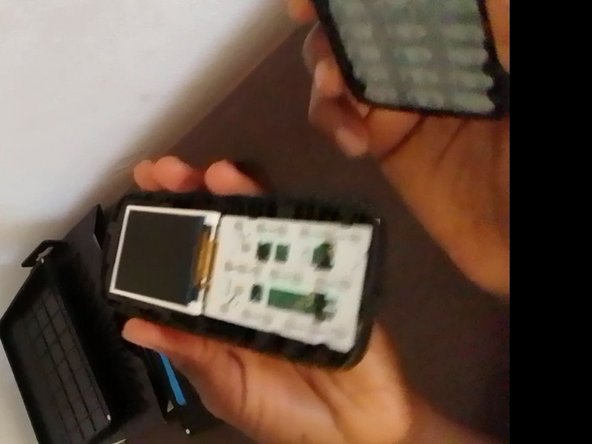
Step 5: The Motherboard in view
After prying the phone open, you will then be left with the motherboard and screen in view. Attached to the motherboard, you'll see the charging port, the mic, the speaker, the earphone jack, etc. Note: be careful with handling of the screen so as not to cause any defect to the screen flex thereby making the screen to malfunction or not work again.
Was du brauchst
-
-
First switch off the phone by longpressing the power button.
-
-
-
Remove the back cover of the phone and the battery, then check for any available sim card(s), and eject the sim card(s) from the sim bed(s).
-
-
-
-
Get the phillips #00 screwdriver and check for the available four (4) nuts/screws attaching the front and middle case together.
-
-
-
Get a plastic card and slice open the phone at the rear end towards the charging port in order to separate the middle case (sim bed case) from the front case (screen case).
-
-
-
After prying the phone open, you will then be left with the motherboard and screen in view. Attached to the motherboard, you'll see the charging port, the mic, the speaker, the earphone jack, etc.
-


To reassemble this device, follow these instructions in reverse order.
To reassemble this device, follow these instructions in reverse order.
Rückgängig: Ich habe diese Anleitung nicht absolviert.
6 weitere Nutzer:innen haben diese Anleitung absolviert.
