Einleitung
Hier wird nur das Zerlegen der größeren Teile gezeigt.
Bei diesem Gerät wurde ein neuer Ladeanschluss eingebaut.
Was du brauchst
Einführungsvideo
-
-
-
Löse die Lautsprechergitter mit einer Plastikkarte oder einem Spudger.
-
Wende nicht zuviel Kraft an. Die Gitter sind leicht verklebt.
 Frag FixBot
-
-
-
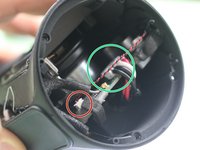
Drehe die vier Schrauben heraus.
-
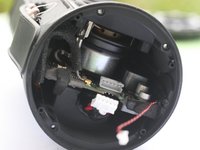
Löse das runde Kunststoffteil und entferne vier weitere Schrauben.
-
-
-
-
Jetzt ist die Hauptplatine zugänglich.
-
Der Akku lässt sich leichter abklemmen, wenn du vorher das Mikrofon abtrennst.
-
-
-
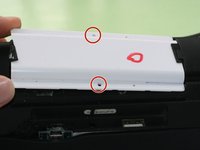
Drehe die beiden Schrauben an der weißen Abdeckung heraus.
-
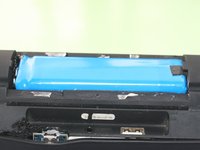
Hole den Akku aus seiner Vertiefung heraus.
-
-




Um dein Gerät wieder zusammenbauen, folge den Schritten in umgekehrter Reihenfolge.
Rückgängig: Ich habe diese Anleitung nicht absolviert.
10 weitere Personen haben diese Anleitung absolviert.
Besonderer Dank geht an diese Übersetzer:innen:
100%

VauWeh hilft uns, die Welt in Ordnung zu bringen! Wie kann ich mithelfen?
Hier starten ›

13 Kommentare zur Anleitung
About to try this, will give feedback
This is the charge2 + not the charge2
there aren,t any screws in the cap
Thanks so much! I had a broken bit of plastic inside the tube after I left my speaker in my checked luggage and it got smashed around. I followed the instructions and managed to get it out, the speaker is purring again without the annoying ass rattle!! You're a legend my friend. TY
