Einleitung
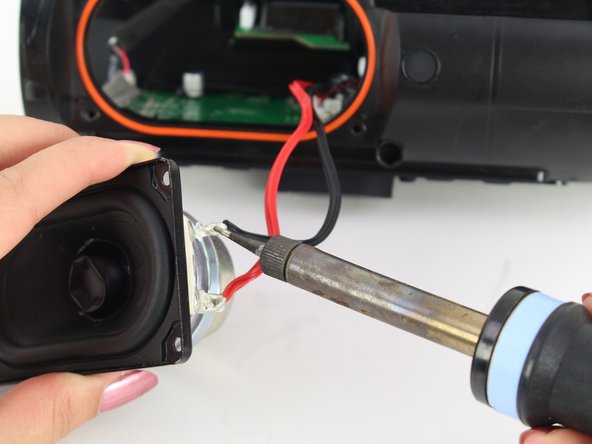
The speaker is responsible for creating the sound coming out of the device. If the sound quality is low or your speaker is not making sound at all but powering on it may be the result of a damaged or broken speaker. This guide will show you how to replace the speaker in your JBL Charge 4. This guide requires knowledge of desoldering. Find a guide on soldering and desoldering here.
Was du brauchst
-
-
Flip your speaker over and insert the plastic opening tool into the slit on the grille.
-
Pry away from yourself towards the back of the speaker to release the clip.
-
Repeat this process for the clip on the other side.
-
-
-
-
Using the plastic opening tool, lift the tab on top of the speaker to release the radiator from the clips.
-
Repeat this process on the other clips around the radiator to release it from the frame.
-
-
-
Flip the device so that the speaker faces you.
-
Remove the four 8mm Phillips #1 screws.
-


To reassemble your device, follow these instructions in reverse order.
To reassemble your device, follow these instructions in reverse order.
Rückgängig: Ich habe diese Anleitung nicht absolviert.
10 weitere Nutzer:innen haben diese Anleitung absolviert.
Team

Cal Poly, Team S1-G1, White Winter 2019 Mitglied von Cal Poly, Team S1-G1, White Winter 2019
CPSU-WHITE-W19S1G1
4 Mitglieder
26 Anleitungen geschrieben
11 Kommentare
Perfect - But where to get the replacement speaker ??? I’ve searched whole web. Please give me the info about replacement speaker diaphragm. Regards, T
Jbl charge 4
Jbl charge 4 Led indicator board G ribbon cable authentic