Einleitung
Diese Anleitung zeigt dir, wie du die Hauptplatine entferne kannst. Dadurch kannst du viel Probleme lösen, z.B. sie austauschen oder an weitere Komponenten zur Reparartur gelangen.
Was du brauchst
-
-
Vor der Arbeit an dem Gerät muss es ausgeschaltet sein!
-
Trenne den Zierrahmen mit einem Jimmy oder Metallspatel vom Lautsprecher ab.
-
-
-
Die Akkuabdeckung ist mit fünf 6 mm Kreuzschlitzschrauben PH1 befestigt. Drehe sie alle heraus.
-
Entferne die Akkuabdeckung und lege sie beiseite.
-
-
-
Der Akku ist mit einem schwarzen halbfesten Kleber verklebt. Entferne ihn mit einem Spudger.
This is NOT liquid Electrical tape! I recommend using 3M adhesive silicone. If you are doing this repair then you can find the 3m adhesive silicone at automotive stores. Liquid tape hardens and 3M adhesive remains mailable vs the rock hardening effect of liquid tape.
-
-
-
Hebe den Akku mit einem Spudger aus dem Gerät.
-
Hebe den Akku am Ende ohne Anschlusskabel hoch, bis du die 16 mm PH2 Kreuzschlitzschraube darunter lösen kannst.
-
-
-
-
Entferne die vier 16 mm Kreuzschlitzschrauben PH2 vom weißen Plastikgehäuse.
The two screws on the right side (side with the USB port) are too long to extract with the iFixit screwdriver in the basic kit. I needed to use a regular thin PH2 screwdriver to get them out.
I had this problem also, whenever putting the screws back in there were still air pockets in the side with smaller screws
-
-
-
Beginne in einer Ecke wo das Gehäuse auf die Seitenteile trifft. Heble mit der Spitze eines Metallspatels die Rückabdeckung vom Lautsprecher und trenne die Klebeverbindung dieser Nähte auf.
-
Fahre mit dem Spatel entlang dieser Nahtstellen um die Rückabdeckung ganz vom Rest des Lautsprechers zu trennen.
-
-
-
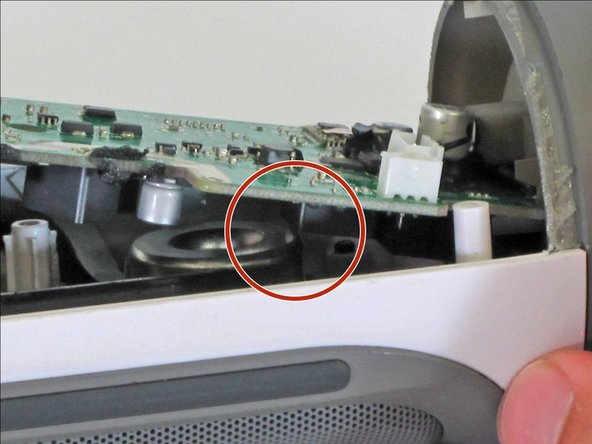
Wenn die Rückabdeckung offen ist, kannst du die drei weißen Verbinder von der Hauptplatine lösen.
-
Entferne das obere Gehäuseteil.
Hi , Thanks a lot in my speacker i had broken plastic part which affect clear sound with your guide i open mine seasily and take it out now i have beand new sound which i had before. thanks again.
-
-
-
Entferne die 9mm Kreuzschlitzschraube in der Ecke der hauptplatine.
There are 2 screws to remove, the other is under the barcode sticker
-
-
-
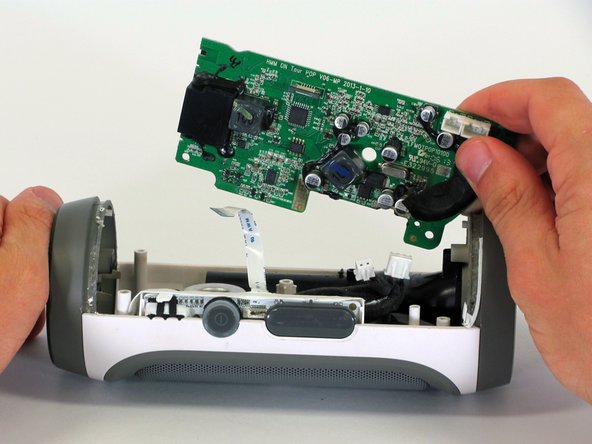
Entferne die Hauptplatine aus dem Gehäuse indem du sie an einer Ecke hoch ziehst.
-
Wenn sich die Hauptplatine nicht bewegen lässt schaue nach, ob das quadratische Teil wirklich frei am Lautsprecher vorbei kommt.
-
-
-
Lege die schwarze Klammer um die das Flachbandkabel befestigt.
-
Ziehe das Flachbandkabel an der blauen Lasche aus dem Sockel.
-
Entferne die Hauptplatine aus dem Gerät.
-


Um dein Gerät wieder zusammen zu setzen folge den Schritten in umgekehrter Reihenfolge.
Um dein Gerät wieder zusammen zu setzen folge den Schritten in umgekehrter Reihenfolge.
Rückgängig: Ich habe diese Anleitung nicht absolviert.
7 weitere Nutzer:innen haben diese Anleitung absolviert.
Besonderer Dank geht an diese Übersetzer:innen:
100%
VauWeh hilft uns, die Welt in Ordnung zu bringen! Wie kann ich mithelfen?
Hier starten ›
Team

Cal Poly, Team 12-1, Lancaster Spring 2015 Mitglied von Cal Poly, Team 12-1, Lancaster Spring 2015
CPSU-LANCASTER-S15S12G1
5 Mitglieder
11 Anleitungen geschrieben
14 Kommentare
Hello I have 3 jbl speakers I bought that work only if plugged to the wall and aux cable... other than that it doesn't work at all .. Bluetooth or even the buttons don't function
had same issue. fixed it by reconnecting the cable that conncts LEDs/ buttons
i have the same problem
hello can i ask if how many pins in the flex for power button i accidentally damage when i fixed it
How much does the motherboard cost.
i have a pulse 2. Please tell me
I have two jbl charger 3 but doesnt Connect it for wifi, could be the problem.
Where can I get the ribbon cable …mine is broken
I think I may have gotten the buttons on top, volume & power, wet from my wet hand. After that it wouldn’t power on & off properly and would not connect to bluetooth. The power button will flash blue, and then red, and any combination of the 2, but doesn’t function properly. Won’t stay blue and doesn’t stay solid blue.
Do you think I damaged the mother board? I did remove the mother board as instructed, but I really don’t want to buy one unless I am reasonably sure that is what is up with it.
i want new mother board
i want new mother board can u plz give me your number
I can play music but all the buttons of my JBL Flip6 aren’t working I can just turn on and turn off my speaker I even cannot pair to another device how can I fix it?🙏🙏