Was du brauchst
-
-
Unscrew two 3mm Phillips #0 screw from the bottom of the camera to remove blue plastic casing.
-
-
-
Unscrew two 3mm Phillips #0 screws. Then remove 6 3mm Philips #0 screws from the bottom of the camera.
-
-
-
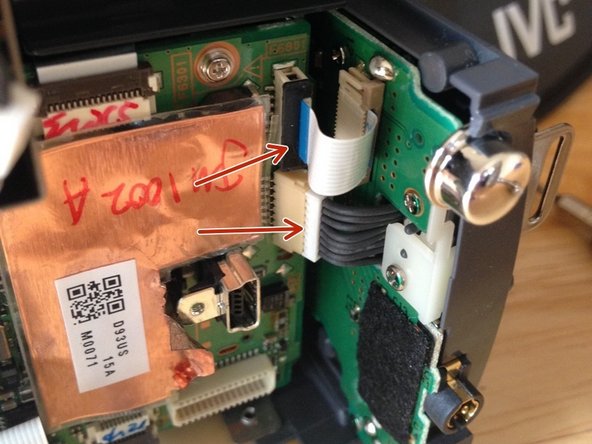
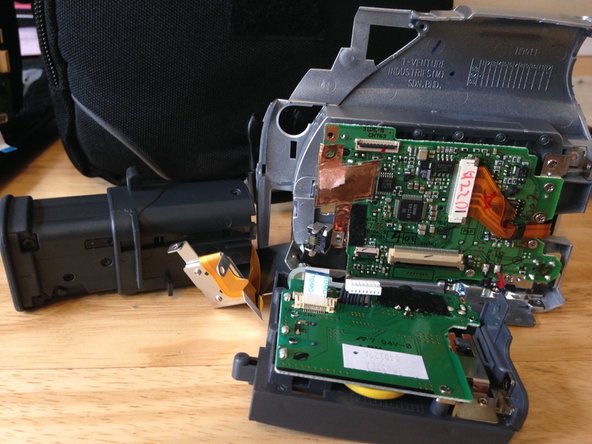
Now the camera can be split into two pieces. Be careful when removing the two sides and remove the cables connecting the two halves. There are also cables that need to be disconnected from the battery pack section.
-
-
-
-
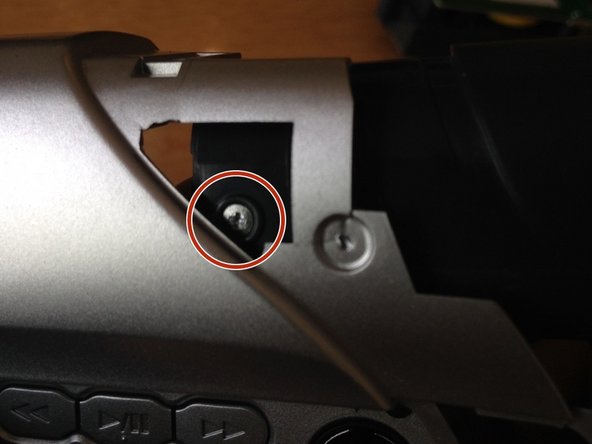
Unscrew two 3mm Phillips #0 screws from around the eye piece. Then flip the camera over and unscrew 3mm Phillips #0 screw. Then unscrew 3mm Phillips #0 screw from under the eye piece.
-
-
-
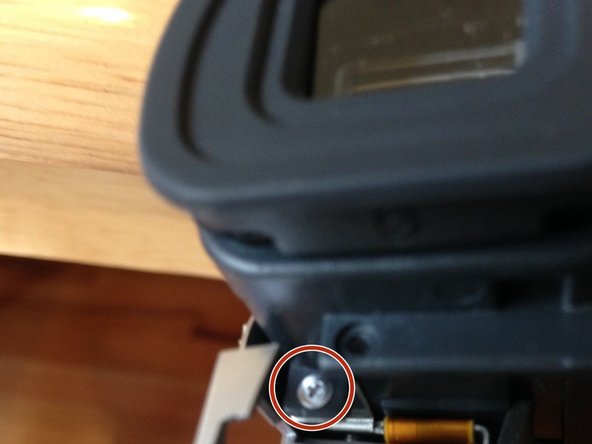
Unscrew 3mm Phillips #0 screw and disconnect cable. This will disconnect the eye piece from the camera.
-
-
-
Remove the blue dust cover using the metal spudger. Unscrew the 3mm screw using the PH0 screwdriver.
-
-
-
Remove the two 5mm screws using the PH0 screw driver. Use the metal spudger to remove plastic casing.
-
-
-
Remove the two logic strips by lifting the plastic clips using the metal spudger.
-


To reassemble your device, follow these instructions in reverse order.
To reassemble your device, follow these instructions in reverse order.
Rückgängig: Ich habe diese Anleitung nicht absolviert.
Ein:e weitere:r Nutzer:in hat diese Anleitung absolviert.
Team

Colorado Springs, Team 1-5, May Spring 2015 Mitglied von Colorado Springs, Team 1-5, May Spring 2015
UCCS-MAY-S15S1G5
4 Mitglieder
3 Anleitungen geschrieben
Ein Kommentar
Do you fix these yourself? This is too much for me but I love my camera and even though I can watch videos and pictures o the screen I cannot see through the view finder to take pictures. No matter what I do it stays dark. Can you fix it? My email address is sl.green2014@gmail.com. Thank you.