Diese Version enthält möglicherweise inkorrekte Änderungen. Wechsle zur letzten geprüften Version.
Was du brauchst
-
Dieser Schritt ist noch nicht übersetzt. Hilf mit, ihn zu übersetzen!
-
Flip the device so that the bottom is facing upwards. Using thumb, push the tab on the bottom in the direction indicated by the arrow and then lift the unhinged part of the tab.
-
-
Dieser Schritt ist noch nicht übersetzt. Hilf mit, ihn zu übersetzen!
-
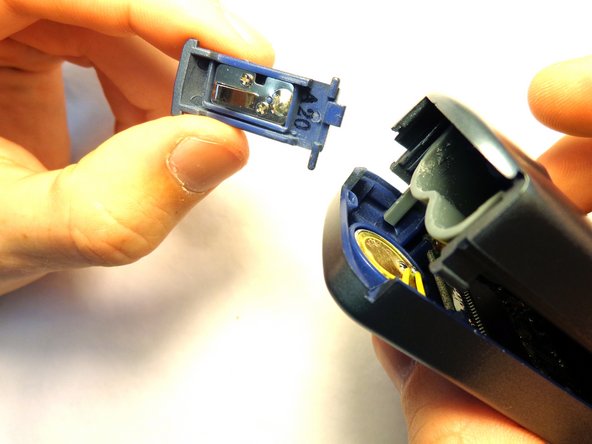
Tilt device so that batteries slide out.
-
-
-
Dieser Schritt ist noch nicht übersetzt. Hilf mit, ihn zu übersetzen!
-
Carefully insert the flat end of the spudger into the seam on the top side of the device. Carefully twist the spudger to open the device. Repeat this step at incremental locations around the seam of the device until the two case halves separate.
-
Before completely separating the two halves, separate the case from the battery compartment cover, pulling the case apart. Take care not to break the plastic hinge as the battery compartment cover is removed.
-
-
Dieser Schritt ist noch nicht übersetzt. Hilf mit, ihn zu übersetzen!
-
Gently seperate the two halves of the device.
-
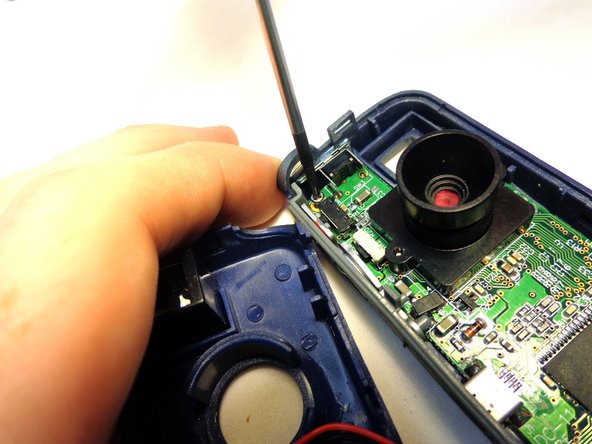
To remove the circuit board from the right section of the device, unscrew the two 5.6 mm Phillips #00 screws.
-
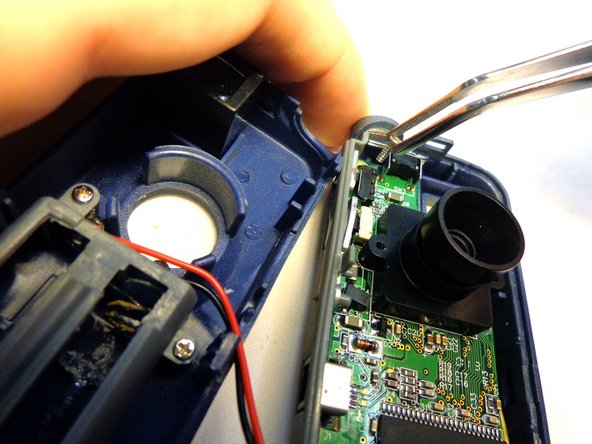
When the screws have been fully unscrewed, use the tweezers to remove them from the device.
-
-
Dieser Schritt ist noch nicht übersetzt. Hilf mit, ihn zu übersetzen!
-
Carefully separate the grey side bar from the case and set it aside.
-
-
Dieser Schritt ist noch nicht übersetzt. Hilf mit, ihn zu übersetzen!
-
Use the tweezers to grasp the bottom of the capture button. Pull the capture button away from the case and set it aside.
-


Team

Clemson, Team 12-3, Benson Spring 2013 Mitglied von Clemson, Team 12-3, Benson Spring 2013
CLEM-BENSON-S13S12G3
3 Mitglieder
7 Anleitungen geschrieben