Diese Version enthält möglicherweise inkorrekte Änderungen. Wechsle zur letzten geprüften Version.
Was du brauchst
-
Dieser Schritt ist noch nicht übersetzt. Hilf mit, ihn zu übersetzen!
-
Pass the thread through the needle eye.
-
-
Dieser Schritt ist noch nicht übersetzt. Hilf mit, ihn zu übersetzen!
-
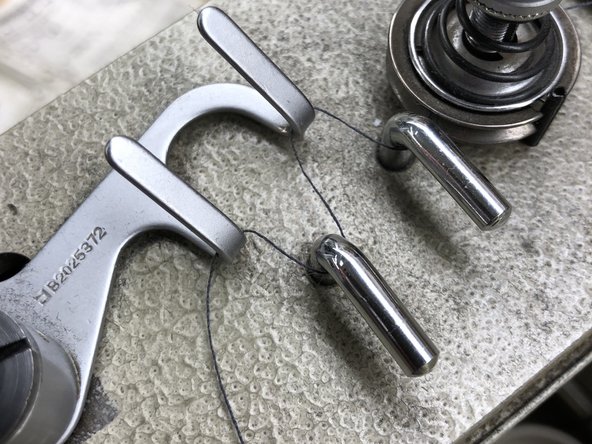
Loop the threading through the two tension posts, making sure you stay in the grooves of the wheels.
-
-
Dieser Schritt ist noch nicht übersetzt. Hilf mit, ihn zu übersetzen!
-
Continue the threading, weaving through the pull-off lever.
-
-
-
Dieser Schritt ist noch nicht übersetzt. Hilf mit, ihn zu übersetzen!
-
Adjust the thread pull-off lever as well as adjust the position of the nipper bar block to the left or the right.
-
-
Dieser Schritt ist noch nicht übersetzt. Hilf mit, ihn zu übersetzen!
-
Tighten the thread on the top loop near the nipper releasing knurled thumb nut.
-
-
Dieser Schritt ist noch nicht übersetzt. Hilf mit, ihn zu übersetzen!
-
Weave threading through the working arm and have it ready to insert through the eye of the needle.
-
-
Dieser Schritt ist noch nicht übersetzt. Hilf mit, ihn zu übersetzen!
-
Again, keep the thread along the groove of the wheel before slipping it through the eye of the needle.
-
-
Dieser Schritt ist noch nicht übersetzt. Hilf mit, ihn zu übersetzen!
-
Using the flathead screwdriver, slide the needle up into the slot, with the indented side facing in and tighten until the needle cannot shift.
-
-
Dieser Schritt ist noch nicht übersetzt. Hilf mit, ihn zu übersetzen!
-
Insert the thread through the eye of the needle, and you are ready for sewing.
-


Rückgängig: Ich habe diese Anleitung nicht absolviert.
Ein:e weitere:r Nutzer:in hat diese Anleitung absolviert.

Team

Eastern Washington University, Team S27-G8, Munoz Winter 2019 Mitglied von Eastern Washington University, Team S27-G8, Munoz Winter 2019
EWU-MUNOZ-W19S27G8
1 Mitglied
1 Anleitung geschrieben