Einleitung
You will need knowledge of how to use a soldering iron station. For more information regarding soldering visit: Soldering Skills
During the replacement of the battery cables, you will locate the battery cables on motherboard, unsolder the battery cable leads from the motherboard, and remove the battery cables.
Was du brauchst
-
-
Access the battery compartment
-
Remove the battery compartment lid and set it aside.
-
Disconnect the battery and set it aside.
-
-
-
Puncture the sticker in the battery compartment with a spudger to access the screw beneath it.
-
-
-
Remove the 7mm Phillips #1 screw from the battery compartment.
-
Place the screw in a secure place.
-
-
-
Begin prying open the device.
-
Insert a plastic opening tool into the side groove about 2cm from the pink plastic component and pry open one side of the device.
-
Once the side is separated, leave the opening tool inside to prevent the two sides from closing.
-
-
-
-
Insert another plastic opening tool into the groove opposite to the side of the tool already inserted.
-
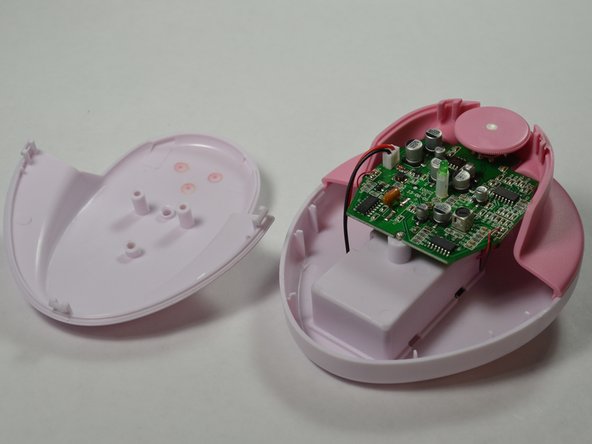
Create separation on that side until the white plastic component comes off entirely.
-
Place the white plastic component in a secure place.
-
-
-
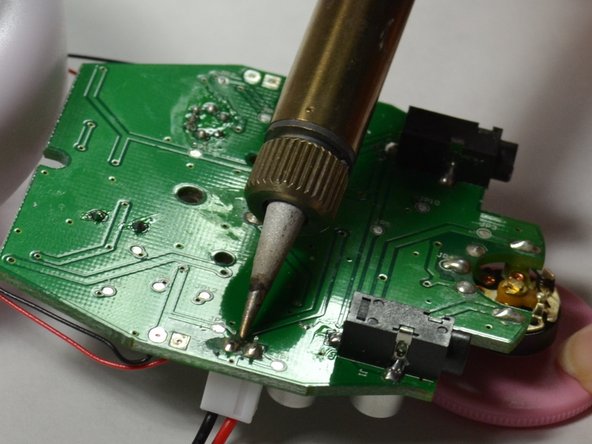
Preheat soldering iron.
-
Locate the battery cable leads on the motherboard.
-


To reassemble your device, follow these instructions in reverse order.
To reassemble your device, follow these instructions in reverse order.
Team

USF Tampa, Team 6-1, Remmell Fall 2015 Mitglied von USF Tampa, Team 6-1, Remmell Fall 2015
USFT-REMMELL-F15S6G1
6 Mitglieder
6 Anleitungen geschrieben