Diese Version enthält möglicherweise inkorrekte Änderungen. Wechsle zur letzten geprüften Version.
Was du brauchst
-
Dieser Schritt ist noch nicht übersetzt. Hilf mit, ihn zu übersetzen!
-
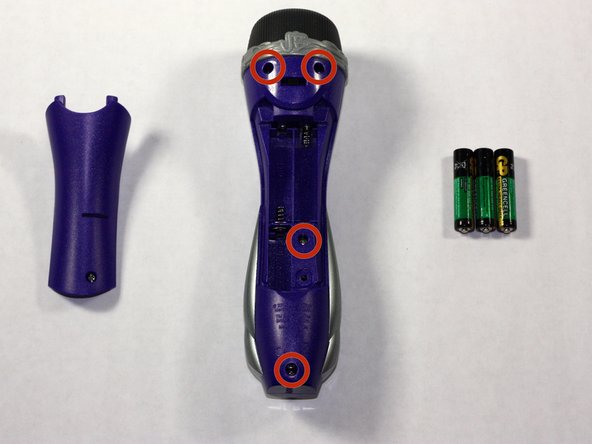
Remove the back panel of the device by unscrewing the single #8 11.6 mm Flathead screw on the back of the device.
-
-
Dieser Schritt ist noch nicht übersetzt. Hilf mit, ihn zu übersetzen!
-
Remove the 3 AAA batteries from the device.
-
-
-
Dieser Schritt ist noch nicht übersetzt. Hilf mit, ihn zu übersetzen!
-
Unscrew the other 4, #8 11.6 mm Phillips Head screws to remove the entire back half of the device.
-
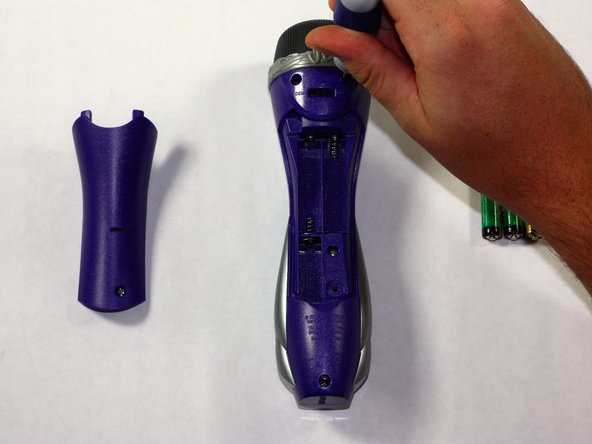
Pull apart the device once screws are loose, splitting the device in half.
-
-
Dieser Schritt ist noch nicht übersetzt. Hilf mit, ihn zu übersetzen!
-
Keeping all wires connected to their attachments, place the front half of the device face down.
-
-
Dieser Schritt ist noch nicht übersetzt. Hilf mit, ihn zu übersetzen!
-
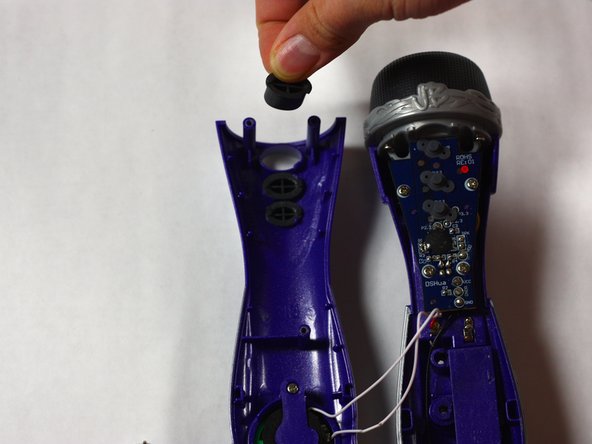
Remove the buttons by pushing them out from the front of the device. Clean or replace them as needed and place them back into the appropriate slots.
-


Team

Baylor, Team 4-1, Williams Fall 2014 Mitglied von Baylor, Team 4-1, Williams Fall 2014
BU-WILLIAMS-F14S4G1
3 Mitglieder
4 Anleitungen geschrieben