Diese Version enthält möglicherweise inkorrekte Änderungen. Wechsle zur letzten geprüften Version.
Was du brauchst
-
Dieser Schritt ist noch nicht übersetzt. Hilf mit, ihn zu übersetzen!
-
Pull the hose on the rear of the carpet cleaner straight down to disconnect it.
-
-
Dieser Schritt ist noch nicht übersetzt. Hilf mit, ihn zu übersetzen!
-
Use a 3 mm hex key to remove two bolts securing the bottom cover.
-
-
Dieser Schritt ist noch nicht übersetzt. Hilf mit, ihn zu übersetzen!
-
Rotate the bottom cover down toward the bottom of the carpet cleaner, then pull it straight back toward the rear of the carpet cleaner to remove it.
-
-
Dieser Schritt ist noch nicht übersetzt. Hilf mit, ihn zu übersetzen!
-
Pull the yellow and green ground wire connectors straight apart to disconnect the bottom cover's ground wire.
-
-
Dieser Schritt ist noch nicht übersetzt. Hilf mit, ihn zu übersetzen!
-
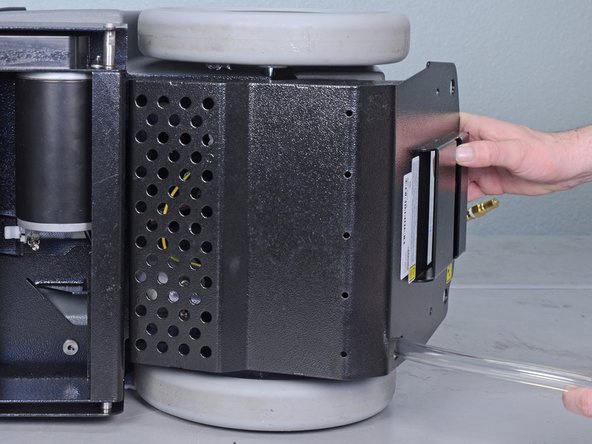
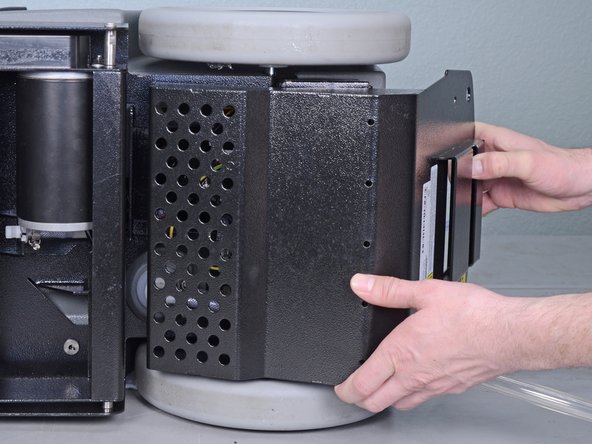
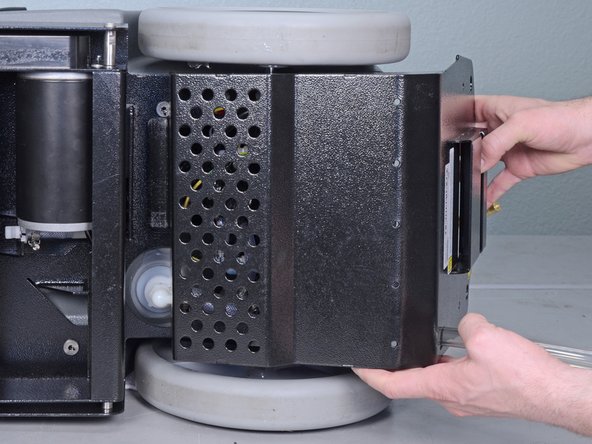
Use a 3 mm hex key to remove the four bolts securing the pump cover.
-
-
-
Dieser Schritt ist noch nicht übersetzt. Hilf mit, ihn zu übersetzen!
-
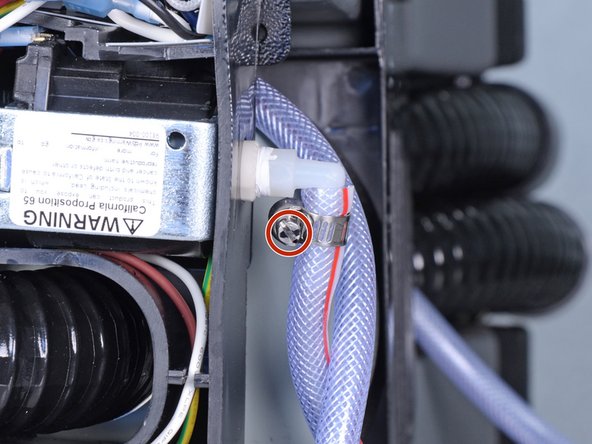
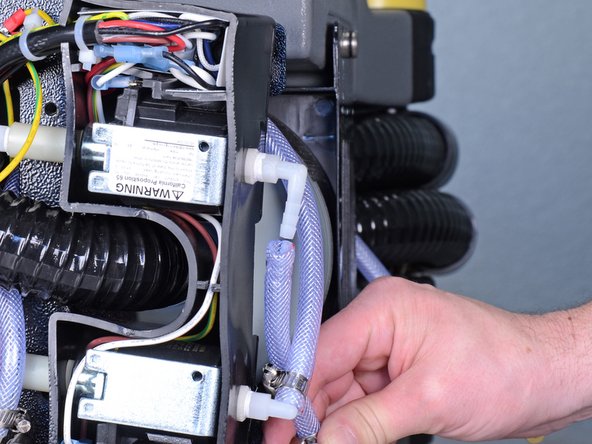
Use a flathead screwdriver to loosen the hose clamps at both ends of the pump.
-
-
Dieser Schritt ist noch nicht übersetzt. Hilf mit, ihn zu übersetzen!
-
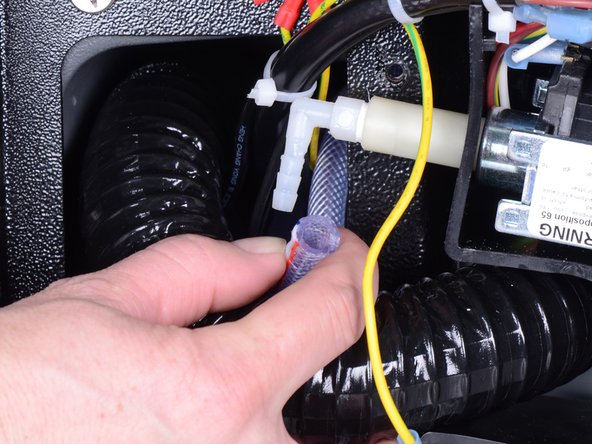
Pull the hoses at both ends of the pump straight off of their hose barbs to remove them.
-
-
Dieser Schritt ist noch nicht übersetzt. Hilf mit, ihn zu übersetzen!
-
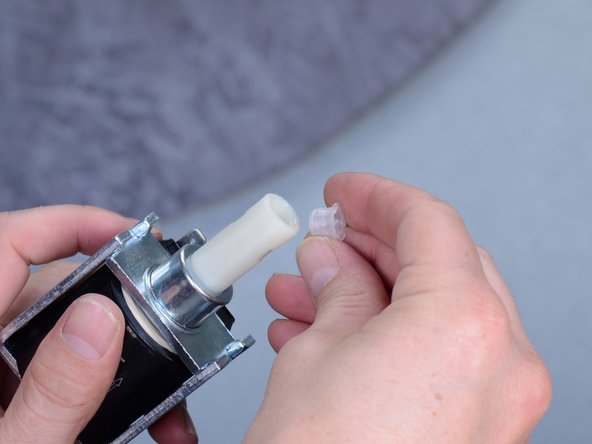
Use your fingers to unscrew the hose barb from the outward-facing end of the pump.
-
-
Dieser Schritt ist noch nicht übersetzt. Hilf mit, ihn zu übersetzen!
-
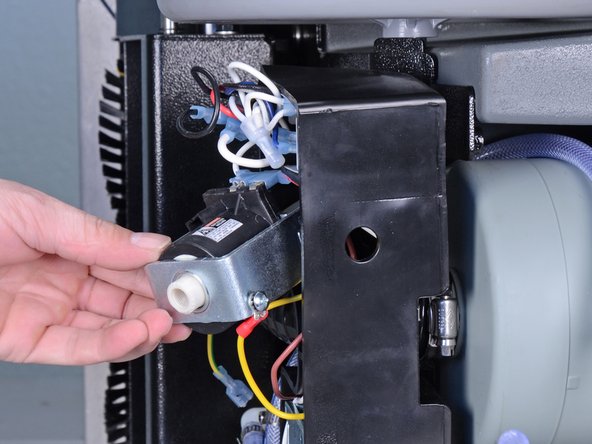
Bend the outer side of the pump compartment away from the pump very slightly.
-
Slide the pump out of the hole in the side of the pump compartment, then continue to slide the pump out of the compartment.
-
-
Dieser Schritt ist noch nicht übersetzt. Hilf mit, ihn zu übersetzen!
-
Use a Phillips #2 screwdriver to remove the screw securing the ground wire to the pump.
-
Remove the ground wire from the pump.
-
-
Dieser Schritt ist noch nicht übersetzt. Hilf mit, ihn zu übersetzen!
-
Pull the two connectors straight off of the pump to disconnect them from the pump.
-
-
Dieser Schritt ist noch nicht übersetzt. Hilf mit, ihn zu übersetzen!
-
Use your fingers to unscrew the remaining hose barb from the pump.
-


Rückgängig: Ich habe diese Anleitung nicht absolviert.
4 weitere Nutzer:innen haben diese Anleitung absolviert.
