Zum Hauptinhalt wechseln

Keurig B70 Platinum Puncture Needle Replacement

Was du brauchst

  1. Keurig B70 Platinum Puncture Needle Replacement, Brewer Handle: Schritt 1, Bild 1 von 3 Keurig B70 Platinum Puncture Needle Replacement, Brewer Handle: Schritt 1, Bild 2 von 3 Keurig B70 Platinum Puncture Needle Replacement, Brewer Handle: Schritt 1, Bild 3 von 3
    • Turn off and unplug the Keurig before starting.

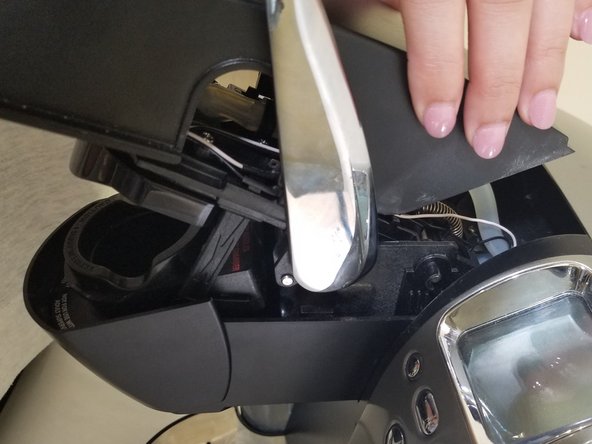
    • Lay the Keurig on its back and open the lid.

    • Using a Phillips #2 screwdriver, remove the two 21.0 mm screws.

    • Be careful when removing the screws. There is a sharp puncture needle!

    • You may need to use tweezers to get the screws out.

  2. Keurig B70 Platinum Puncture Needle Replacement: Schritt 2, Bild 1 von 2 Keurig B70 Platinum Puncture Needle Replacement: Schritt 2, Bild 2 von 2
    • Using a T15 Torx screwdriver, remove the two 29.0 mm screws on each ends of the handle.

  3. Keurig B70 Platinum Puncture Needle Replacement: Schritt 3, Bild 1 von 2 Keurig B70 Platinum Puncture Needle Replacement: Schritt 3, Bild 2 von 2
    • Lift and pull the black plastic cover away from the Keurig.

  4. Keurig B70 Platinum Puncture Needle Replacement: Schritt 4, Bild 1 von 1
    • Push the handle back and upward to detach it from the Keurig.

  5. Keurig B70 Platinum Puncture Needle Replacement, Puncture Needle: Schritt 5, Bild 1 von 2 Keurig B70 Platinum Puncture Needle Replacement, Puncture Needle: Schritt 5, Bild 2 von 2
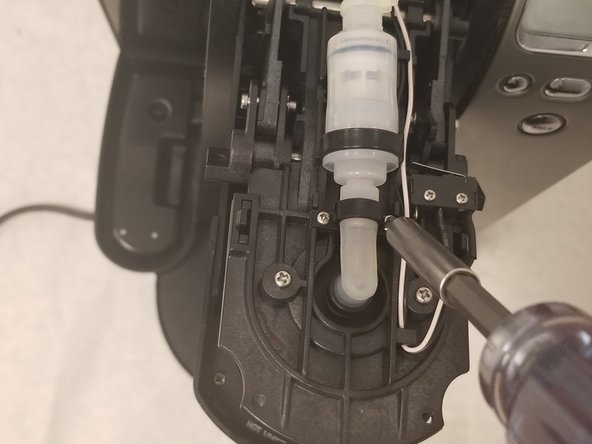
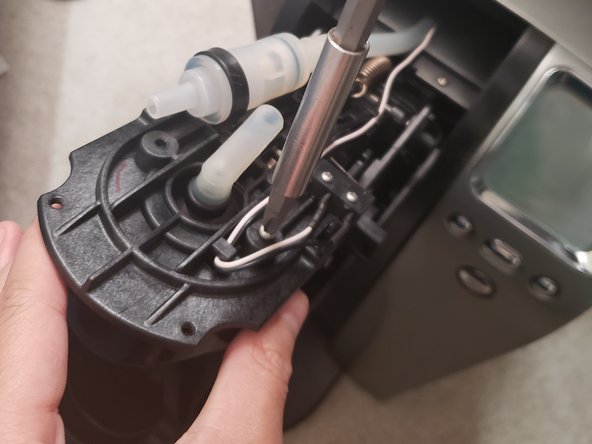
    • Using a Phillips #0 screwdriver, remove the two 7.0 mm screws located on the sides of the tube near the puncture needle.

  6. Keurig B70 Platinum Puncture Needle Replacement: Schritt 6, Bild 1 von 2 Keurig B70 Platinum Puncture Needle Replacement: Schritt 6, Bild 2 von 2
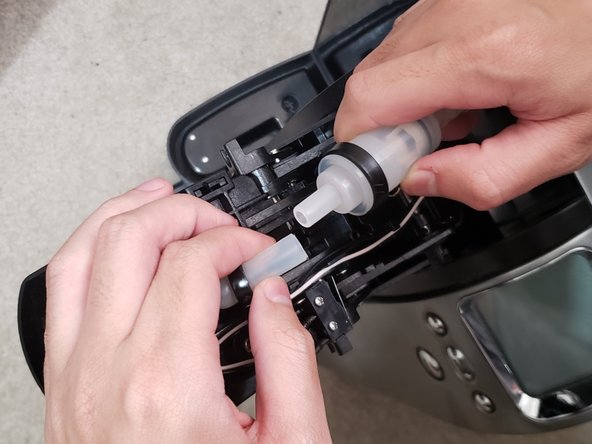
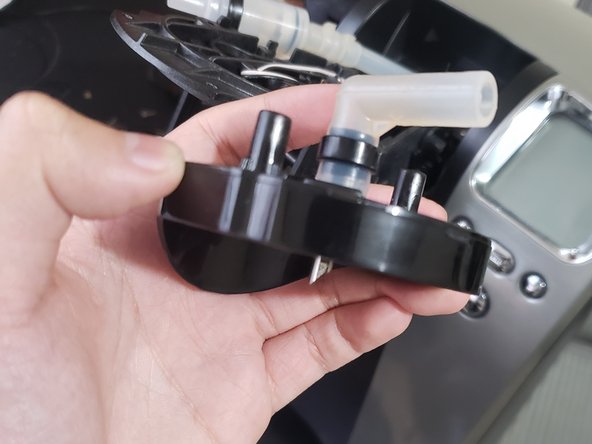
    • Using both hands, pull the puncture needle tube and the Keurig tube apart to disconnect the tubes.

    • Don't be afraid to pull hard! The tubes are tightly connected.

  7. Keurig B70 Platinum Puncture Needle Replacement: Schritt 7, Bild 1 von 2 Keurig B70 Platinum Puncture Needle Replacement: Schritt 7, Bild 2 von 2
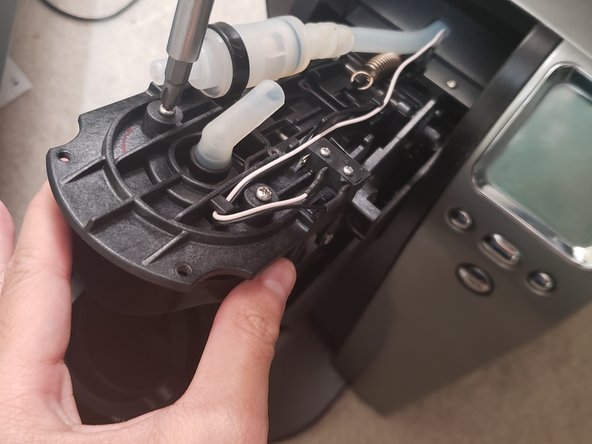
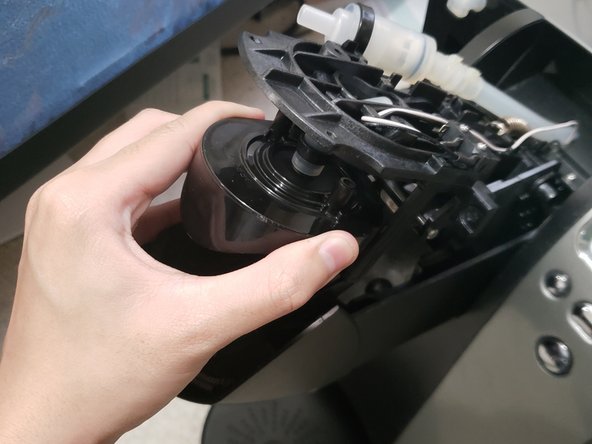
    • Slide the black plastic ring, which holds the puncture needle tube down, off of the tube.

  8. Keurig B70 Platinum Puncture Needle Replacement: Schritt 8, Bild 1 von 3 Keurig B70 Platinum Puncture Needle Replacement: Schritt 8, Bild 2 von 3 Keurig B70 Platinum Puncture Needle Replacement: Schritt 8, Bild 3 von 3
    • Using a Phillips #2 screwdriver, remove the two 9.0 mm screws next to the detached tube.

    • Hold on to the puncture needle when removing the screws to ensure that the puncture needle does not fall and cause injury.

  9. Keurig B70 Platinum Puncture Needle Replacement: Schritt 9, Bild 1 von 3 Keurig B70 Platinum Puncture Needle Replacement: Schritt 9, Bild 2 von 3 Keurig B70 Platinum Puncture Needle Replacement: Schritt 9, Bild 3 von 3
    • Gently pull the puncture needle down and out from the Keurig.

Abschluss

To reassemble your device, follow these instructions in reverse order.

Steven Tran

Mitglied seit: 10/14/18

329 Reputation

2 Anleitungen geschrieben

Team

UW Tacoma, Team S1-G6, Rose Fall 2018 Mitglied von UW Tacoma, Team S1-G6, Rose Fall 2018

UWT-ROSE-F18S1G6

4 Mitglieder

5 Anleitungen geschrieben

0 Kommentare

Kommentar hinzufügen

Seitenaufrufe:

Letzte 24 Stunden: 2

Letzte 7 Tage: 4

Letzte 30 Tage: 13

Insgesamt: 1,105