Einleitung
You will need to use solder device in order to be able to replace the power button.
Was du brauchst
-
-
-
Slowly separate the cases of the device. Try not to damage the wires connecting the two pieces.
-
Keep the two pieces away from each other so you can follow the next step accordingly.
-
-
-
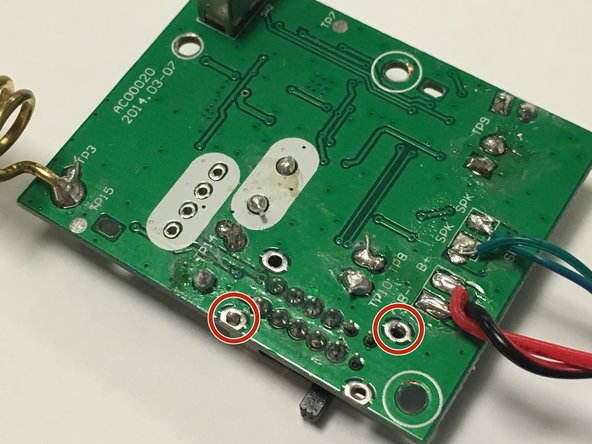
Use the soldering iron to remove the broken switch.
-
Push down on the metal locks to separate the switch from the motherboard.
-


To reassemble your device, follow these instructions in reverse order.
To reassemble your device, follow these instructions in reverse order.
Rückgängig: Ich habe diese Anleitung nicht absolviert.
2 weitere Nutzer:innen haben diese Anleitung absolviert.
Team

IUPUI, Team 1-1, Wilson Spring 2016 Mitglied von IUPUI, Team 1-1, Wilson Spring 2016
IUPUI-WILSON-S16S1G1
4 Mitglieder
5 Anleitungen geschrieben