Einleitung
This guide will go through the process of replacing the SD Card Reader in the First Generation Amazon Kindle.
Was du brauchst
-
-
Use a plastic opening tool to lift the battery on the side closest to the edge of the device.
-
Unplug the battery from the device by pinching the white connector and pulling.
-
-
-
-
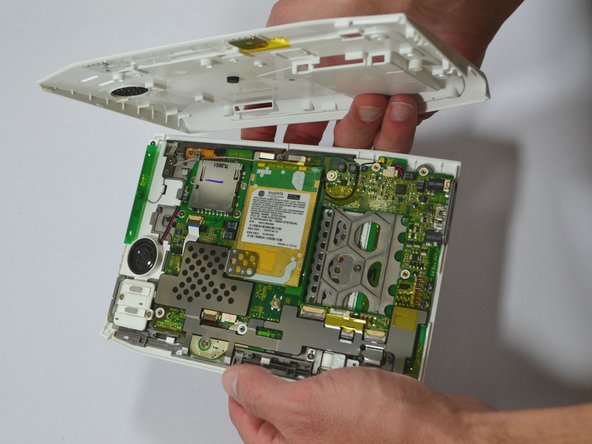
Start at one side of the device. Use a plastic opening tool to separate the casing of the device. Slowly work your way around the entire device.
-
-
-
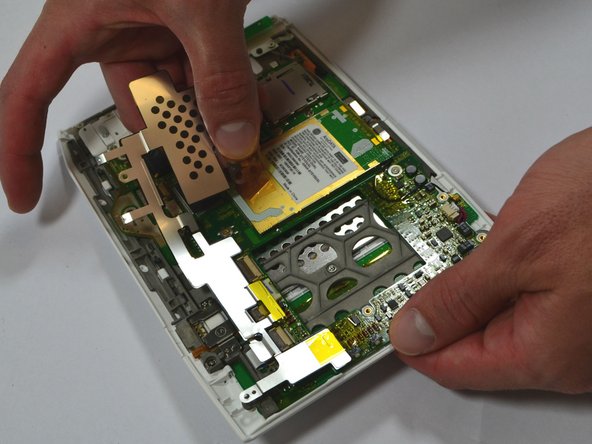
Unscrew the two (2) Phillips #00 screws (3 mm) which fasten the metal casing shield.
-
Slowly remove the metal casing shield by lifting it and carefully peeling up the tape.
-
-
-
Remove the four (4) Phillips #00 screws (3 mm) which fasten the SD Card Reader.
-
-
-
Lift the flap attaching the blue and white ribbon cable to the motherboard by lifting it vertically with a spudger.
-
Carefully lift the SD Card Reader vertically from the motherboard.
-


To reassemble your device, follow these instructions in reverse order.
To reassemble your device, follow these instructions in reverse order.
Rückgängig: Ich habe diese Anleitung nicht absolviert.
2 weitere Personen haben diese Anleitung absolviert.
Team

University of Kentucky Louisville, Team 1-1, Chamberlain Spring 2013 Mitglied von University of Kentucky Louisville, Team 1-1, Chamberlain Spring 2013
LOUISVILLE-CHAMBERLAIN-S13S1G1
2 Mitglieder
7 Anleitungen geschrieben