Zum Hauptinhalt wechseln

Diese Anleitung enthält neuere Änderungen. Wechsel zur neuesten unüberprüften Version.

Kindle 1st Generation SD Card Reader Replacement

Was du brauchst

  1. Kindle 1st Generation SD Card Reader Replacement, Battery: Schritt 1, Bild 1 von 1
    • Slide the grey plastic cover laterally off the back of the device.

  2. Kindle 1st Generation SD Card Reader Replacement: Schritt 2, Bild 1 von 2 Kindle 1st Generation SD Card Reader Replacement: Schritt 2, Bild 2 von 2
    • Use a plastic opening tool to lift the battery on the side closest to the edge of the device.

    • Unplug the battery from the device by pinching the white connector and pulling.

    • Do not yank the battery or try to disconnect the battery by pulling the wires.

  3. Kindle 1st Generation SD Card Reader Replacement, SD Card Reader: Schritt 3, Bild 1 von 1
    • Unscrew eight (8) Phillips #00 screws (3 mm).

  4. Kindle 1st Generation SD Card Reader Replacement: Schritt 4, Bild 1 von 2 Kindle 1st Generation SD Card Reader Replacement: Schritt 4, Bild 2 von 2
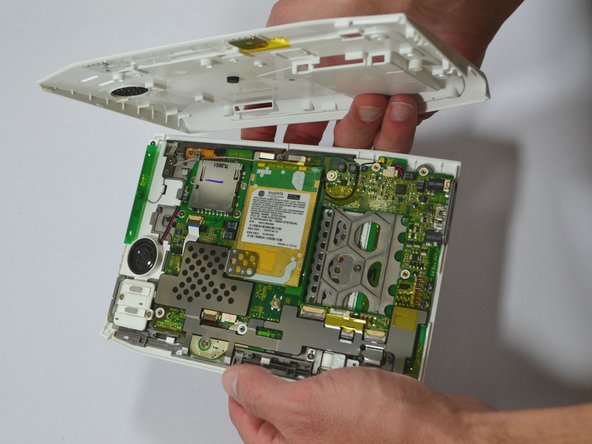
    • Start at one side of the device. Use a plastic opening tool to separate the casing of the device. Slowly work your way around the entire device.

    • Avoid prying between the buttons and the device. This could cause damage to the buttons.

  5. Kindle 1st Generation SD Card Reader Replacement: Schritt 5, Bild 1 von 2 Kindle 1st Generation SD Card Reader Replacement: Schritt 5, Bild 2 von 2
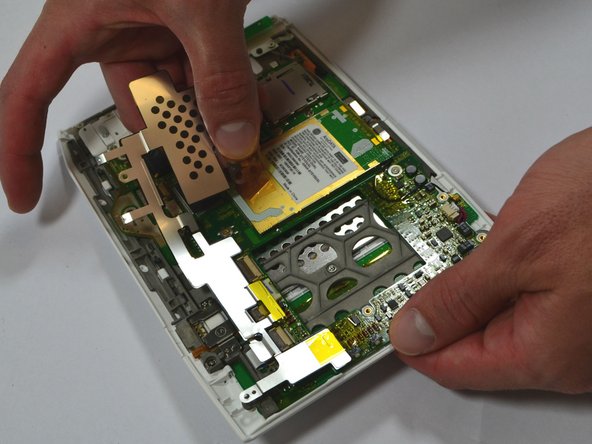
    • Unscrew the two (2) Phillips #00 screws (3 mm) which fasten the metal casing shield.

    • Slowly remove the metal casing shield by lifting it and carefully peeling up the tape.

  6. Kindle 1st Generation SD Card Reader Replacement: Schritt 6, Bild 1 von 1
    • Remove the four (4) Phillips #00 screws (3 mm) which fasten the SD Card Reader.

  7. Kindle 1st Generation SD Card Reader Replacement: Schritt 7, Bild 1 von 2 Kindle 1st Generation SD Card Reader Replacement: Schritt 7, Bild 2 von 2
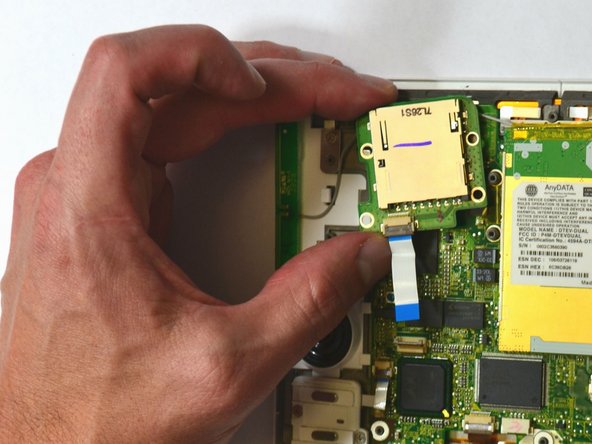
    • Lift the flap attaching the blue and white ribbon cable to the motherboard by lifting it vertically with a spudger.

    • The flap is connected via a hinge. Once you lift the flap, it will stay up and the cable will be lose. Remember to snap it back down during reassembly.

    • Carefully lift the SD Card Reader vertically from the motherboard.

Abschluss

To reassemble your device, follow these instructions in reverse order.

2 weitere Nutzer:innen haben diese Anleitung absolviert.

0 Kommentare

Kommentar hinzufügen

Seitenaufrufe:

Letzte 24 Stunden: 0

Letzte 7 Tage: 6

Letzte 30 Tage: 24

Insgesamt: 1,732