Einleitung
Diese Anleitung zeigt dir, wie du die defekte Platine der Einschalttaste austauschen kannst.
Was du brauchst
-
-
Zwänge ein Plastiköffnungswerkzeug in den Spalt an der unteren rechten Ecke des Kindle Fire.
-
Heble die Teile auseinander und lasse das Werkzeug rings um das Kindle Fire laufen. Löse so die Rasten, welche die beiden Gehäuseteile zusammenhalten.
-
Es kann helfen, wenn du die Unterseite des Kindle weg vom oberen Teil ziehst (und heraus aus der Seite). Wenn du zuviel Kraft zum Trennen aufbringst, ohne zu ziehen, können die Rasten brechen.
-
-
-
Wenn alle Kunststoffrasten gelöst sind, kannst du das Gehäuserückteil weg vom Kindle Fire ziehen.
Order placed
Mine has another plastic pc over the m.etal plate
-
-
-
Setze die Spitze eines Plastiköffnungswerkzeugs zwischen die rechte Akkuzelle und dem Rahmen des Kindle Fire.
-
Heble den Akku hoch und arbeite dich mit dem Werkzeug die Kante entlang, um die Klebeverbindung zum Rahmen zu trennen.
-
-
-
Wiederhole den vorherigen Schritt für die linke Akkuzelle.
The CPU got extremely hot and just now getting repaired 5 days or so
I can't get the battery to charge
-
-
-
-
Hebe die Rückseite des Akkus hoch, um jegliche Spannung vom Akkuanschluss zu nehmen, und benutze gleichzeitig einen Spudger, um den Akkuanschluss aus seinem Verbinder zu schieben.
-
Ziehe den Akku aus dem Kindle Fire heraus.
-
-
-
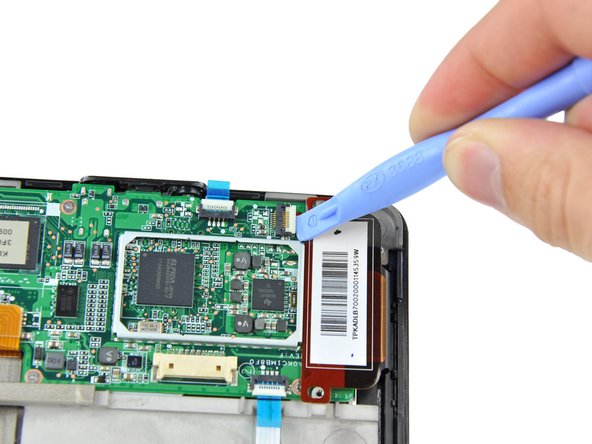
Entferne die beiden 2,3 mm Kreuzschlitzschrauben #00 vom Kontroller des Touchscreens.
-
Löse den Stecker am Kontroller des Touchscreens mit einem Plastiköffnungswerkzeug.
-
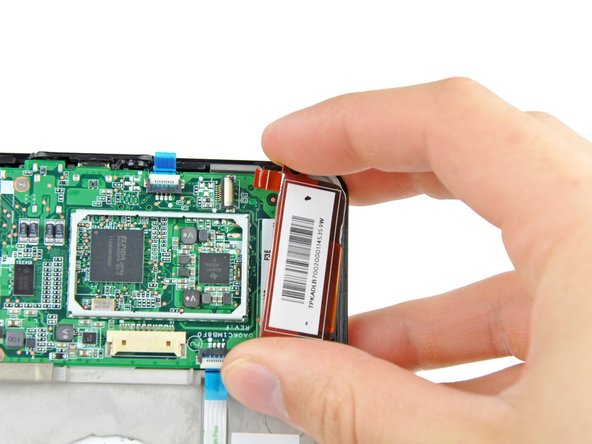
Hebe den Touchscreen Kontroller hoch und nach rechts. Entferne ihn vorsichtig.
-
-
-
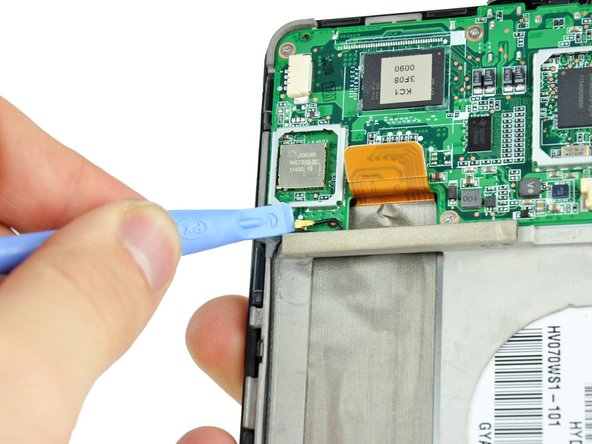
Klappe den Sicherungsbügel am ZIF Verbinder der Einschalttaste mit einem Plastiköffnungswerkzeug hoch.
-
Klappe den Sicherungsbügel am ZIF Verbinder des Helligkeitssensors mit einem Plastiköffnungswerkzeug hoch.
-
Ziehe mit einer Pinzette an der blauen Lasche am Kabel des Helligkeitssensors, um es aus seinem Sockel zu entfernen.
Make sure to mark what ZIF connector goes where, they are not interchangeable even though a first glance the appear to be the same size
It took about 2 hours, but that is, mainly, because reconnecting the ZIF connectors can be overly tedios.
I cannot get the zif connectors to go back in ..what can i do...been trying for hours to get them back in...im talking bout the white flip pieces that lock in film..some one please help me with this!!
Stand it up on its end, lining up the holes to the wires. Slide into holes and 'flip'/rotate white plastic piece down into a flat position.
-
-
-
Benutze ein Plastiköffnungswerkzeug um das Displaydatenkabel hochzuheben und abzulösen.
-
Hebe den Antennenstecker mit einem Plastiköffnungswerkzeug hoch und löse ihn.
-
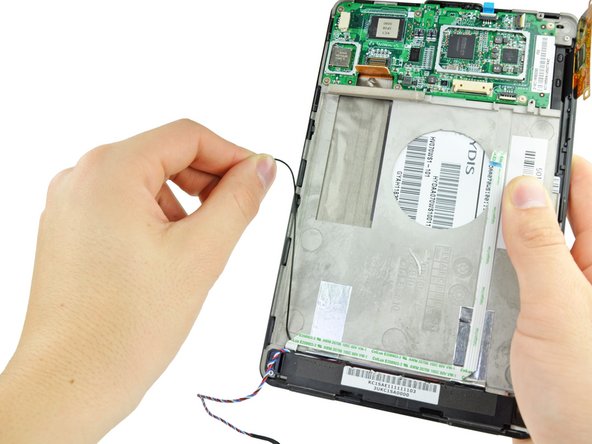
Fädle das Antennenkabel aus.
Be very careful when disconnecting the antenna, and be sure to note how the cable is routed into the little socket on the motherboard. The reconnecting of the antenna cable into its motherboard port can be tricky and will require patience, persistence and perhaps a magnifier and tweezers.
Followed the steps but once reassembled the screen comes on but doesn't respond to touch. It was working fine even with broken glass screen. Any suggestions?
Mine is doing the same thing! What did you do to fix it?
Tara -
I order a replacement motherboard from ifixit and for some reason it had a plastic increasing around the outer edge of the "display data cable connection port" on the motherboard, which makes it impossible to connect the cable to the motherboard. I called ifixit and they said send a picture and a description. Hopefully the customer who owns the kindle fire will understand that after waiting on the part for a week. :\
-
-
-
Entferne die sechs 2,6 mm Kreuzschlitzschrauben #00, welche die Hauptplatine am Rahmen befestigen.
-
-
-
Hebele vorsichtig mit einem Plastiköffnungswerkzeug an der Unterseite der Hauptplatine, um sie von der Klebeverbindung darunter zu lösen.
-
Hebele die Hauptplatine oben mit einem Plastiköffnungswerkzeug hoch, bis sie frei kommt.
-
Hebe die Hauptplatine aus dem Kindle Fire. Achte dabei darauf, dass das Kabel zur Einschalttaste aus Schritt 8 aus seinem Anschluss herauskommt.
-
-
-
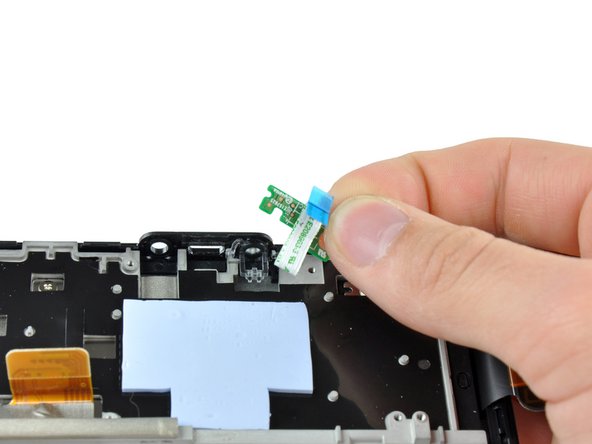
Entferne die 2,5 mm Kreuzschlitzschraube, welche die Platine der Einschalttaste am Kindle Fire befestigt.
-
Hebe die Platine der Einschalttaste aus dem Kindle Fire.
-


Um dein Gerät wieder zusammenzusetzen, folge den Schritten in umgekehrter Reihenfolge.
Um dein Gerät wieder zusammenzusetzen, folge den Schritten in umgekehrter Reihenfolge.
Rückgängig: Ich habe diese Anleitung nicht absolviert.
18 weitere Nutzer:innen haben diese Anleitung absolviert.
Besonderer Dank geht an diese Übersetzer:innen:
100%

Diese Übersetzer:innen helfen uns, die Welt zu reparieren! Wie kann ich mithelfen?
Hier starten ›

Ein Kommentar
This PCB does not contain the power button, only the power LED. The button is located on the main PCB next to the USB port.
Where can I buy a battery for my kindle fire
nannyto2 - Antwort
Try EBay or Amazon. make sure you get the right battery for your Kindle , one is for a Kindle HD and the older version........both are 7 ".
vvenona1954 - Antwort
Remember to remove any sd card first!!! Snapped mine in half.
lucy_lady_bug - Antwort
I have the first kindle that came out and it doesn't have the same setup how can I open the back of my kindle?
Kris Sanders - Antwort