Einleitung
This is surprisingly easy to open - just clips! Hooray! Just wanted to kick it off by getting the first guide out so others can keep rolling with repair guides. First part is always hardest when you don't know what you're getting into, but give this a go, slow and easy, you'll have it opened up in no time flat!
Was du brauchst
-
-
Using a guitar pick style pry tool and/or black pry tool get started on one of the corners to loosen back cover from display. Once the corner is loose, you'll notice you can pry the back away and slide your pick to the next corner
-
-
-
At this point, having one or more corners loose, you can almost pry by hand, but best to be safe and not break the plastic by continuing to run pry tool around each corner (see open case photo for clip style)
-
-
-
-
Ah sweet open Kindle...feels good. Easier than we thought. No messy adhesives. And no cables on back case just unclip, unclip...snap, snap, snap.
-
-
-
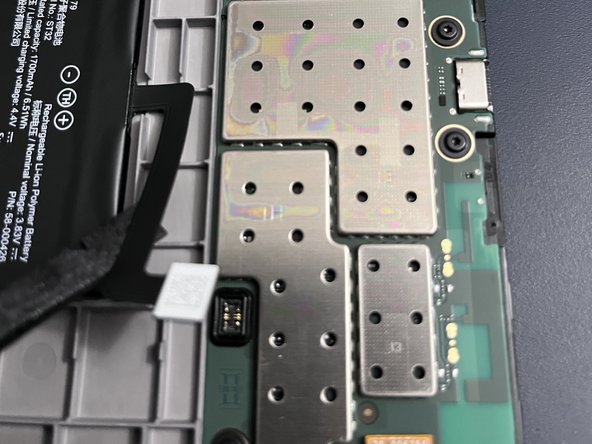
Whatever repair you have in mind next, always start with disconnecting the battery, and for this, the black pry tool is your friend. Enjoy.
-


To reassemble your device, follow these instructions in reverse order.
To reassemble your device, follow these instructions in reverse order.
Rückgängig: Ich habe diese Anleitung nicht absolviert.
Eine weitere Person hat diese Anleitung absolviert.

