Diese Version enthält möglicherweise inkorrekte Änderungen. Wechsle zur letzten geprüften Version.
Was du brauchst
-
Dieser Schritt ist noch nicht übersetzt. Hilf mit, ihn zu übersetzen!
-
Open the circular portion at the top of the speaker by twisting it until it reaches the maximum possible height.
-
-
Dieser Schritt ist noch nicht übersetzt. Hilf mit, ihn zu übersetzen!
-
Remove the four 12 mm Phillips screws from the enclosure.
-
-
Dieser Schritt ist noch nicht übersetzt. Hilf mit, ihn zu übersetzen!
-
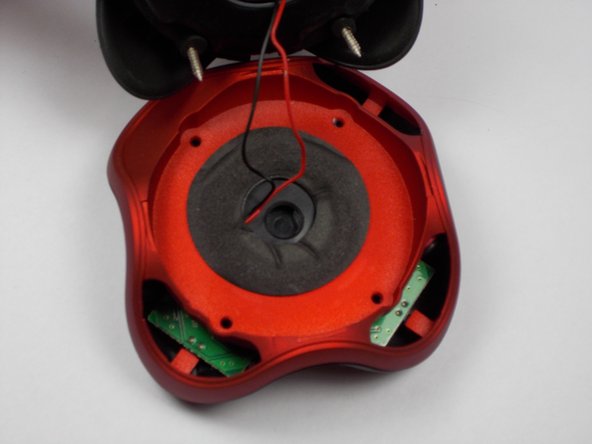
Separate the resonator portion from the base of device to reveal the middle separator of the enclosure. The enclosure will now be in two pieces.
-
Hold the resonator portion of the enclosure gently aside to make sure there is no tension on the black and red wires coming from the bottom portion of the device.
-
-
-
Dieser Schritt ist noch nicht übersetzt. Hilf mit, ihn zu übersetzen!
-
Separate the very bottom portion of the enclosure (marked in red) by pulling vertically on the red portion of the enclosure (marked in orange).
-
Gently set the very bottom portion and the resonator section aside once they have both been separated.
-
Remove the circuit board with your hands by lifting and sliding the board away from the LED indicator.
-
-
Dieser Schritt ist noch nicht übersetzt. Hilf mit, ihn zu übersetzen!
-
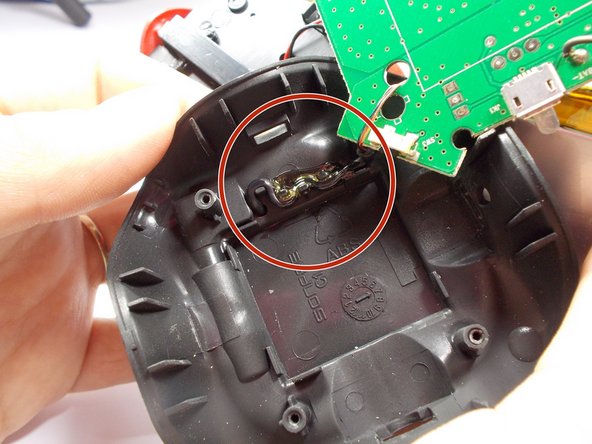
Locate the audio wire beneath the circuit board that is adjacent to the battery component on the very bottom layer of the device.
-
-
Dieser Schritt ist noch nicht übersetzt. Hilf mit, ihn zu übersetzen!
-
Use glue remover to loosen the glue holding down the existing wire to the bottom casting.
-
Gently pull the wire out of the glue and use a sharp cutting device to cut it from the existing connection.
-
-
Dieser Schritt ist noch nicht übersetzt. Hilf mit, ihn zu übersetzen!
-
Obtain new audio wire from manufacturer.
-
Depending on where you cut the audio wire underneath the circuit board, you will have to splice the new wire with the old wire.
-


Rückgängig: Ich habe diese Anleitung nicht absolviert.
2 weitere Nutzer:innen haben diese Anleitung absolviert.
Team

UMass Dartmouth, Team 1-5, Shastany Spring 2015 Mitglied von UMass Dartmouth, Team 1-5, Shastany Spring 2015
UMASSD-SHASTANY-S15S1G5
4 Mitglieder
4 Anleitungen geschrieben