Zum Hauptinhalt wechseln

Kitchen Smith 1.7L Electric Kettle KE01102-UL Disassembly

Was du brauchst

  1. Kitchen Smith 1.7L Electric Kettle KE01102-UL Disassembly, Kitchen Smith 1.7L Electric Kettle KE01102-UL Disassembly: Schritt 1, Bild 1 von 2 Kitchen Smith 1.7L Electric Kettle KE01102-UL Disassembly, Kitchen Smith 1.7L Electric Kettle KE01102-UL Disassembly: Schritt 1, Bild 2 von 2
    • At the bottom of the kettle pot, remove two 10 mm screws with a Phillips #2 screwdriver.

  2. Kitchen Smith 1.7L Electric Kettle KE01102-UL Disassembly: Schritt 2, Bild 1 von 3 Kitchen Smith 1.7L Electric Kettle KE01102-UL Disassembly: Schritt 2, Bild 2 von 3 Kitchen Smith 1.7L Electric Kettle KE01102-UL Disassembly: Schritt 2, Bild 3 von 3
    • Open the lid of the kettle

    • Remove two 12 mm screws at the top of the handle with a Phillips #2 screwdriver.

  3. Kitchen Smith 1.7L Electric Kettle KE01102-UL Disassembly: Schritt 3, Bild 1 von 2 Kitchen Smith 1.7L Electric Kettle KE01102-UL Disassembly: Schritt 3, Bild 2 von 2
    • The exterior of the plastic handle and lid can now be removed from the kettle to expose the electric components.

    • The plastic cover may need a little wiggling to pop off.

  4. Kitchen Smith 1.7L Electric Kettle KE01102-UL Disassembly: Schritt 4, Bild 1 von 3 Kitchen Smith 1.7L Electric Kettle KE01102-UL Disassembly: Schritt 4, Bild 2 von 3 Kitchen Smith 1.7L Electric Kettle KE01102-UL Disassembly: Schritt 4, Bild 3 von 3
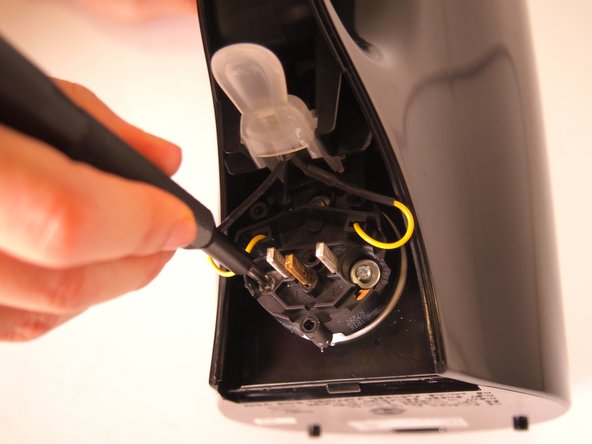
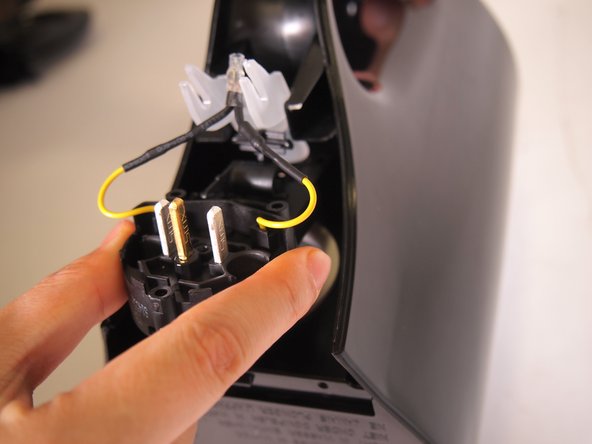
    • Turn the kettle over to the back of the handle.

    • Remove three 10 mm screws connecting the switch circuit to the heating element with a Phillips #2 screwdriver.

    • The heating element should disconnect, allowing you to remove it.

  5. Kitchen Smith 1.7L Electric Kettle KE01102-UL Disassembly: Schritt 5, Bild 1 von 2 Kitchen Smith 1.7L Electric Kettle KE01102-UL Disassembly: Schritt 5, Bild 2 von 2
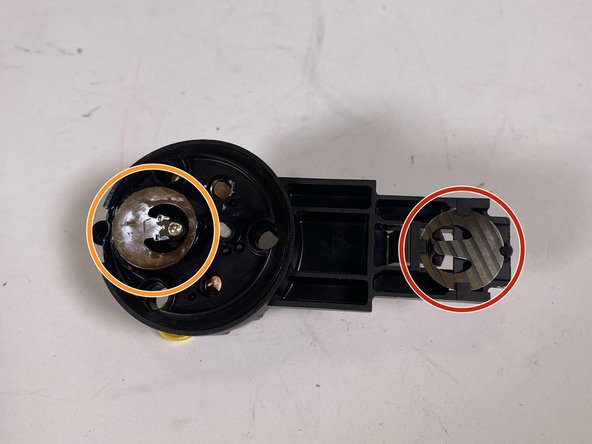
    • The pronged power element, removed in Step 4, will have a dry-heating safety feature on the opposite side.

    • This switch turns off the kettle once steam is detected, indicating the water is boiling.

    • This is the boil dry protection switch.

  6. Kitchen Smith 1.7L Electric Kettle KE01102-UL Disassembly: Schritt 6, Bild 1 von 2 Kitchen Smith 1.7L Electric Kettle KE01102-UL Disassembly: Schritt 6, Bild 2 von 2
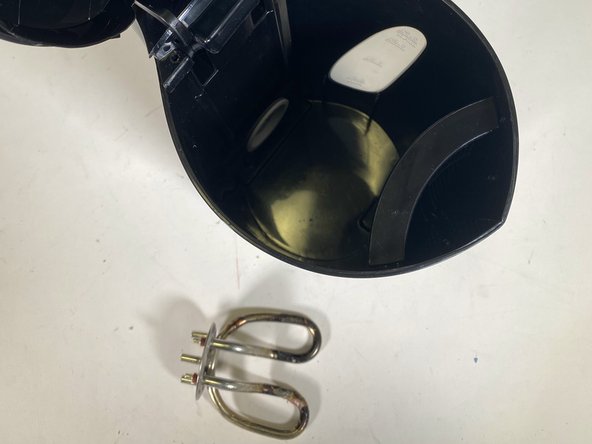
    • The inner heating element can now be removed after the completion of Step 4.

  7. Kitchen Smith 1.7L Electric Kettle KE01102-UL Disassembly: Schritt 7, Bild 1 von 3 Kitchen Smith 1.7L Electric Kettle KE01102-UL Disassembly: Schritt 7, Bild 2 von 3 Kitchen Smith 1.7L Electric Kettle KE01102-UL Disassembly: Schritt 7, Bild 3 von 3
    • Looking at the bottom of the base, remove two 12 mm screws from the base with a Triangle #2 screwdriver.

    • You are now able to take the black plastic cover off and remove the cord.

Abschluss

To reassemble your device, follow these instructions in reverse order.

Angehängte Dokumente

Amanda Yan

Mitglied seit: 09/14/22

195 Reputation

1 Anleitung geschrieben

0 Kommentare

Kommentar hinzufügen

Seitenaufrufe:

Letzte 24 Stunden: 1

Letzte 7 Tage: 6

Letzte 30 Tage: 32

Insgesamt: 371