Einleitung
This guide will illustrate how to replace the motor on the KitchenAid KHM512ER.
Was du brauchst
-
-
Insert the back of a plastic opening tool into one of the beater holes
-
Apply force to pull the circular plastic part off.
-
If necessary, use the other side of the plastic opening tool to pry the circular plastic part off.
-
-
-
Use a Phillips 2 screwdriver to remove the two 20mm screws holding the bottom plastic piece in place.
-
Remove the bottom plastic piece using a plastic opening tool.
-
-
-
-
Using a Phillips 2 screwdriver, remove the three 20mm screws holding the motor assembly in place.
-
Use your hands to remove the motor assembly and circuit board.
-
-
-
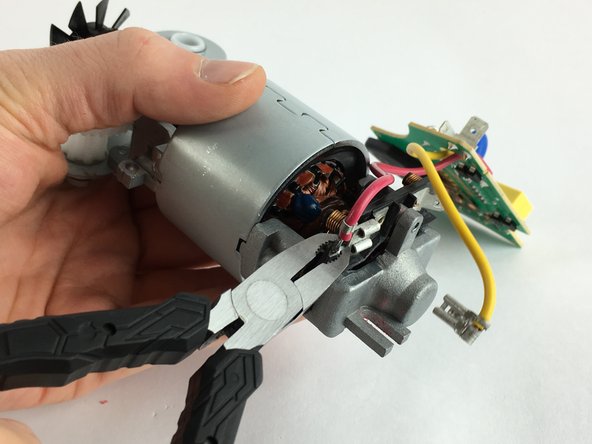
Firmly grip the motor in your hand. Using pliers, pull the connectors off the motors.
-


To reassemble your device, follow these instructions in reverse order.
To reassemble your device, follow these instructions in reverse order.
Rückgängig: Ich habe diese Anleitung nicht absolviert.
2 weitere Nutzer:innen haben diese Anleitung absolviert.