Einleitung
The motor is the driving force of the blender. It sits in a metal container and is surrounded by copper wire.
Was du brauchst
-
-
Remove the glass container and place the blender upside down on a solid surface.
-
Remove the four rubber feet using the needle nose pliers.
-
Remove the four #7.5 Phillips 25mm screws that were located underneath the rubber feet using the Phillips #2 screwdriver.
-
-
-
Lift the back panel up, sliding it along the power cord.
-
-
-
Remove the two #5 Phillips 95 mm machine screws using the Phillips #2 screwdriver.
-
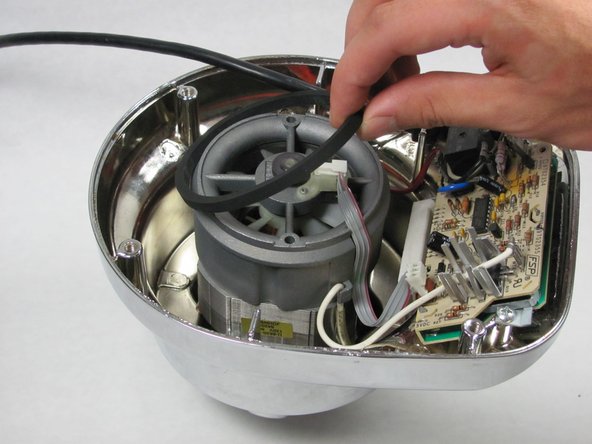
Remove the rubber O-ring by lifting it up.
-
Remove the ribbon cable from the chassis by lifting it up.
-
-
-
-
Unhook the white wire that is looped around the peg by pulling it out of the clip.
-
Repeat this process with the red wire on the other side of the chassis.
-
Remove the end cap using the 8" needle nose pliers.
-
Pull up the fan chassis.
-
-
-
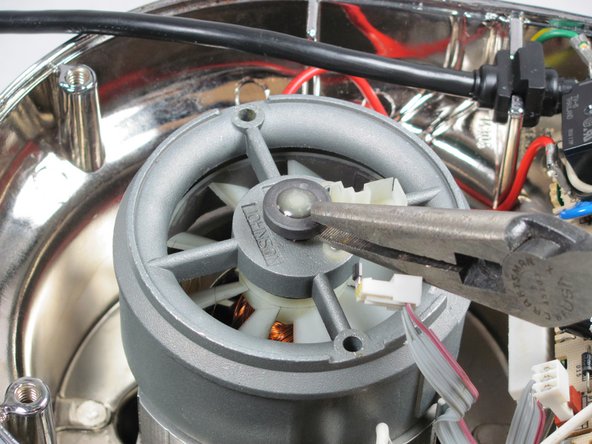
Use the needle nose pliers to turn the coupling clockwise to loosen it.
-
-
-
Rotate the blender 90 degrees clockwise.
-
Remove the two #8 Phillips 12 mm screws using the Phillips #2 screwdriver.
-
-
-
Slide the knife in the metal loop holding the insulation before the white copper wire, and wiggle the knife back and forth until it loosens.
-
Pull the wire out from the metal loop that you loosened.
-


To reassemble your device, follow these instructions in reverse order.
To reassemble your device, follow these instructions in reverse order.
Rückgängig: Ich habe diese Anleitung nicht absolviert.
Eine weitere Person hat diese Anleitung absolviert.
Team

Cal Poly, Team 12-5, Forte Fall 2014 Mitglied von Cal Poly, Team 12-5, Forte Fall 2014
CPSU-FORTE-F14S12G5
5 Mitglieder
6 Anleitungen geschrieben