Zum Hauptinhalt wechseln

Kodak EasyShare C913 LCD Screen Replacement

Was du brauchst

  1. Kodak EasyShare C913 LCD Screen Replacement, Batteries: Schritt 1, Bild 1 von 3 Kodak EasyShare C913 LCD Screen Replacement, Batteries: Schritt 1, Bild 2 von 3 Kodak EasyShare C913 LCD Screen Replacement, Batteries: Schritt 1, Bild 3 von 3
    • Position the camera with the bottom facing up.

    • Slide the battery cover in the direction of the arrow with your finger gently.

    • Remove the batteries

  2. Kodak EasyShare C913 LCD Screen Replacement, Back Case: Schritt 2, Bild 1 von 3 Kodak EasyShare C913 LCD Screen Replacement, Back Case: Schritt 2, Bild 2 von 3 Kodak EasyShare C913 LCD Screen Replacement, Back Case: Schritt 2, Bild 3 von 3
    • Remove the seven 4.5mm screws with a Phillips #00 screwdriver.

    • 2 on the left

    • 2 on the right

    • 3 on the bottom

  3. Kodak EasyShare C913 LCD Screen Replacement: Schritt 3, Bild 1 von 3 Kodak EasyShare C913 LCD Screen Replacement: Schritt 3, Bild 2 von 3 Kodak EasyShare C913 LCD Screen Replacement: Schritt 3, Bild 3 von 3
    • Firmly grasp the back of the camera and pull the away the casing.

  4. Kodak EasyShare C913 LCD Screen Replacement, Front Case: Schritt 4, Bild 1 von 3 Kodak EasyShare C913 LCD Screen Replacement, Front Case: Schritt 4, Bild 2 von 3 Kodak EasyShare C913 LCD Screen Replacement, Front Case: Schritt 4, Bild 3 von 3
    • Keep the battery door open

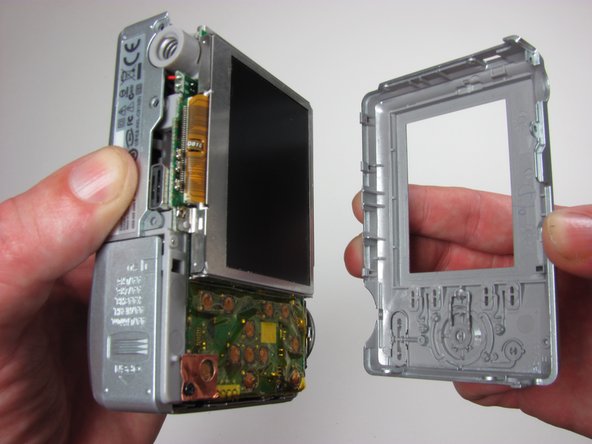
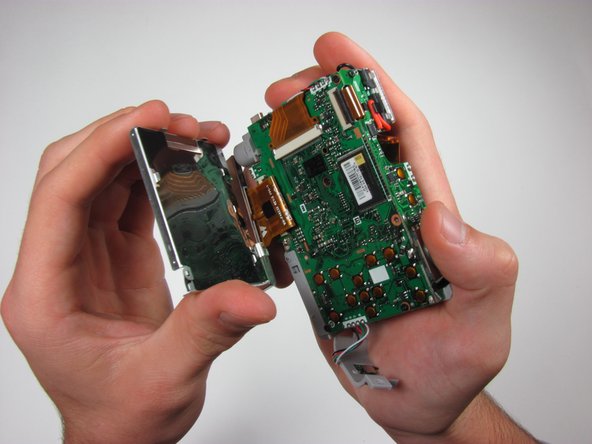
    • Firmly grasp the front casing and pull away from the camera.

  5. Kodak EasyShare C913 LCD Screen Replacement, LCD Screen: Schritt 5, Bild 1 von 3 Kodak EasyShare C913 LCD Screen Replacement, LCD Screen: Schritt 5, Bild 2 von 3 Kodak EasyShare C913 LCD Screen Replacement, LCD Screen: Schritt 5, Bild 3 von 3
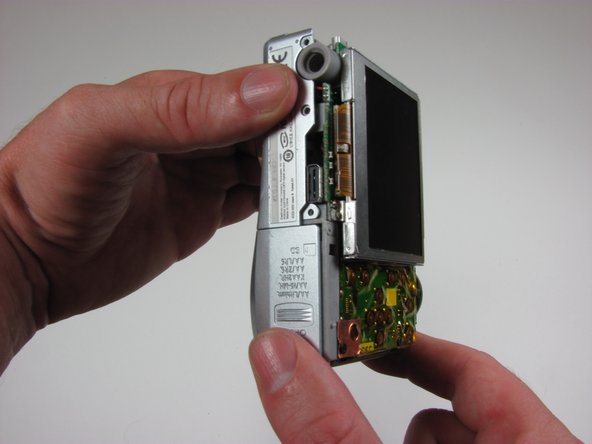
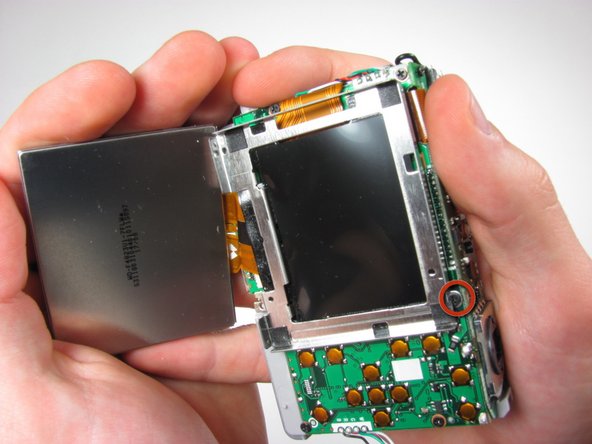
    • Locate the 2 solder joints on both sides of the LCD casing.

    • De-solder the joints.

  6. Kodak EasyShare C913 LCD Screen Replacement: Schritt 6, Bild 1 von 3 Kodak EasyShare C913 LCD Screen Replacement: Schritt 6, Bild 2 von 3 Kodak EasyShare C913 LCD Screen Replacement: Schritt 6, Bild 3 von 3
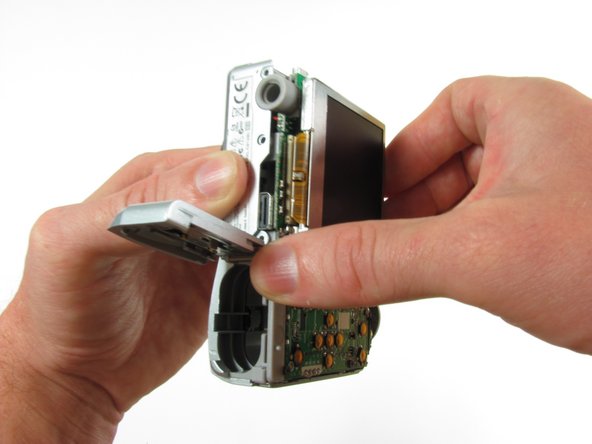
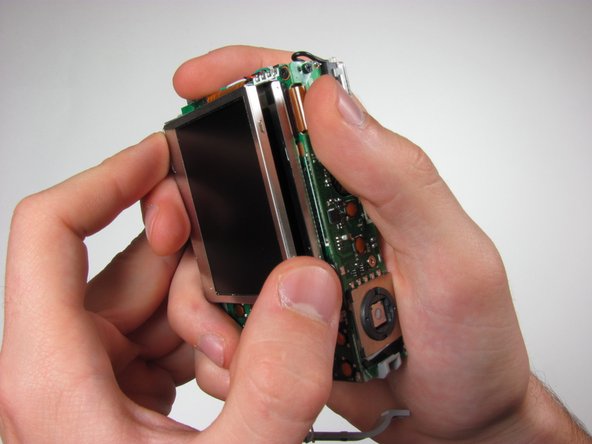
    • Gently grasp the lower right side of LCD screen.

    • Lift the screen out of its casing.

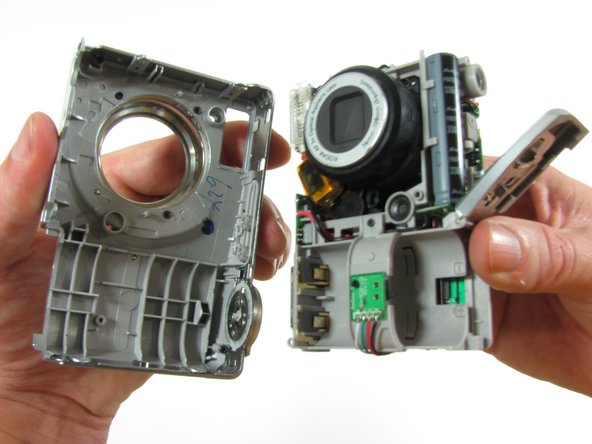
    • Remove 3mm screw from LCD casing using #00 screwdriver.

  7. Kodak EasyShare C913 LCD Screen Replacement: Schritt 7, Bild 1 von 3 Kodak EasyShare C913 LCD Screen Replacement: Schritt 7, Bild 2 von 3 Kodak EasyShare C913 LCD Screen Replacement: Schritt 7, Bild 3 von 3
    • Gently grab the sides of the LCD casing and remove it from the camera

  8. Kodak EasyShare C913 LCD Screen Replacement: Schritt 8, Bild 1 von 2 Kodak EasyShare C913 LCD Screen Replacement: Schritt 8, Bild 2 von 2
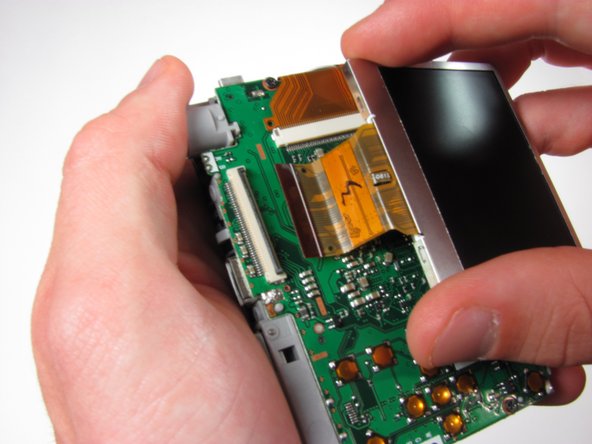
    • Lift the black tab with your finger

    • Gently remove ribbon from underneath black tab.

Abschluss

To reassemble your device, follow these instructions in reverse order.

Ein:e weitere:r Nutzer:in hat diese Anleitung absolviert.

Alan Galarza

Mitglied seit: 10/03/10

72 Reputation

3 Anleitungen geschrieben

Team

Cal Poly, Team 7-51, Amido Fall 2010 Mitglied von Cal Poly, Team 7-51, Amido Fall 2010

CPSU-AMIDO-F10S7G51

4 Mitglieder

14 Anleitungen geschrieben

0 Kommentare

Kommentar hinzufügen

Seitenaufrufe:

Letzte 24 Stunden: 1

Letzte 7 Tage: 4

Letzte 30 Tage: 19

Insgesamt: 4,240