Zum Hauptinhalt wechseln

Kodak Easyshare V1003 Lens Replacement

Was du brauchst

  1. Kodak Easyshare V1003 Lens  Replacement, Battery: Schritt 1, Bild 1 von 1
    • Turn off camera by firmly pressing the power button that is located on the top of the camera.

  2. Kodak Easyshare V1003 Lens  Replacement: Schritt 2, Bild 1 von 1
    • Position camera with the bottom facing up.

  3. Kodak Easyshare V1003 Lens  Replacement: Schritt 3, Bild 1 von 1
    • With your finger, slide the battery cover in the direction of the open arrow.

  4. Kodak Easyshare V1003 Lens  Replacement: Schritt 4, Bild 1 von 1
    • Lift the battery cover up gently.

  5. Kodak Easyshare V1003 Lens  Replacement: Schritt 5, Bild 1 von 2 Kodak Easyshare V1003 Lens  Replacement: Schritt 5, Bild 2 von 2
    • Gently push the battery down until a click is heard. Battery should release and be lifted out of slot.

  6. Kodak Easyshare V1003 Lens  Replacement, Lens: Schritt 6, Bild 1 von 2 Kodak Easyshare V1003 Lens  Replacement, Lens: Schritt 6, Bild 2 von 2
    • Use a J00 screwdriver to remove the five exterior screws.

  7. Kodak Easyshare V1003 Lens  Replacement: Schritt 7, Bild 1 von 1
    • Pull the outer case off using the plastic opening tool.

  8. Kodak Easyshare V1003 Lens  Replacement: Schritt 8, Bild 1 von 2 Kodak Easyshare V1003 Lens  Replacement: Schritt 8, Bild 2 von 2
    • Remove the LCD display by unplugging the connector

    • Take apart the LCD display from the back case

  9. Kodak Easyshare V1003 Lens  Replacement: Schritt 9, Bild 1 von 2 Kodak Easyshare V1003 Lens  Replacement: Schritt 9, Bild 2 von 2
    • Peel off the yellow film.

    • Peel off the black tape holding the wires.

  10. Kodak Easyshare V1003 Lens  Replacement: Schritt 10, Bild 1 von 1
    • Unplug the connector by lifting the little lock holding it in place.

  11. Kodak Easyshare V1003 Lens  Replacement: Schritt 11, Bild 1 von 2 Kodak Easyshare V1003 Lens  Replacement: Schritt 11, Bild 2 von 2
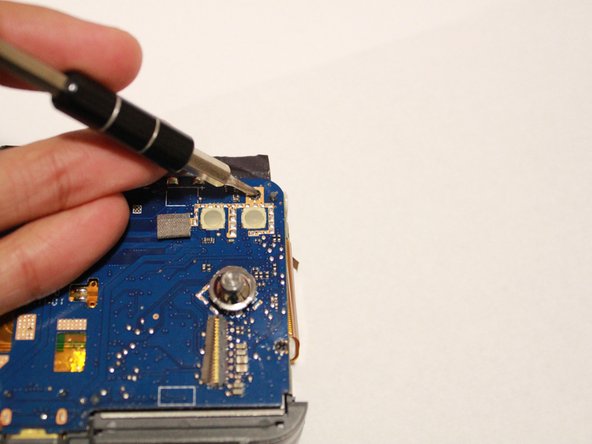
    • Use a J00 screwdriver to remove two screws located on the far right, near to the main button.

  12. Kodak Easyshare V1003 Lens  Replacement: Schritt 12, Bild 1 von 3 Kodak Easyshare V1003 Lens  Replacement: Schritt 12, Bild 2 von 3 Kodak Easyshare V1003 Lens  Replacement: Schritt 12, Bild 3 von 3
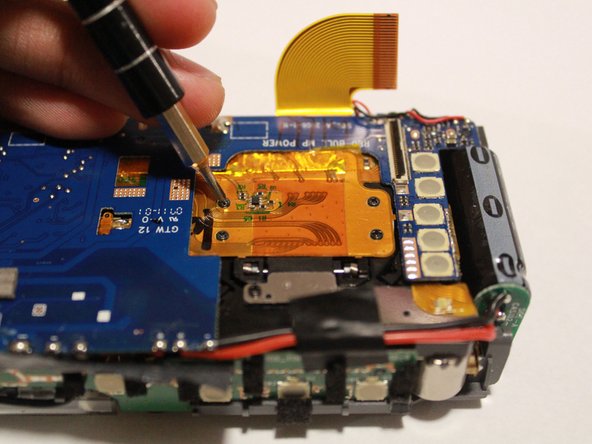
    • Use a J00 screwdriver to remove 6 screws located at the center of the back panel.

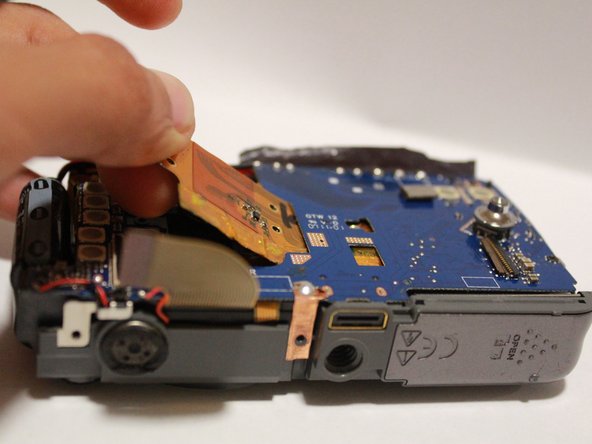
    • Gently pull out the lens using you finger tips or pincers.

Abschluss

To reassemble your device, follow these instructions in reverse order.

Sarah Berry

Mitglied seit: 03/21/17

301 Reputation

3 Anleitungen geschrieben

Team

UMass Dartmouth, Team S9-G4, Martin Spring 2017 Mitglied von UMass Dartmouth, Team S9-G4, Martin Spring 2017

UMASSD-MARTIN-S17S9G4

4 Mitglieder

10 Anleitungen geschrieben

0 Kommentare

Kommentar hinzufügen

Seitenaufrufe:

Letzte 24 Stunden: 0

Letzte 7 Tage: 3

Letzte 30 Tage: 7

Insgesamt: 312