Einleitung
To get to the speaker you're going to have to go in past the motherboard and do some soldering work, which will require a little bit of finesse. Replacing the speaker should fix any issue of sound coming out of the Kurio 7.
Was du brauchst
-
-
Insert the plastic opening tool in the gap between the front cover and the back cover of the device.
-
Slide the plastic opening tool around the edge of the device. Gently pry apart the tabs that hold the front cover and the back cover together.
-
-
-
-
Use a plastic credit card, or other thin object, to separate the battery from the screen.
-
Carefully set the battery aside.
-
-
-
Use a Phillips #00 screwdriver to remove the eight 40mm screws holding the motherboard in place.
-
-
-
Place the plastic opening tool on the base of the black ribbon clip and pull up, like a lever, to release the mount. This should release the clip holding the ribbon to the mount.
-
Pull the ribbon out of the mount.
-
-
-
There should be masking tape on the yellow ribbon. Pull the tape off of the motherboard and wrap it around the yellow ribbon.
-
To remove the ribbon from the mount, follow the same steps in Step 3.
-
-
-
Pull back the ribbons and put the battery near the bottom of the Kurio.
-
The motherboard is now removed so that other components can be worked on.
-
-
-
Pull the wires off of the motherboard using the tweezers. The wires aren't soldered on well.
-
-
-
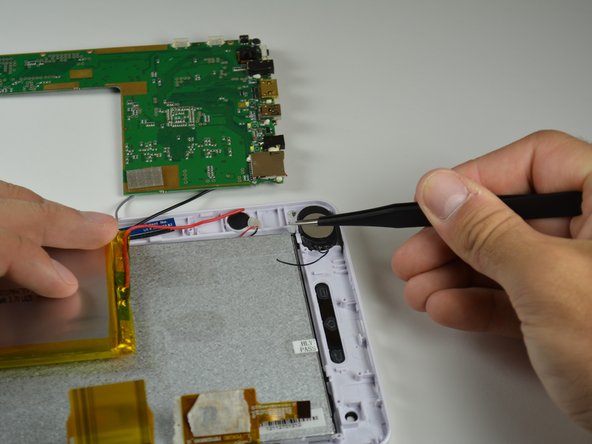
Remove any hot glue residue holding the speaker in place by peeling it off using tweezers.
-
-
-
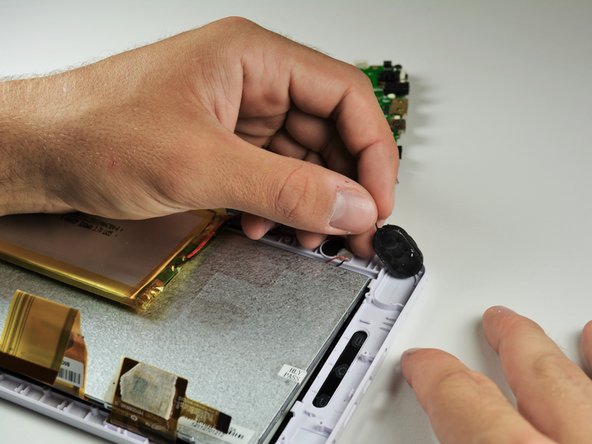
Use the spudger to pry out the old speaker.
-
You have successfully removed the speaker!
-


Solder in the new speaker. Refer to the soldering guide if you're unsure on how to solder. To reassemble your device, follow these instructions in reverse order.
Solder in the new speaker. Refer to the soldering guide if you're unsure on how to solder. To reassemble your device, follow these instructions in reverse order.
Rückgängig: Ich habe diese Anleitung nicht absolviert.
Ein:e weitere:r Nutzer:in hat diese Anleitung absolviert.

Team

Cal Poly, Team 12-36, Maness Spring 2014 Mitglied von Cal Poly, Team 12-36, Maness Spring 2014
CPSU-MANESS-S14S12G36
4 Mitglieder
14 Anleitungen geschrieben