Zum Hauptinhalt wechseln

Kurio Touch 4S Front & Rear Facing Cameras Replacement

Was du brauchst

  1. Kurio Touch 4S Front & Rear Facing Cameras Replacement, Front & Rear Facing Cameras: Schritt 1, Bild 1 von 1
    • Make sure to open the back cover easily using the plastic opening tool.

  2. Kurio Touch 4S Front & Rear Facing Cameras Replacement: Schritt 2, Bild 1 von 3 Kurio Touch 4S Front & Rear Facing Cameras Replacement: Schritt 2, Bild 2 von 3 Kurio Touch 4S Front & Rear Facing Cameras Replacement: Schritt 2, Bild 3 von 3
    • Remove back cover by prying away from the Kurio.

    • The easiest place to remove the cover is from the bottom and top; try to open it from right to left sides.

  3. Kurio Touch 4S Front & Rear Facing Cameras Replacement: Schritt 3, Bild 1 von 3 Kurio Touch 4S Front & Rear Facing Cameras Replacement: Schritt 3, Bild 2 von 3 Kurio Touch 4S Front & Rear Facing Cameras Replacement: Schritt 3, Bild 3 von 3
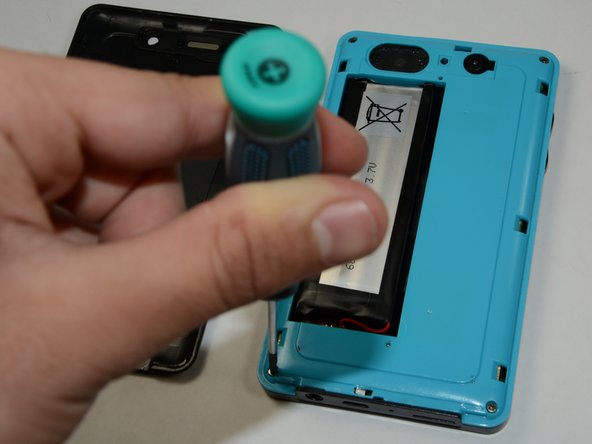
    • To remove the battery, make sure the four 5mm Philips screws on each side of your device is open using the philips#1 Screwdriver.

  4. Kurio Touch 4S Front & Rear Facing Cameras Replacement: Schritt 4, Bild 1 von 1
    • After you remove your four 5mm Philips screws, use your plastic opening tool to help you open the plastic cover of your device.

    • All these screws are identical so don't worry if you miss them up.

  5. Kurio Touch 4S Front & Rear Facing Cameras Replacement: Schritt 5, Bild 1 von 1
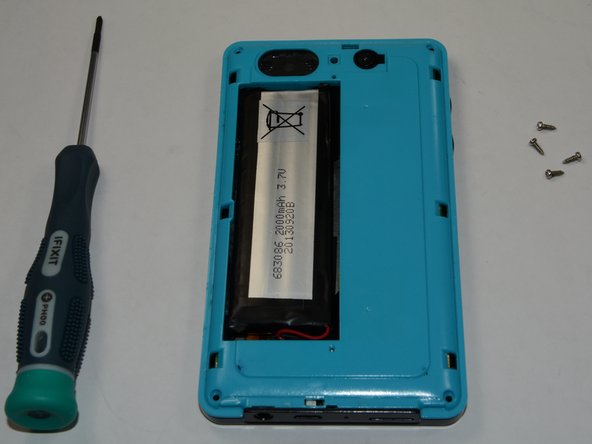
    • Remove the battery because it blocks the plastic shield that covers the camera.

    • Do not remove the wires that are attached to the battery and the motherboard.

  6. Kurio Touch 4S Front & Rear Facing Cameras Replacement: Schritt 6, Bild 1 von 1
    • Remove the plastic cover that is covering the camera area using tweezers.

  7. Kurio Touch 4S Front & Rear Facing Cameras Replacement: Schritt 7, Bild 1 von 2 Kurio Touch 4S Front & Rear Facing Cameras Replacement: Schritt 7, Bild 2 von 2
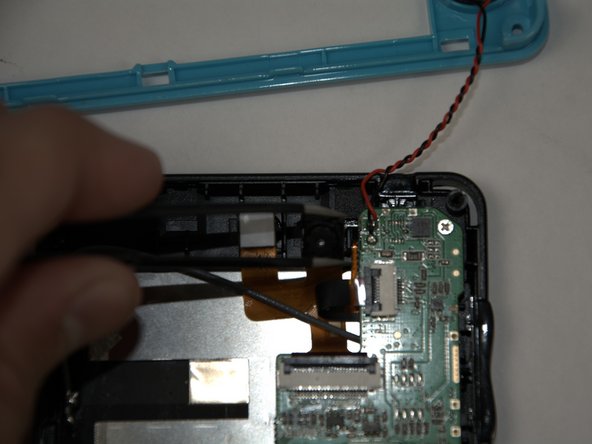
    • Separate the two halves of your Kurio Touch 4S.

    • Gently use a brush to remove any dirt or finger prints around the area.

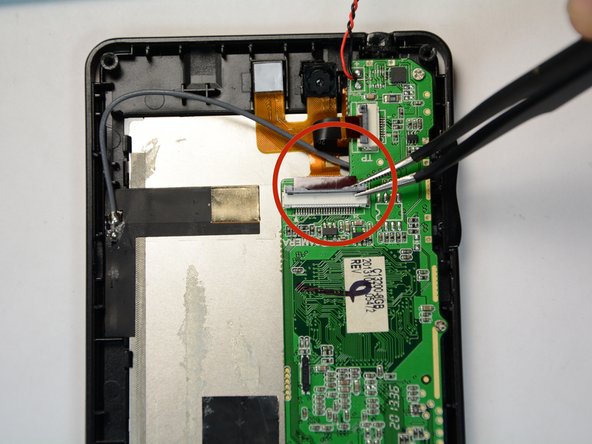
    • Use the Tweezers to detach the front and back camera from its place.

  8. Kurio Touch 4S Front & Rear Facing Cameras Replacement: Schritt 8, Bild 1 von 2 Kurio Touch 4S Front & Rear Facing Cameras Replacement: Schritt 8, Bild 2 von 2
    • Remove the copper wires by using the Tweezers to replace your new camera.

Abschluss

To reassemble your device, follow these instructions in reverse order.

Ein:e weitere:r Nutzer:in hat diese Anleitung absolviert.

Team

USF Tampa, Team 6-5, Brown Winter 2015 Mitglied von USF Tampa, Team 6-5, Brown Winter 2015

USFT-BROWN-W15S6G5

3 Mitglieder

10 Anleitungen geschrieben

0 Kommentare

Kommentar hinzufügen

Seitenaufrufe:

Letzte 24 Stunden: 0

Letzte 7 Tage: 0

Letzte 30 Tage: 0

Insgesamt: 242