Diese Version enthält möglicherweise inkorrekte Änderungen. Wechsle zur letzten geprüften Version.
Was du brauchst
-
Dieser Schritt ist noch nicht übersetzt. Hilf mit, ihn zu übersetzen!
-
Locate the small notch on the bottom right side of the phone.
-
To remove the cover, hook your thumb or fingernail into the slot. Then, gently lift the cover up and off.
-
-
Dieser Schritt ist noch nicht übersetzt. Hilf mit, ihn zu übersetzen!
-
Locate the small notch below the battery. You may see a white plastic notch sticking out of this space; if so, grasp that tab to pull the battery out of its compartment. If you do not see a white plastic tab, then place your fingernail in the notch and pull upward to release the battery from its compartment.
-
-
-
Dieser Schritt ist noch nicht übersetzt. Hilf mit, ihn zu übersetzen!
-
The SIM card slot can be seen in the middle left of the photograph.
-
-
Dieser Schritt ist noch nicht übersetzt. Hilf mit, ihn zu übersetzen!
-
The SD card slot can be opened and closed, as depicted by the tool.
-
The SD card itself slides into and out of the metal cover.
-
-
Dieser Schritt ist noch nicht übersetzt. Hilf mit, ihn zu übersetzen!
-
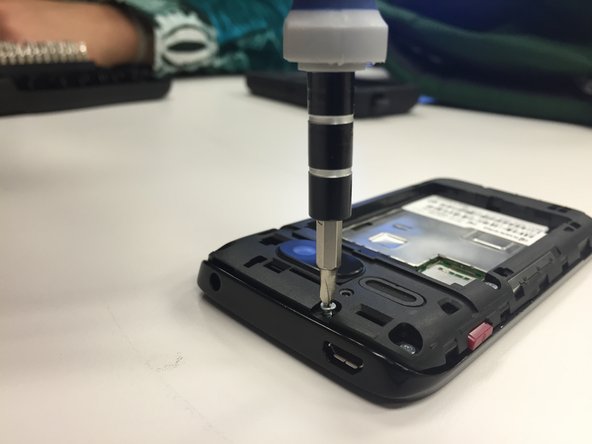
Remove seven of the 4.9mm tri-head screws. Keep them in a secure location.
-
-
Dieser Schritt ist noch nicht übersetzt. Hilf mit, ihn zu übersetzen!
-
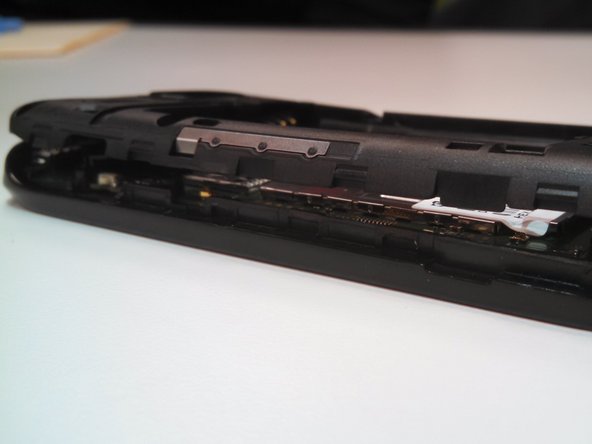
Pry the back assembly away from the body on all four sides of the phone.
-
Start prying at the top and work around.
-
Remove the buttons for the volume and power-this will allow for easier disassembly.
-


Team

Ohio State, Team 1-4, Michaels Spring 2015 Mitglied von Ohio State, Team 1-4, Michaels Spring 2015
OSU-MICHAELS-S15S1G4
3 Mitglieder
4 Anleitungen geschrieben