Einleitung
Information to replace the screen of your Kyocera Oystr.
Was du brauchst
-
-
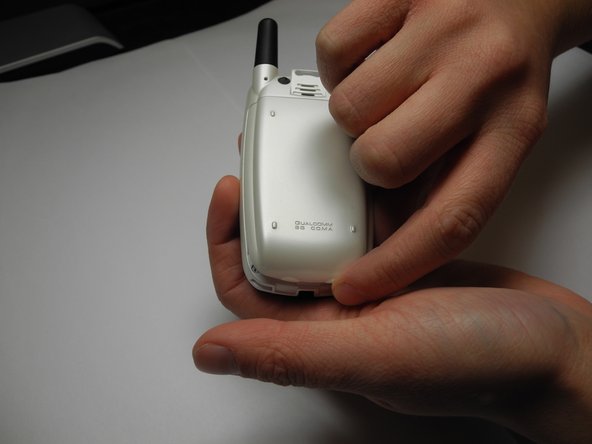
Make sure the phone is turned off before disassembly.
-
Lift the bottom of the phone's back cover upwards, revealing the phone's battery housing.
-
Remove the battery from the casing. This is simply a precaution.
-
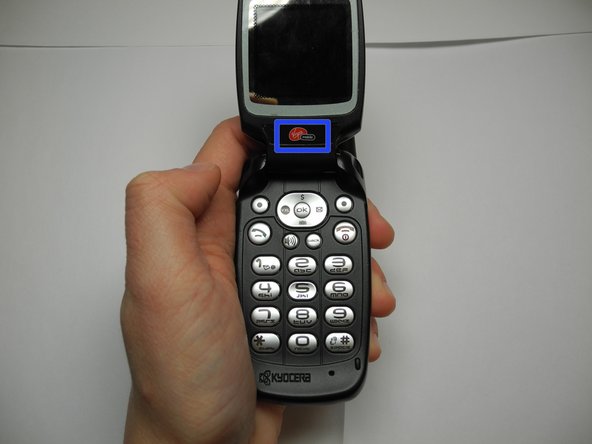
Turn the phone over, so that the front side is facing you. Open the device in preparation for the next step.
-
-
-
Peel the Virgin Mobile sticker off of the phone's screen to reveal two screws beneath it.
-
Use the Tri-Wing Y0 screwdriver to remove the two screws from the screen.
-
-
-
-
Lift the plastic cover of the phone screen upwards with a plastic opening tool.
-
Remove the two screws from the metal cover.
-
-
-
Remove the metal cover by lifting up and away from the device.
-
-
-
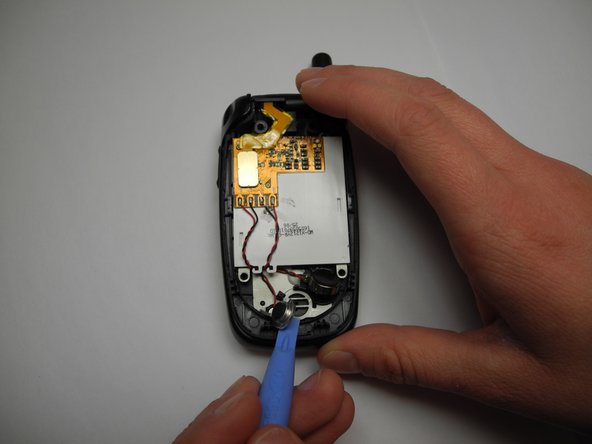
Use the plastic opening tool to pry the phone's speakers up and away from the device. These speakers will dangle by the wires attached to the board.
-
Use your fingernail to detach the ribbon connecting the board to the screen.
-
Remove the damaged screen from the device.
-
-
-
Follow these steps in reverse order to replace Kyocera Oystr’s screen.
-


To reassemble your device, follow these instructions in reverse order.
To reassemble your device, follow these instructions in reverse order.
Team

UW Stout, Team 5-7, Zhou Fall 2011 Mitglied von UW Stout, Team 5-7, Zhou Fall 2011
UWSTOUT-ZHOU-F11S5G7
2 Mitglieder
4 Anleitungen geschrieben
2 Kommentare
My screen goes blank for days, then shows. maybe for minutes of seconds. Do I need to replace the screen, or is there a control I can try to bring back the display? The phone is charged and rings. Yours is a wonderful website. Thank you.
Martha Carnahan mpc@netsync.net
My screen goes blank for days, then appears, but only for minutes or seconds before it goes blank again. Do I need to replace the screen, or do you know if there a command which would solve the problem? The phone is charged and rings.