Einleitung
The motherboard allows all the different parts and functions of the phone to work together.
Was du brauchst
-
-
Use your thumb to press down and slide off the back cover of the phone.
-
-
-
Push the spudger between each of the two rubber cushions and the body of the phone. Then turn the spudger to pop each cushion out.
-
-
-
-
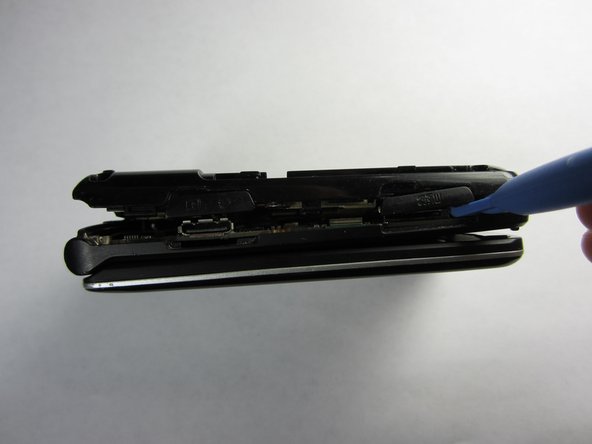
Push the spudger into the crack separating the two pieces of the phone.
-
Then use the plastic opening tools to pry the back off by separating the two pieces of the phone.
-
Repeat as necessary around the perimeter of the phone until the casing pops off. Use force as necessary without breaking the cover.
-
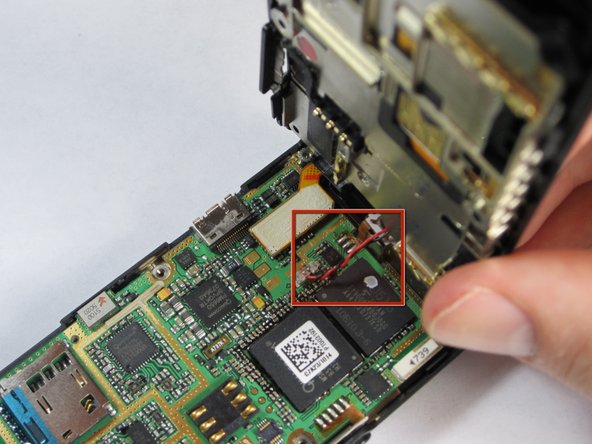
The back is attached to the motherboard by a wire, so don't pull the back casing off just yet.
-
-
-
Gently pull the wire up from the motherboard, separating the back of the phone and the motherboard.
-
-
-
Remove the plastic tab connecting the screen to the motherboard by pulling the tab up from the board.
-
-
-
Gently grasp one of the corners of the motherboard and simply lift it straight up out of the phone casing.
-
Replace the motherboard with a new one.
-


To reassemble your device, follow these instructions in reverse order.
To reassemble your device, follow these instructions in reverse order.
Team

Cal Poly, Team 21-55, Johann Spring 2013 Mitglied von Cal Poly, Team 21-55, Johann Spring 2013
CPSU-JOHANN-S13S21G55
4 Mitglieder
12 Anleitungen geschrieben