Diese Version enthält möglicherweise inkorrekte Änderungen. Wechsle zur letzten geprüften Version.
Was du brauchst
-
Dieser Schritt ist noch nicht übersetzt. Hilf mit, ihn zu übersetzen!
-
Find a sliding button on the lower back side of the device and with your finger, slide it to the left firmly.
-
-
Dieser Schritt ist noch nicht übersetzt. Hilf mit, ihn zu übersetzen!
-
Use a Phillips #00 screwdriver to unscrew the four Phillips #00 screws on the four corners under the battery to unfasten the back case from the phone.
-
-
Dieser Schritt ist noch nicht übersetzt. Hilf mit, ihn zu übersetzen!
-
Take the case off by using a plastic opening tool.
-
Continue using the plastic opening tool around the sides of the device, unhooking the eight tabs securing the back cover to the rest of the phone as shown in the second photo.
-
The back speaker will be connected to the motherboard, and must be disconnected to remove the case.
-
-
Dieser Schritt ist noch nicht übersetzt. Hilf mit, ihn zu übersetzen!
-
Unscrew the 4 Phillips 00 screws that connect the two halves of the phone together.
-
-
-
Dieser Schritt ist noch nicht übersetzt. Hilf mit, ihn zu übersetzen!
-
Between the two halves is a ribbon. Use a plastic opening tool to flip up the lock and disconnect it.
-
-
Dieser Schritt ist noch nicht übersetzt. Hilf mit, ihn zu übersetzen!
-
Pry off the plastic tabs that cover two screws, as shown in the first picture.
-
Then, remove the 6 Phillips 00 screws from the back of the case, as shown in the second picture.
-
-
Dieser Schritt ist noch nicht übersetzt. Hilf mit, ihn zu übersetzen!
-
Pry off the back cover from the front of the case using a plastic opening tool.
-
-
Dieser Schritt ist noch nicht übersetzt. Hilf mit, ihn zu übersetzen!
-
Pry the front speaker and wireless receiver out of the front case using a spudger.
-
-
Dieser Schritt ist noch nicht übersetzt. Hilf mit, ihn zu übersetzen!
-
Starting with the side that has the speaker and receiver, carefully lift the LCD Board out of the case.
-
-
Dieser Schritt ist noch nicht übersetzt. Hilf mit, ihn zu übersetzen!
-
Unhook the ribbon cable using that flat side of a spudger.
-
-
Dieser Schritt ist noch nicht übersetzt. Hilf mit, ihn zu übersetzen!
-
Next, carefully remove the tape from the LCD board.
-
-
Dieser Schritt ist noch nicht übersetzt. Hilf mit, ihn zu übersetzen!
-
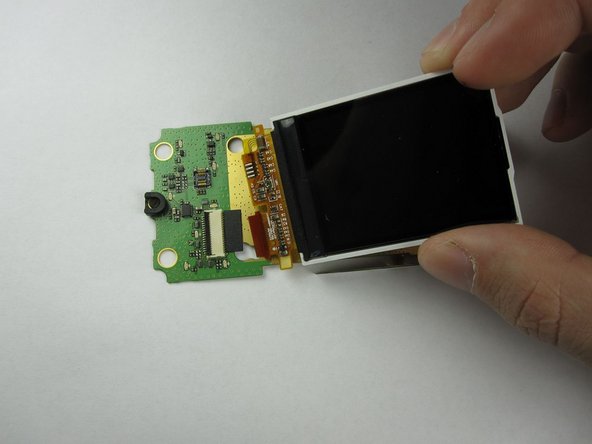
Finally, flip up the black switch to unhook the LCD screen from the LCD board using a spudger.
-
The LCD Board in now accessible.
-


