Einleitung
If you need to replace the audio jack in your LG Encore GT550, follow this guide.
Was du brauchst
-
-
Turn the device over so the backside is facing up.
-
Use your fingers or an opening tool to remove the back cover in order to expose the battery.
-
-
-
Use your fingers or a spudger to remove the battery. Lift it from the side opposite of the camera.
-
-
-
-
Use a Phillips #0 screwdriver to remove six screws around the perimeter of the phone.
-
-
-
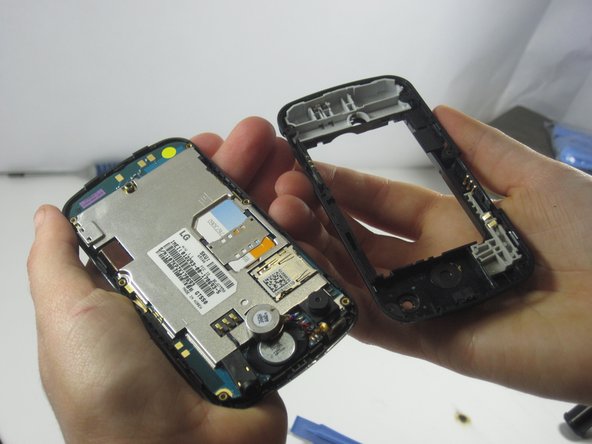
Place the opening tool in the seam of the device and pry around the perimeter to separate the top case from the bottom case.
-
-
-
Place the opening tool on the top on the device between the phone casing and motherboard.
-
Separate the screen and the motherboard.
-


To reassemble your device, follow these instructions in reverse order.
To reassemble your device, follow these instructions in reverse order.
Rückgängig: Ich habe diese Anleitung nicht absolviert.
Ein:e weitere:r Nutzer:in hat diese Anleitung absolviert.
Team

UMass Dartmouth, Team 1-4, Shastany Fall 2013 Mitglied von UMass Dartmouth, Team 1-4, Shastany Fall 2013
UMASSD-SHASTANY-F13S1G4
2 Mitglieder
10 Anleitungen geschrieben