Diese Version enthält möglicherweise inkorrekte Änderungen. Wechsle zur letzten geprüften Version.
Was du brauchst
-
Dieser Schritt ist noch nicht übersetzt. Hilf mit, ihn zu übersetzen!
-
Hold the phone camera-side up and locate the rear cover.
-
-
Dieser Schritt ist noch nicht übersetzt. Hilf mit, ihn zu übersetzen!
-
Place a thumb below the camera, apply a little pressure, and slide the cover toward the bottom of the phone.
-
-
Dieser Schritt ist noch nicht übersetzt. Hilf mit, ihn zu übersetzen!
-
Place the plastic opening tool in the small slot below and to the left of the battery.
-
Pry the battery upward to remove it.
-
-
Dieser Schritt ist noch nicht übersetzt. Hilf mit, ihn zu übersetzen!
-
Using the #00 Philips screw driver, unscrew the four 4.5mm screws located around the battery compartment.
-
-
-
Dieser Schritt ist noch nicht übersetzt. Hilf mit, ihn zu übersetzen!
-
Wedge the plastic opening tool between the screen and the body of the device, using care to avoid damaging internal components.
-
Gently move the tool around the perimeter of the screen to separate it from the body.
-
-
Dieser Schritt ist noch nicht übersetzt. Hilf mit, ihn zu übersetzen!
-
Flip the device over so the battery compartment faces up.
-
Press the scroll wheel, located in the upper-left corner, into the device to avoid damage.
-
Gently insert the plastic opening tool into the seam between the frame and front cover to separate the back panel from the device.
-
-
Dieser Schritt ist noch nicht übersetzt. Hilf mit, ihn zu übersetzen!
-
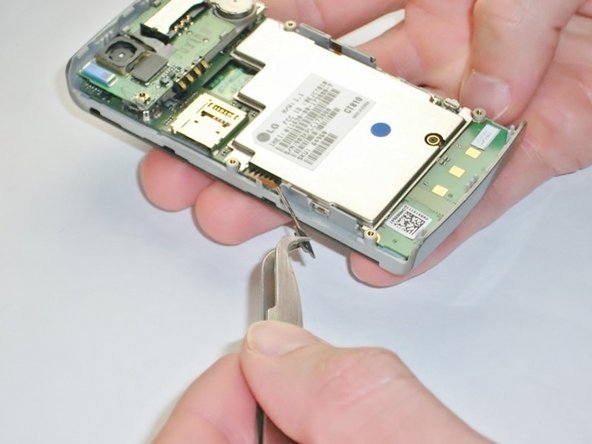
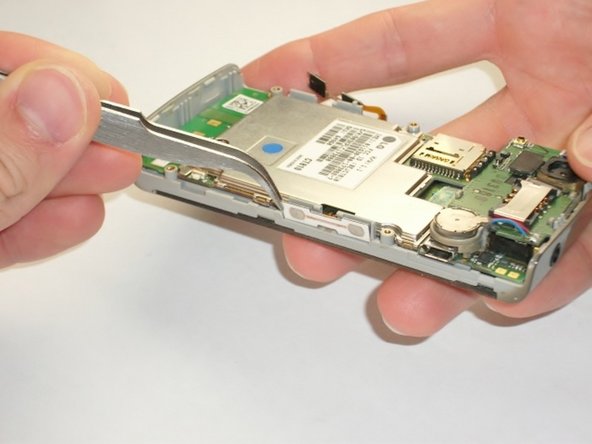
Use the metal tweezers to gently peel the yellow tab from the left edge of the phone at the two plastic bases.
-
Repeat this for the white tab on the opposite side of the phone.
-
-
Dieser Schritt ist noch nicht übersetzt. Hilf mit, ihn zu übersetzen!
-
Insert your plastic opening tool underneath the speaker/camera panel, and gently pry it upwards.
-
-
Dieser Schritt ist noch nicht übersetzt. Hilf mit, ihn zu übersetzen!
-
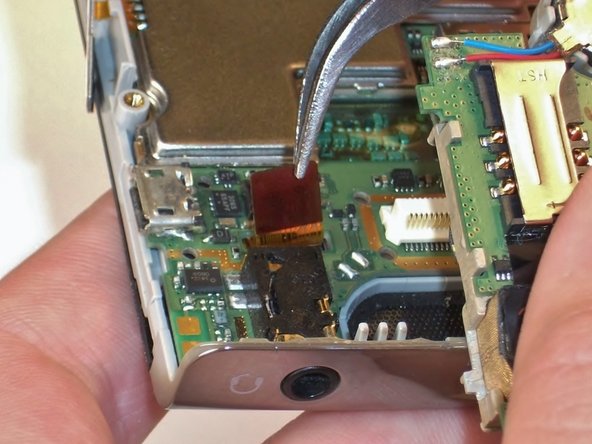
Use the metal tweezers to gently lift the edge of the maroon tab, it should pop up easily.
-
-
Dieser Schritt ist noch nicht übersetzt. Hilf mit, ihn zu übersetzen!
-
Insert the plastic opening tool underneath the motherboard towards the bottom edge of the phone and gently pry it from its case.
-
Lift the motherboard and slide it towards you by hand to free it from the phone.
-


