Diese Version enthält möglicherweise inkorrekte Änderungen. Wechsle zur letzten geprüften Version.
Was du brauchst
-
Dieser Schritt ist noch nicht übersetzt. Hilf mit, ihn zu übersetzen!
-
With one hand, push the rectangular button located on the back top-side of the phone.
-
With your other hand, remove the rear cover.
-
-
Dieser Schritt ist noch nicht übersetzt. Hilf mit, ihn zu übersetzen!
-
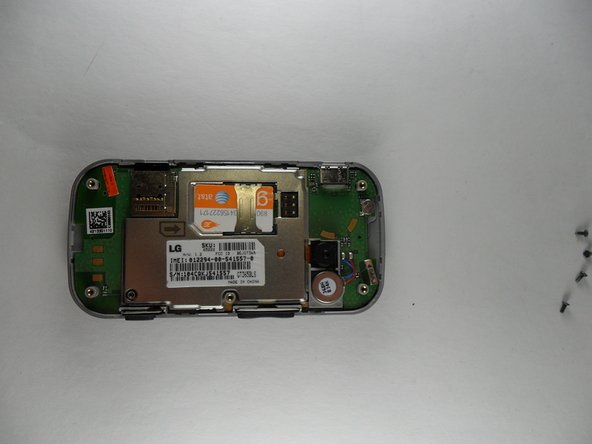
Remove 5 screws, 1 from each corner of the phone and 1 from the center-right of the phone.
-
-
Dieser Schritt ist noch nicht übersetzt. Hilf mit, ihn zu übersetzen!
-
Now pull off the rear casing, using an opening tool. **Buttons for volume and pictures may fall out**
-
-
Dieser Schritt ist noch nicht übersetzt. Hilf mit, ihn zu übersetzen!
-
Hold the circuit board and turn the phone upside down.
-
Then let the circuit board hang down so you can disconnect the ribbon by getting under an edge and popping it off. **the rubber keyboard may fall out**
-
-
Dieser Schritt ist noch nicht übersetzt. Hilf mit, ihn zu übersetzen!
-
Once the circuit board has been removed the rubber keypad will be visible. If it has not fallen out on its own it can simply be peeled out. It is lightly attached like a sticker on the top three tabs. The left most table is labeled “B”, the center tab is blank, and the right tab is labeled “N”.
-


Team

UMass Dartmouth, Team 2-1, Gulbrandsen Fall 2013 Mitglied von UMass Dartmouth, Team 2-1, Gulbrandsen Fall 2013
UMASSD-GULBRANDSEN-F13S2G1
4 Mitglieder
10 Anleitungen geschrieben