Zum Hauptinhalt wechseln

LG Optimus L9 P769 Rear Facing Camera Replacement

Was du brauchst

  1. LG Optimus L9 P769 Rear Facing Camera Replacement, Removing the Back Panel: Schritt 1, Bild 1 von 2 LG Optimus L9 P769 Rear Facing Camera Replacement, Removing the Back Panel: Schritt 1, Bild 2 von 2
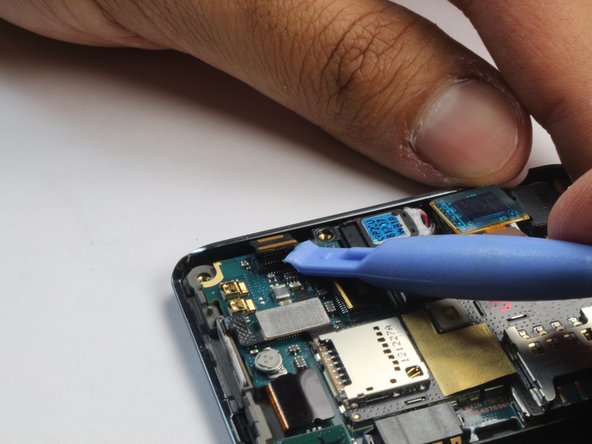
    • Pry the back panel from the frame of the phone to reveal the motherboard.

  2. LG Optimus L9 P769 Rear Facing Camera Replacement, Unpluging the Motherboard: Schritt 2, Bild 1 von 3 LG Optimus L9 P769 Rear Facing Camera Replacement, Unpluging the Motherboard: Schritt 2, Bild 2 von 3 LG Optimus L9 P769 Rear Facing Camera Replacement, Unpluging the Motherboard: Schritt 2, Bild 3 von 3
    • Detach the connectors on the motherboard.

  3. LG Optimus L9 P769 Rear Facing Camera Replacement, Unpluging the Motherboard Cont.: Schritt 3, Bild 1 von 3 LG Optimus L9 P769 Rear Facing Camera Replacement, Unpluging the Motherboard Cont.: Schritt 3, Bild 2 von 3 LG Optimus L9 P769 Rear Facing Camera Replacement, Unpluging the Motherboard Cont.: Schritt 3, Bild 3 von 3
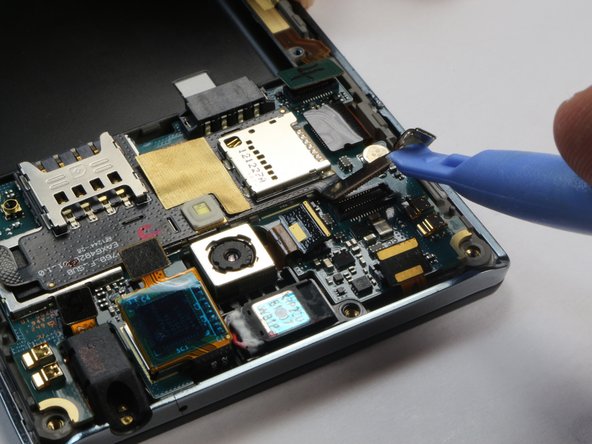
    • Continue to lift the connectors off the motherboard.

  4. LG Optimus L9 P769 Rear Facing Camera Replacement, Lifting Motherboard from the Phone: Schritt 4, Bild 1 von 3 LG Optimus L9 P769 Rear Facing Camera Replacement, Lifting Motherboard from the Phone: Schritt 4, Bild 2 von 3 LG Optimus L9 P769 Rear Facing Camera Replacement, Lifting Motherboard from the Phone: Schritt 4, Bild 3 von 3
    • Lift the speaker cable off the motherboard.

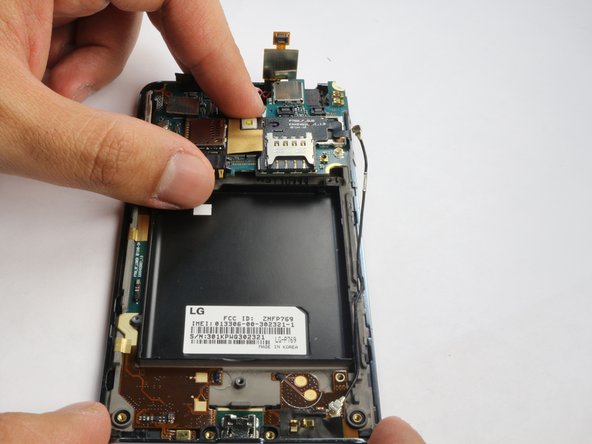
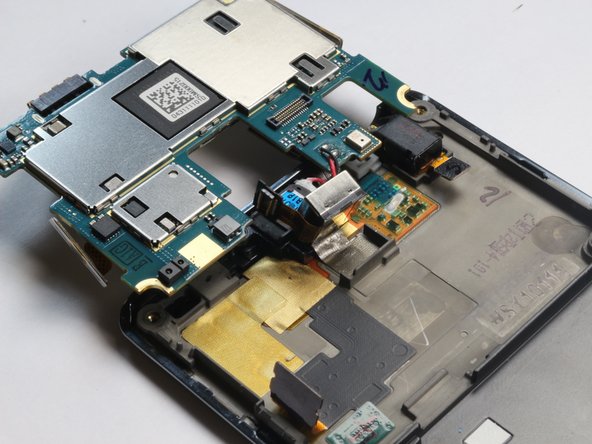
    • Lift the motherboard up. It will Still be connected to the frame.

  5. LG Optimus L9 P769 Rear Facing Camera Replacement, Pry and remove the camera: Schritt 5, Bild 1 von 3 LG Optimus L9 P769 Rear Facing Camera Replacement, Pry and remove the camera: Schritt 5, Bild 2 von 3 LG Optimus L9 P769 Rear Facing Camera Replacement, Pry and remove the camera: Schritt 5, Bild 3 von 3
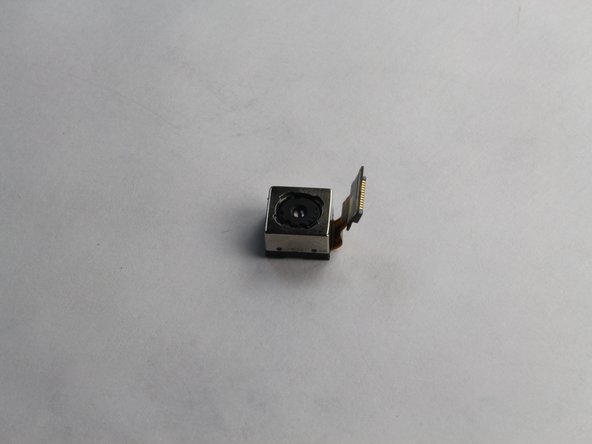
    • Pry under the camera to lift it off the frame.

    • There is some adhesive that will keep it attached to the frame, pulling the camera off will not damage the phone.

    • The camera should now be entirely separated from the phone.

Abschluss

To reassemble your device, follow these instructions in reverse order.

Ein:e weitere:r Nutzer:in hat diese Anleitung absolviert.

Paul

Mitglied seit: 10/07/14

145 Reputation

4 Anleitungen geschrieben

Team

USF Tampa, Team 8-1, Leahy Fall 2014 Mitglied von USF Tampa, Team 8-1, Leahy Fall 2014

USFT-LEAHY-F14S8G1

4 Mitglieder

5 Anleitungen geschrieben

0 Kommentare

Kommentar hinzufügen

Seitenaufrufe:

Letzte 24 Stunden: 0

Letzte 7 Tage: 4

Letzte 30 Tage: 9

Insgesamt: 972