Diese Version enthält möglicherweise inkorrekte Änderungen. Wechsle zur letzten geprüften Version.
Was du brauchst
-
Dieser Schritt ist noch nicht übersetzt. Hilf mit, ihn zu übersetzen!
-
Locate the dark gray tab on the back of the phone towards the top. Push the tab towards the top of the phone to release the battery.
-
-
Dieser Schritt ist noch nicht übersetzt. Hilf mit, ihn zu übersetzen!
-
Pull out the two rubber cushions located on the top of the phone using tweezers.
-
-
-
Dieser Schritt ist noch nicht übersetzt. Hilf mit, ihn zu übersetzen!
-
Unscrew the six screws seen on the back using a Phillips 00 Screwdriver.
-
Remove screws and carefully place on an uncluttered surface or in a small container.
-
-
Dieser Schritt ist noch nicht übersetzt. Hilf mit, ihn zu übersetzen!
-
Carefully remove the back of the phone gently using your fingernails or tweezers.
-
-
Dieser Schritt ist noch nicht übersetzt. Hilf mit, ihn zu übersetzen!
-
Carefully peel off the adhesive tab as shown in the photo
-
-
Dieser Schritt ist noch nicht übersetzt. Hilf mit, ihn zu übersetzen!
-
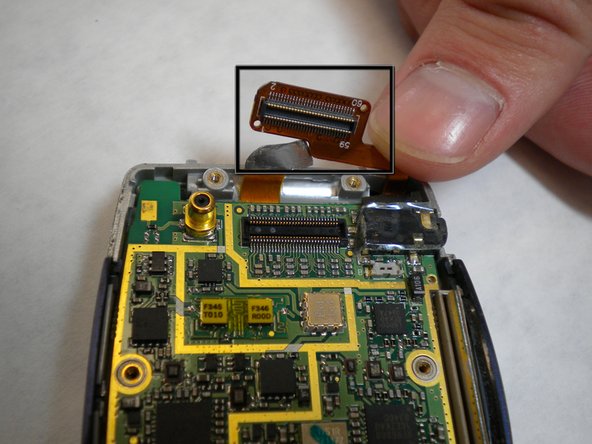
Locate the yellow connection towards the top of the phone. This is directly connected to the screen.
-
Remove the connector by carefully prying it away from the motherboard and lifting it away from the phone
-
-
Dieser Schritt ist noch nicht übersetzt. Hilf mit, ihn zu übersetzen!
-
Gently lift a corner of the motherboard away from the casing to remove.
-


Team

Cal Poly, Team 4-11, Forte Winter 2010 Mitglied von Cal Poly, Team 4-11, Forte Winter 2010
CPSU-FORTE-W10S4G11
5 Mitglieder
11 Anleitungen geschrieben