Einleitung
Without a functioning fuse, a Lasko CD08200 space heater will not be able to operate safely because it will have no safety mechanism to stop the current flow and prevent overpowering the device.
Please refer to this Troubleshooting guide before beginning to make sure replacing the fuse is the correct action to fix your device.
This guide will require soldering if you are not experienced in soldering. lease refer to this soldering guide.
For this replacement guide, you will need: a TR15 screwdriver, a PH2 screwdriver, and a soldering kit. A precision bit driver could also be used with the following bits:
- Torx Security 15 (TR15 bit)
- Phillips 2 (PH2 bit)
Warning: Repairing space heaters can be dangerous. Exercise extreme caution when following this guide.
Was du brauchst
-
-
Turn over the device and place it on its head.
-
Remove the four 14mm screws holding the bottom using a TR15 screwdriver.
-
-
-
Remove both 14mm screws from the power cord casing using a Phillips #2 screwdriver.
-
Remove the power cord casing from the device case.
-
-
-
Cut the sticker on the right side of the device using a Jimmy.
-
Unscrew the four 14mm screws with a Phillips #2 bit on the back of the device.
-
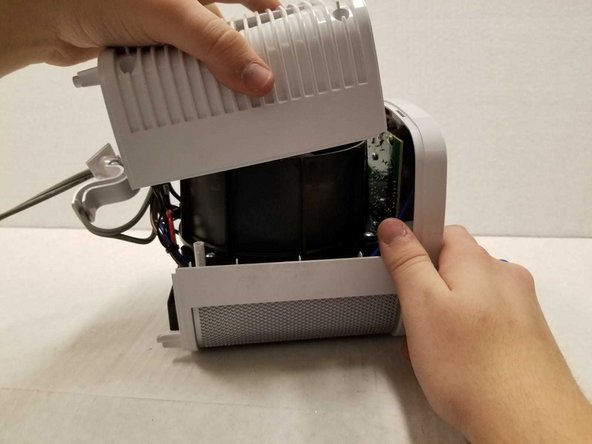
Remove the back casing from the device.
-
-
-
-
Remove the four 14mm screws housing the fan using the Phillips #2 screwdriver.
-
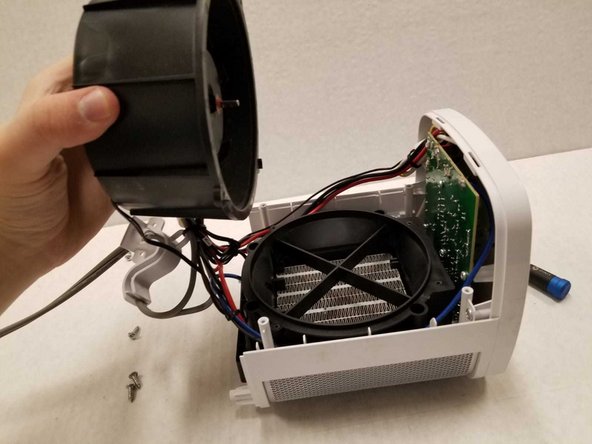
Remove the top of the fan housing with the fan attached and place it on the table.
-
-
-
Remove the four 14mm screws housing the fan base using the Phillips #2 screwdriver.
-
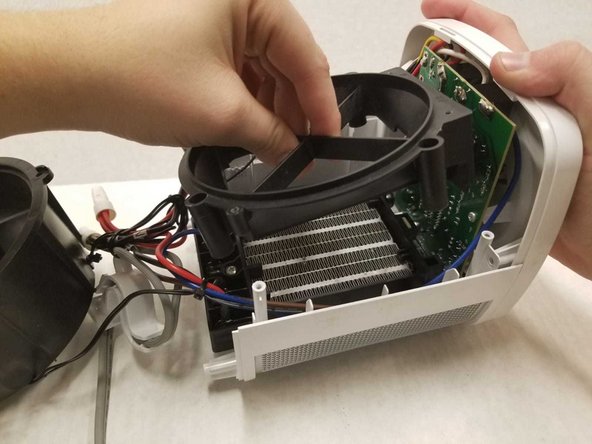
Remove the fan base from the device.
-
-
-
Remove the four 14mm screws housing the top panel using the Phillips #2 screwdriver.
-
Remove the top panel from the device.
-
-
-
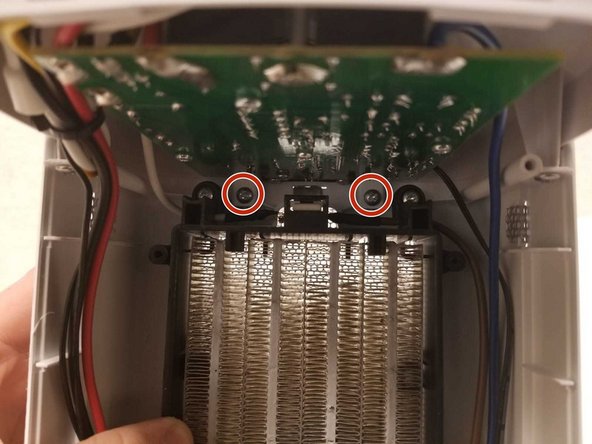
Remove the four 14mm screws housing the motherboard to the top panel using the Phillips #2 screwdriver.
-
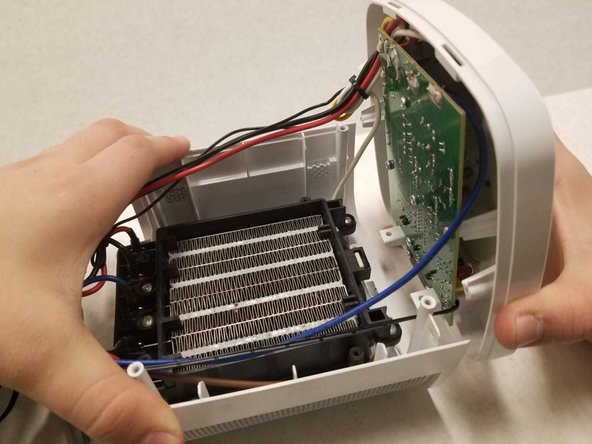
Remove the motherboard from the top panel.
-
-
-
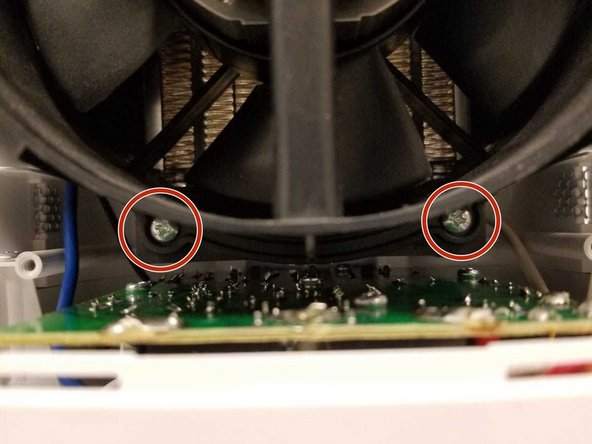
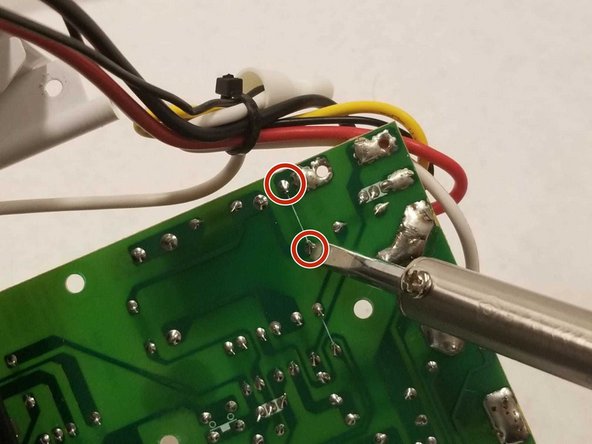
Solder the two points on the back of the motherboard to release the fuse on the front.
-
Remove the fuse from the motherboard.
-


To reassemble your device, follow these instructions in reverse order.
To reassemble your device, follow these instructions in reverse order.
Rückgängig: Ich habe diese Anleitung nicht absolviert.
Ein:e weitere:r Nutzer:in hat diese Anleitung absolviert.

Team

York University, Team S1-G1, Woodhouse Winter 2020 Mitglied von York University, Team S1-G1, Woodhouse Winter 2020
YORK-WOODHOUSE-W20S1G1
3 Mitglieder
9 Anleitungen geschrieben
3 Kommentare
This is a very clearly written and beautifully photographed repair description. Thank you!
The only other information I need is a detailed description of the fuse so I can have a replacement ready to install when I begin the repair. Would you be willing to provide this information?
Thanks very much!
Salutations!
I'm afraid that neither I or my colleagues have no information on the fuse replaced on this guide. Perhaps an electrician with a careful eye may be able to help determine which fuse is required for this guide.
Best of luck on repairing your Lasko!
Thanks for your response and for your good wishes!