Zum Hauptinhalt wechseln

Lenovo Flex 3-1120 Motherboard Replacement

Was du brauchst

  1. Lenovo Flex 3-1120 Motherboard Replacement, Bottom Panel: Schritt 1, Bild 1 von 1
    • Lay the computer down with the bottom panel facing up.

  2. Lenovo Flex 3-1120 Motherboard Replacement: Schritt 2, Bild 1 von 2 Lenovo Flex 3-1120 Motherboard Replacement: Schritt 2, Bild 2 von 2
    • Locate the ten 6mm Phillips screws along the edges and in the center of the back panel.

    • Remove all ten 6mm Phillips screws with a size 0 Phillips screwdriver.

  3. Lenovo Flex 3-1120 Motherboard Replacement: Schritt 3, Bild 1 von 1
    • Wedge the plastic opening tool into the small space under the back panel.

    • Use the plastic opening tool as a lever to separate the bottom panel from the computer.

    • Slide the tool along the edges of the computer until the bottom panel is completely separated.

    • You may start prying the bottom panel on any edge.

  4. Lenovo Flex 3-1120 Motherboard Replacement: Schritt 4, Bild 1 von 1
    • Lift the bottom panel off of the computer.

  5. Lenovo Flex 3-1120 Motherboard Replacement, Battery: Schritt 5, Bild 1 von 1
    • Locate the black battery on the bottom right of the computer.

  6. Lenovo Flex 3-1120 Motherboard Replacement: Schritt 6, Bild 1 von 2 Lenovo Flex 3-1120 Motherboard Replacement: Schritt 6, Bild 2 von 2
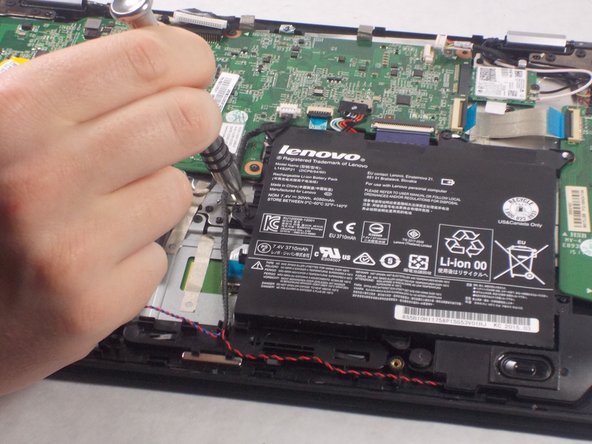
    • Locate the six 3.5mm Phillips head screws along the edges of the battery.

    • Remove all six of the screws using a size 0 Phillips screwdriver.

  7. Lenovo Flex 3-1120 Motherboard Replacement: Schritt 7, Bild 1 von 2 Lenovo Flex 3-1120 Motherboard Replacement: Schritt 7, Bild 2 von 2
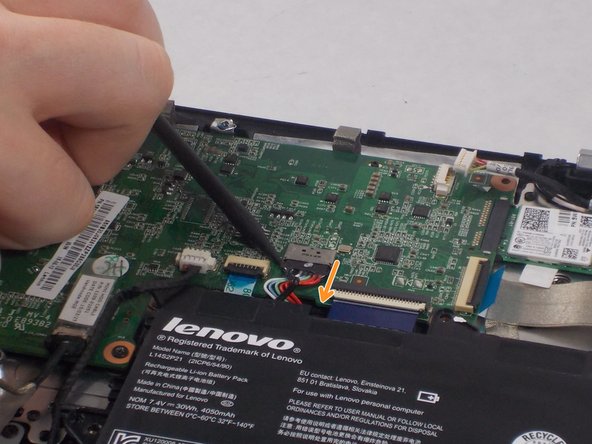
    • Locate the multicolored power cables coming directly from the top of the battery and into the motherboard.

    • Use a spudger to slide the power cables down and away from its port on the motherboard.

  8. Lenovo Flex 3-1120 Motherboard Replacement: Schritt 8, Bild 1 von 1
    • Lift the battery out from the computer.

  9. Lenovo Flex 3-1120 Motherboard Replacement, Hard Drive: Schritt 9, Bild 1 von 1
    • Locate the hard drive in the bottom left of your computer.

  10. Lenovo Flex 3-1120 Motherboard Replacement: Schritt 10, Bild 1 von 2 Lenovo Flex 3-1120 Motherboard Replacement: Schritt 10, Bild 2 von 2
    • Locate the three 3.5mm Phillips screws on the corners of the hard drive.

    • Remove the three screws with a size 0 Phillips screwdriver.

  11. Lenovo Flex 3-1120 Motherboard Replacement: Schritt 11, Bild 1 von 1
    • Follow the wire out from the right side of the hard drive to locate where the hard drive connects to the motherboard.

  12. Lenovo Flex 3-1120 Motherboard Replacement: Schritt 12, Bild 1 von 1
    • Lift off the strip of tape securing the wire down to the computer.

  13. Lenovo Flex 3-1120 Motherboard Replacement: Schritt 13, Bild 1 von 1
    • Pull the connector out of its port on the motherboard.

  14. Lenovo Flex 3-1120 Motherboard Replacement: Schritt 14, Bild 1 von 1
    • Lift the hard drive out from the computer.

  15. Lenovo Flex 3-1120 Motherboard Replacement, Motherboard: Schritt 15, Bild 1 von 2 Lenovo Flex 3-1120 Motherboard Replacement, Motherboard: Schritt 15, Bild 2 von 2
    • Locate the power input cable on the top right corner of the motherboard.

    • Remove the power input cable by gently sliding each side of the cable out of its port. Alternate between the left and right sides of the cable until it disconnects.

  16. Lenovo Flex 3-1120 Motherboard Replacement: Schritt 16, Bild 1 von 3 Lenovo Flex 3-1120 Motherboard Replacement: Schritt 16, Bild 2 von 3 Lenovo Flex 3-1120 Motherboard Replacement: Schritt 16, Bild 3 von 3
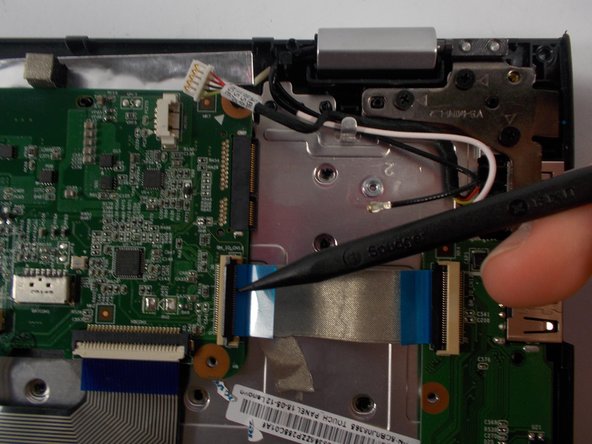
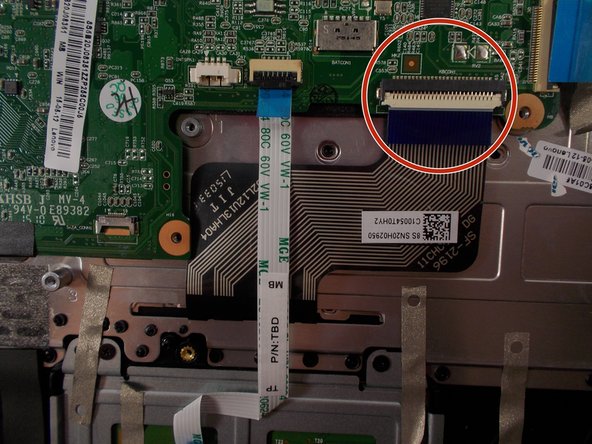
    • Locate the ribbon cable with a blue tab on it. The cable is connected to the right edge of the motherboard.

    • Lift up the black latch with the spudger.

    • Pull on the blue tab to the left to remove the cable.

  17. Lenovo Flex 3-1120 Motherboard Replacement: Schritt 17, Bild 1 von 3 Lenovo Flex 3-1120 Motherboard Replacement: Schritt 17, Bild 2 von 3 Lenovo Flex 3-1120 Motherboard Replacement: Schritt 17, Bild 3 von 3
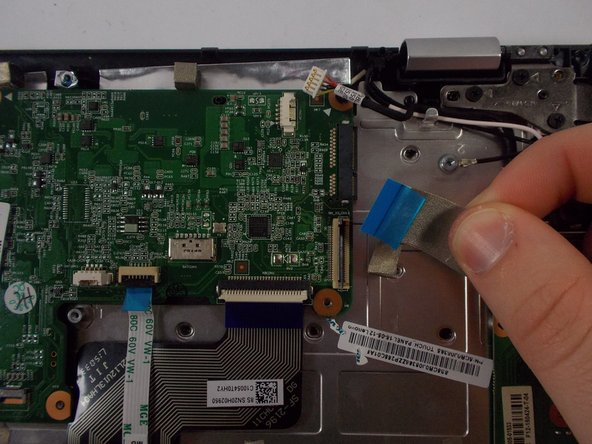
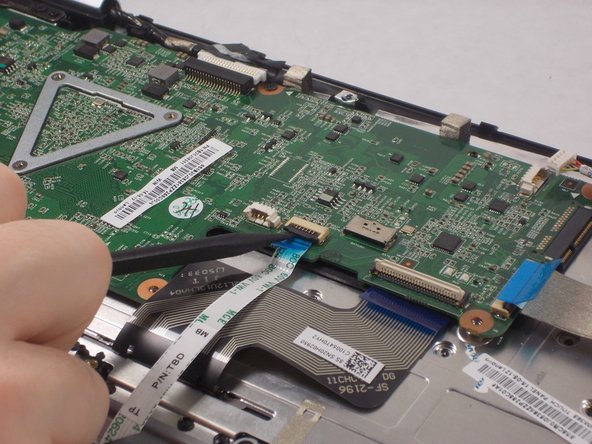
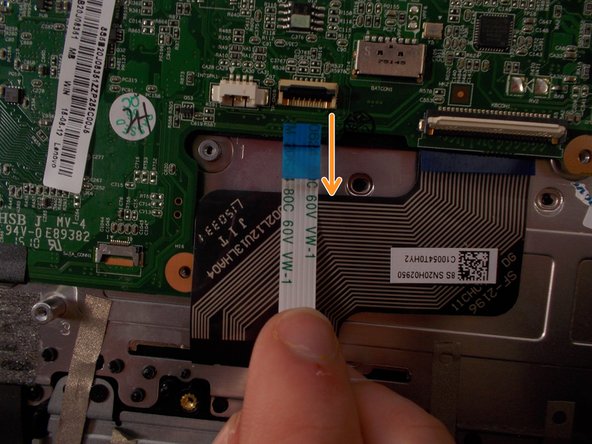
    • Locate the black ribbon cable on the bottom right of the motherboard.

    • Lift the white door on the end of the cable that connects to the motherboard.

    • Slide the cable down to disconnect it from the motherboard.

  18. Lenovo Flex 3-1120 Motherboard Replacement: Schritt 18, Bild 1 von 3 Lenovo Flex 3-1120 Motherboard Replacement: Schritt 18, Bild 2 von 3 Lenovo Flex 3-1120 Motherboard Replacement: Schritt 18, Bild 3 von 3
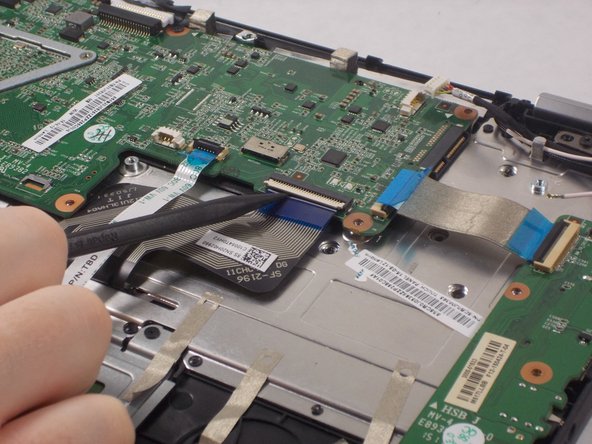
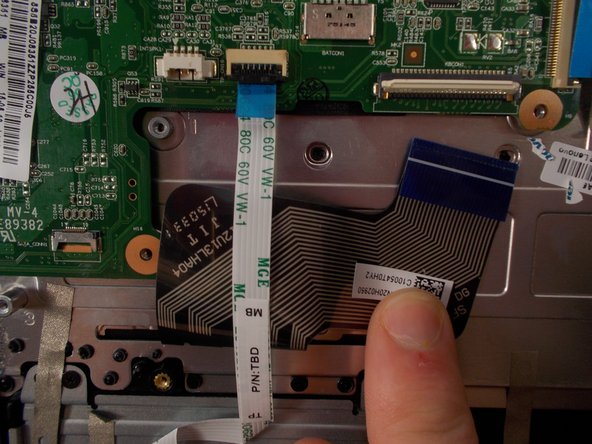
    • Locate the white ribbon cable with a blue tab to the left of the black ribbon cable.

    • Lift up the black latch holding the cable in to the motherboard.

    • Pull the cable out of its port on the motherboard.

  19. Lenovo Flex 3-1120 Motherboard Replacement: Schritt 19, Bild 1 von 2 Lenovo Flex 3-1120 Motherboard Replacement: Schritt 19, Bild 2 von 2
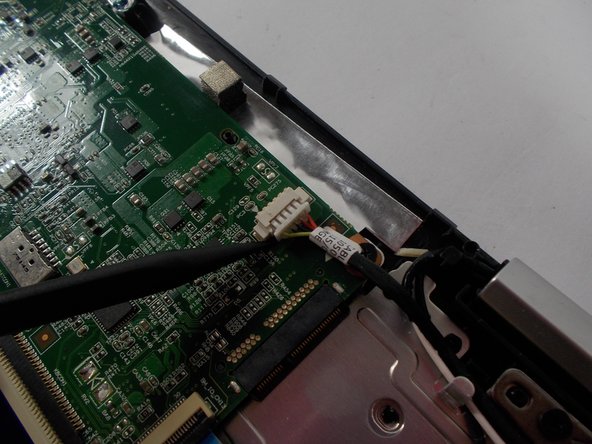
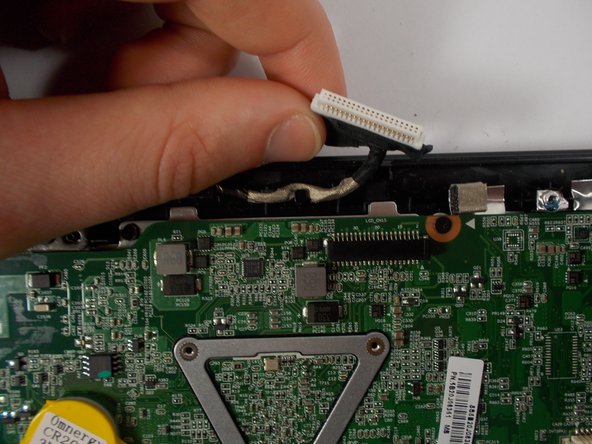
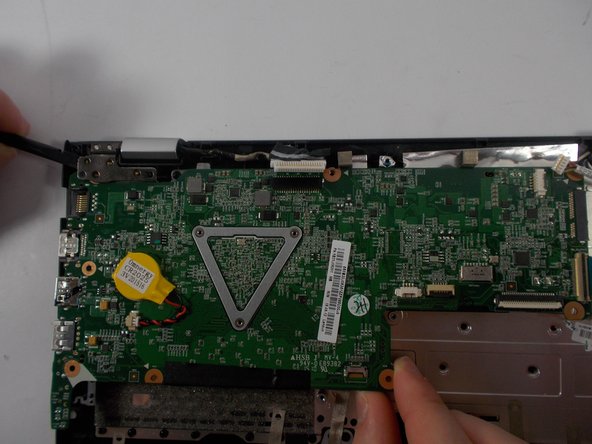
    • Locate the white connector on the top edge of the motherboard.

    • Simply pull the wire away from the motherboard by hand to disconnect it.

    • A spudger may also be used to remove the cable, but it is not necessary.

  20. Lenovo Flex 3-1120 Motherboard Replacement: Schritt 20, Bild 1 von 2 Lenovo Flex 3-1120 Motherboard Replacement: Schritt 20, Bild 2 von 2
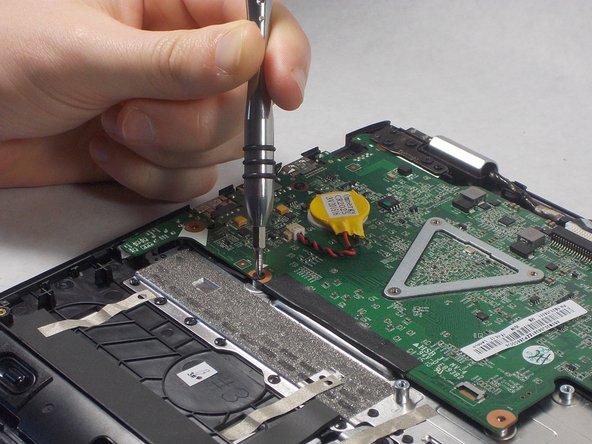
    • Locate the three 4.5mm screws that are securing the bracket in the top left corner of the motherboard.

    • Locate the four 3.5mm screws holding the motherboard in place.

    • Remove all of the screws with a size 0 Phillips screwdriver.

  21. Lenovo Flex 3-1120 Motherboard Replacement: Schritt 21, Bild 1 von 2 Lenovo Flex 3-1120 Motherboard Replacement: Schritt 21, Bild 2 von 2
    • Locate the metal bracket attaching the motherboard to the top-left of the computer.

    • Raise the metal bracket by prying it up and away from the motherboard.

    • Pull the motherboard away from the bracket to separate them.

    • These steps may need to be performed simultaneously in order to remove the motherboard from the bracket. The parts can easily stay stuck.

    • Do not pull the motherboard with too much force. The motherboard could be broken if handled too poorly.

  22. Lenovo Flex 3-1120 Motherboard Replacement: Schritt 22, Bild 1 von 1
    • Lift the motherboard out from the computer.

Abschluss

To reassemble your device, follow these instructions in reverse order.

3 weitere Nutzer:innen haben diese Anleitung absolviert.

patrick drew

Mitglied seit: 03/09/16

219 Reputation

2 Anleitungen geschrieben

Team

UMass Dartmouth, Team 7-1, Catania Spring 2016 Mitglied von UMass Dartmouth, Team 7-1, Catania Spring 2016

UMASSD-CATANIA-S16S7G1

4 Mitglieder

7 Anleitungen geschrieben

Ein Kommentar

One important thing that is not noted is to remove the NIC before removing the MOBO. The NIC is attached to the Top Plate with a single screw and needs to be removed before attempting to remove the MOBO.

John Ivanoff - Antwort

Kommentar hinzufügen

Seitenaufrufe:

Letzte 24 Stunden: 1

Letzte 7 Tage: 2

Letzte 30 Tage: 8

Insgesamt: 2,934