Einleitung
This guide will show you how to unscrew and remove the power board button from your laptop.
Was du brauchst
-
-
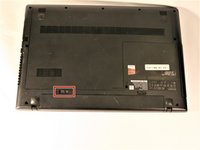
Place the laptop on a flat surface with the back cover facing up and the hinges facing you.
-
-
-
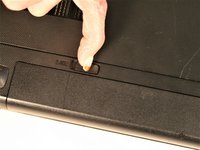
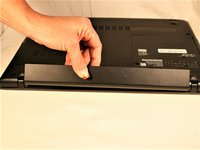
Move the left tab to the left to release the battery.
-
You will hear an audible 'click' and see the battery separate from the rest of the laptop.
-
-
-
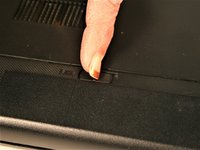
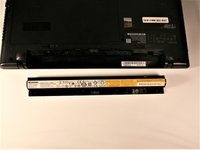
Hold the battery at the top seam between it and the laptop.
-
Roll the battery towards yourself.
-
Lift the battery out of the laptop.
-
-
-
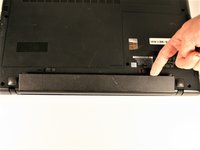
Remove the three screws securing the outer cover of the laptop using a Phillips #0 screwdriver.
-
-
-
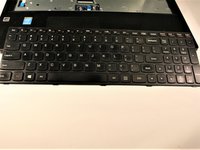
Locate the 3 screws on the bottom securing the keyboard in place.
-
One Screw will be located under a Lenovo security sticker. Break sticker to gain access to screw.
-
-
-
In diesem Schritt verwendetes Werkzeug:Tweezers$4.99
-
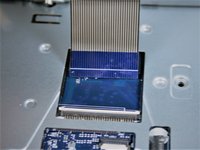
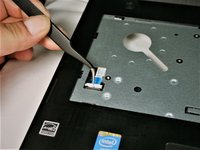
Using tweezers, lift up clip to remove keyboard ribbon cable.
-
-
-
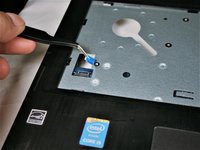
Keyboard ribbon cable removed
-
Once ribbon is removed, keyboard can be lifted out
-
-
In diesem Schritt verwendetes Werkzeug:Tweezers$4.99
-
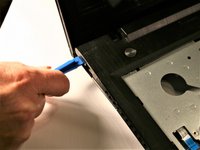
remove power cable with tweezers by gently pullying
-
-
-
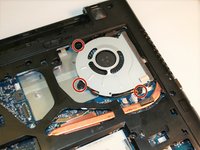
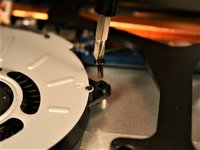
Locate the 3 screws holding fan in place
-
Remove 3 screws
-
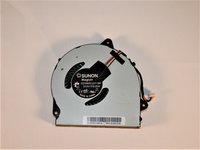
fan should lift out of place
-
-
-
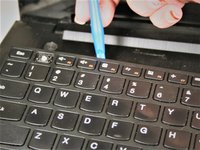
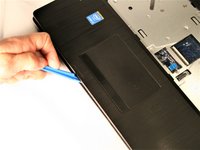
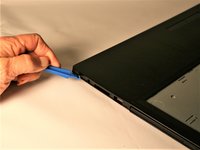
Once screws are removed, begin by gently prying up in one corner using a spudge
-
Continue to center and then around to opposite side.
-
once all sides have been pried open, lift top half off
-
-
-
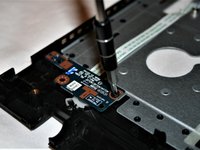
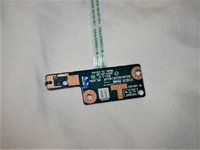
At this point in disassembly, there will be one #00x5.5 mm screw securing the power button board in place.
-
Take your screwdriver and remove the screw.
-
-
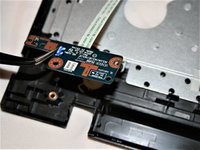
In diesem Schritt verwendetes Werkzeug:Tweezers$4.99
-
Take your tweezers and grip the power button board.
-
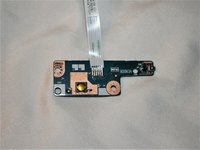
Using tweezers, lift power button board up and out. The cable wire for the power button board should be disconnected at this point and the piece should lift out without any extra work needed.
-


To reassemble your device, follow these instructions in reverse order.
To reassemble your device, follow these instructions in reverse order.
Rückgängig: Ich habe diese Anleitung nicht absolviert.
2 weitere Personen haben diese Anleitung absolviert.
Team

UMass Dartmouth, Team S1-G6, Simcock Fall 2017 Mitglied von UMass Dartmouth, Team S1-G6, Simcock Fall 2017
UMASSD-SIMCOCK-F17S1G6
4 Mitglieder
10 Anleitungen geschrieben