Einleitung
Is the display to your Lenovo IdeaPad Flex 5 14ARE05 giving you problems? In this guide, you will find a step-by-step guide on how to replace it. The display allows you to interact with your laptop. When it malfunctions you may have problems with a flashing screen, or an unstable picture preventing you from using your laptop effectively. Before starting this guide make sure to power down the laptop and disconnect it from any power sources.
Was du brauchst
-
-
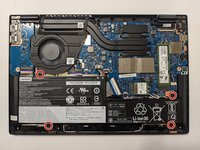
Remove the five 8 mm screws using a T5 Torx Screwdriver.
-
Remove the four 5 mm screws using a T5 Torx Screwdriver.
-
-
-
Use a small suction cup to pull open the back case at the two hinge cutouts.
-
Gently, use the plastic opening tool around the edges of the laptop to pry up the rest of the back panel.
-
-
-
-
Remove the four 5 mm Phillips #00 screws that secure the battery in place.
-
-
-
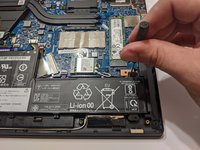
Rotate the device 90 degrees.
-
Gently lift up on the battery and use a spudger to disconnect the battery connector.
-
-
-
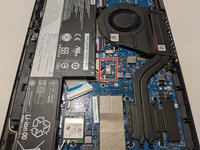
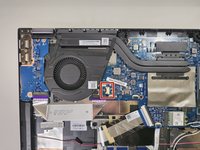
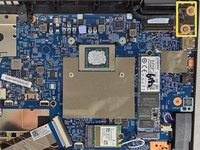
Remove the four 2 mm screws using a JIS #1 screwdriver.
-
Remove the three 5 mm screws using a JIS #1 screwdriver.
-
-
-
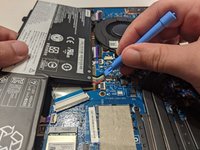
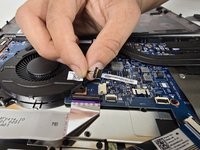
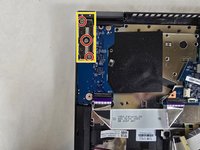
Unplug the wire at the bottom right of the fan.
-
Carefully lift the fan from its place.
-
-
-
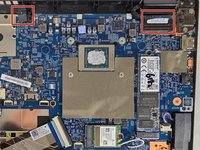
Remove the three 2 mm screws from the left hinge using a Phillips #2 screwdriver.
-
Remove the two 2 mm screws from the right hinge using a Phillips #2 screwdriver.
-
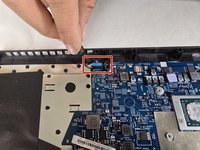
Bend the metal brackets, lift the hinges off the frame, and remove the display.
-


To reassemble your device, follow these instructions in reverse order.
To reassemble your device, follow these instructions in reverse order.

Team

UMass Dartmouth, Team 1-6, Konn Fall 2024 Mitglied von UMass Dartmouth, Team 1-6, Konn Fall 2024
UMASSD-KONN-F24S1G6
4 Mitglieder
5 Anleitungen geschrieben