Was du brauchst
-
-
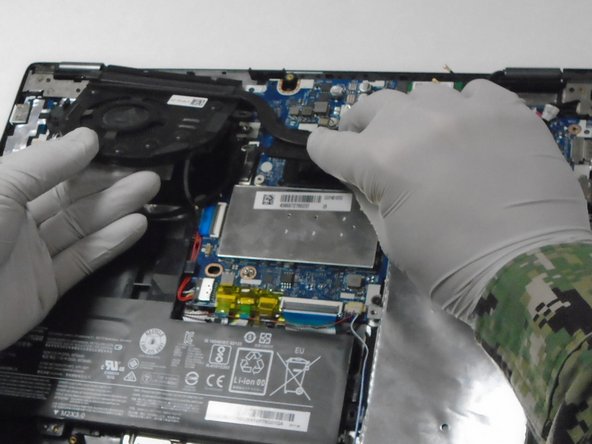
Use a Phillips #00 screwdriver to remove the three screws securing the fan.
-
Lift the fan up and out.
-
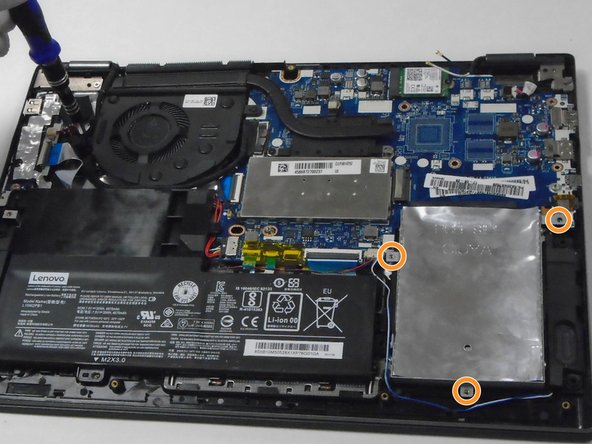
Use a Phillips #00 screwdriver to remove the three screws securing the hard drive.
-
Lift the hard drive up and out.
-
-
-
-
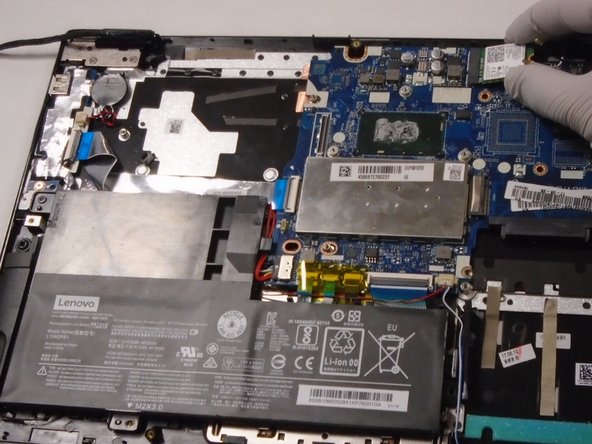
Use a Phillips #00 screwdriver to remove the single screw securing the Wi-Fi card.
-
Pull the Wi-Fi card directly out of its port.
-
-
-
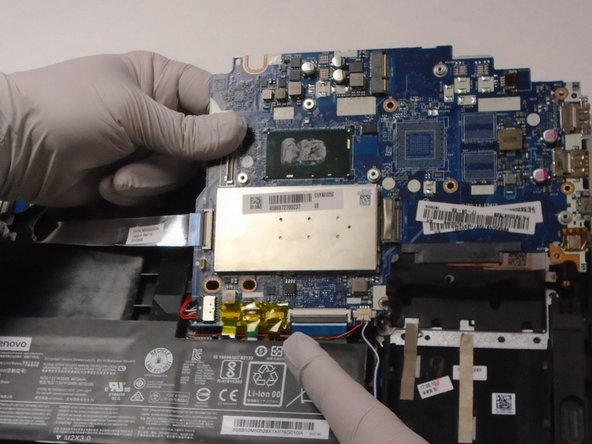
Use a Phillips #00 screwdriver to remove the three screws securing the motherboard.
-
Gently disconnect the cables and ribbon cables connected to the motherboard.
-
-
-
Use a Phillips #00 screwdriver to remove the four 5 mm screws from the left and right hinges (two screws on each hinge).
-
-
-
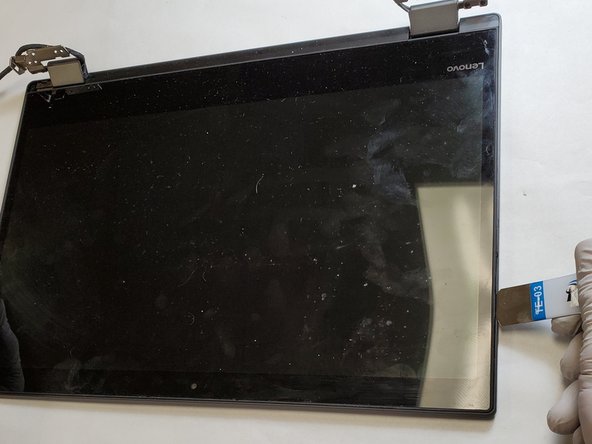
Disconnect the display assembly from the rest of the device by separating the hinges of the display from the body of the laptop.
-
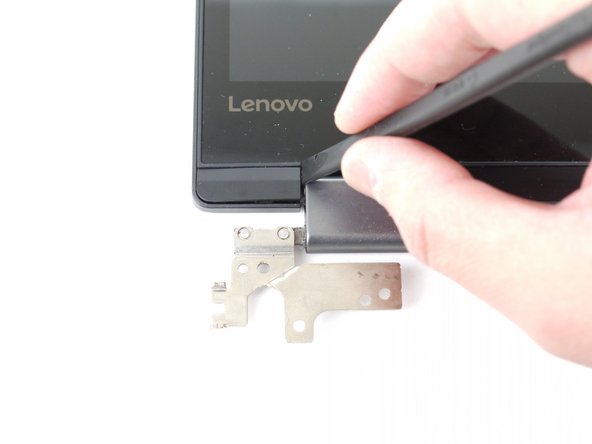
Use a spudger to carefully pry loose the two screw covers (one on each hinge).
-
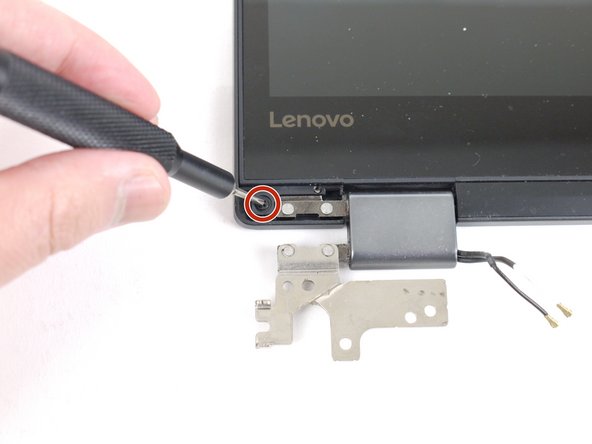
Use a Phillips #00 screwdriver to remove the two 3 mm screws from the display (one on each side).
-
-
-
Use a heat gun or an iOpener to lightly heat the outer edges of the display, loosening the adhesive strips.
-
Wedge a Jimmy or opening picks between the display and display housing, then carefully pry around the entire perimeter until the display separates from the housing.
-


To reassemble your device, follow these instructions in reverse order.
To reassemble your device, follow these instructions in reverse order.
Rückgängig: Ich habe diese Anleitung nicht absolviert.
Ein:e weitere:r Nutzer:in hat diese Anleitung absolviert.

Team

The Citadel Military College of South Carolina, Team 1-5, Eggleston Spring 2022 Mitglied von The Citadel Military College of South Carolina, Team 1-5, Eggleston Spring 2022
CMCSC-EGGLESTON-S22S1G5
3 Mitglieder
3 Anleitungen geschrieben