Einleitung
Also known as the daughter card, piggyback card, or mezzanine board, the daughterboard is an extension of the motherboard. The daughterboard is typically connected to the motherboard via a series of cables. Similar to the motherboard, the daughterboard has pins, plugs, sockets, and connectors to be attached to other boards.
Particularly for this device, the daughterboard houses the USB port. If you find that your USB devices are not being recognized by the laptop, it may be time to replace the daughterboard of the device. Follow these instructions to remove and replace the daughterboard of your Lenovo IdeaPad Flex 5-1570 laptop.
Was du brauchst
-
-
Remove the ten 5 mm Phillips #00 screws that are holding the back panel on.
-
-
-
Use a spudger to pry open the back case at the two hinge cutouts.
-
Gently use the plastic opening tool around the edges of the laptop to pry up the clips holding the rest of the back panel.
-
-
-
Remove the two 5 mm Phillips #00 screws that secure the battery in place.
-
-
-
-
Using your fingers, grasp the entire bundle of wires to pull the battery cable from its connector. This will cut off power to the motherboard.
-
Remove the battery from the device.
-
-
-
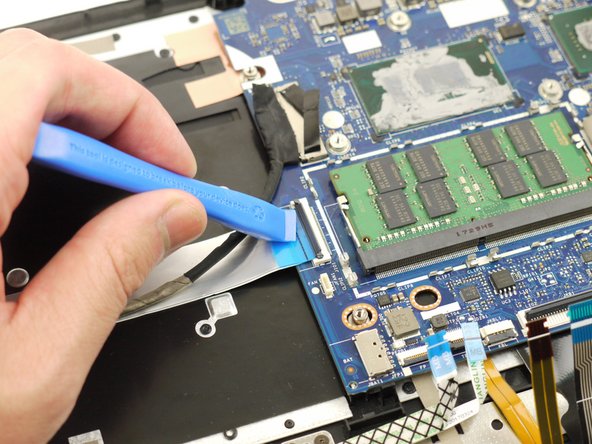
Using the plastic opening tool, unlock the connector for the side ports panel and disconnect the cable from the motherboard.
-
-
-
Using the plastic opening tool, disconnect the CMOS battery from the daughterboard by pushing it out towards the direction of the CMOS battery.
-
-
-
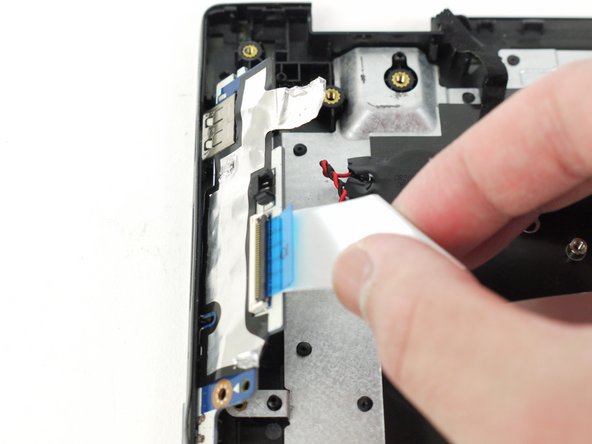
Using the iFixit Opening tool, remove the silver piece of tape from the device.
-


To reassemble your device, follow these instructions in reverse order.
Take your e-waste to an R2 or e-Stewards certified recycler.
To reassemble your device, follow these instructions in reverse order.
Take your e-waste to an R2 or e-Stewards certified recycler.

