Zum Hauptinhalt wechseln

Lenovo Ideapad 110S-11IBR USB & Headphone Jack PCB Board Replacement

Was du brauchst

  1. Lenovo Ideapad 110S-11IBR USB & Headphone Jack PCB Board Replacement, Battery: Schritt 1, Bild 1 von 1
    • Ensure that your device is completely OFF before performing this procedure.

    • Unscrew the eleven 4 mm Phillips #0 screws on the bottom of the device.

  2. Lenovo Ideapad 110S-11IBR USB & Headphone Jack PCB Board Replacement: Schritt 2, Bild 1 von 2 Lenovo Ideapad 110S-11IBR USB & Headphone Jack PCB Board Replacement: Schritt 2, Bild 2 von 2
    • Separate the back lid from the laptop using a plastic opening tool.

    • Lift the back lid off of the device.

  3. Lenovo Ideapad 110S-11IBR USB & Headphone Jack PCB Board Replacement: Schritt 3, Bild 1 von 2 Lenovo Ideapad 110S-11IBR USB & Headphone Jack PCB Board Replacement: Schritt 3, Bild 2 von 2
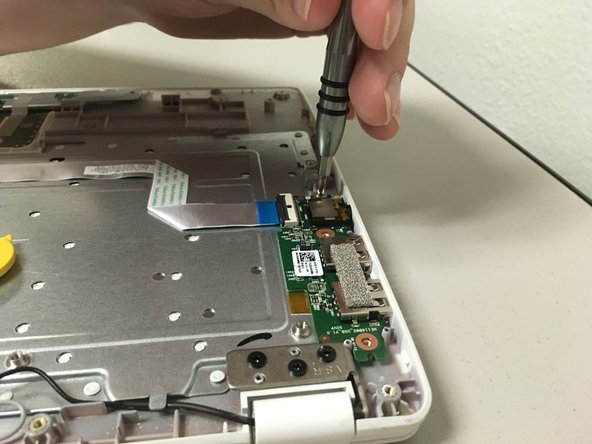
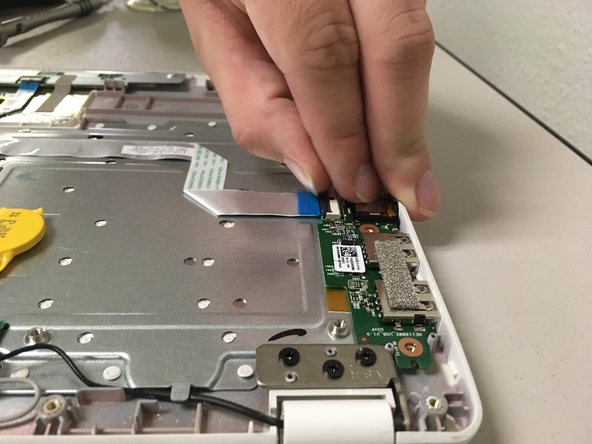
    • Remove the battery connector from its socket by pulling the cable away from the hinge using your fingers or a plastic opening tool.

    • Do not pull on the socket itself or you risk damaging the motherboard.

    • Remove the two pieces of tape that are holding the battery down.

  4. Lenovo Ideapad 110S-11IBR USB & Headphone Jack PCB Board Replacement: Schritt 4, Bild 1 von 1
    • Remove the five 4 mm Phillips screws securing the battery.

  5. Lenovo Ideapad 110S-11IBR USB & Headphone Jack PCB Board Replacement: Schritt 5, Bild 1 von 2 Lenovo Ideapad 110S-11IBR USB & Headphone Jack PCB Board Replacement: Schritt 5, Bild 2 von 2
    • Lift the battery up and out of the device.

  6. Lenovo Ideapad 110S-11IBR USB & Headphone Jack PCB Board Replacement, USB & Headphone Jack PCB Board: Schritt 6, Bild 1 von 2 Lenovo Ideapad 110S-11IBR USB & Headphone Jack PCB Board Replacement, USB & Headphone Jack PCB Board: Schritt 6, Bild 2 von 2
    • Unscrew the three 4 mm Phillips screws.

  7. Lenovo Ideapad 110S-11IBR USB & Headphone Jack PCB Board Replacement: Schritt 7, Bild 1 von 2 Lenovo Ideapad 110S-11IBR USB & Headphone Jack PCB Board Replacement: Schritt 7, Bild 2 von 2
    • Unlatch and remove the ribbon cable.

    • Ribbon cables can be fragile, so avoid excessively bending it.

  8. Lenovo Ideapad 110S-11IBR USB & Headphone Jack PCB Board Replacement: Schritt 8, Bild 1 von 1
    • Remove the card from the laptop.

Abschluss

To reassemble your device, follow these instructions in reverse order.

Ein:e weitere:r Nutzer:in hat diese Anleitung absolviert.

0 Kommentare

Kommentar hinzufügen

Seitenaufrufe:

Letzte 24 Stunden: 0

Letzte 7 Tage: 0

Letzte 30 Tage: 8

Insgesamt: 1,661