Diese Version enthält möglicherweise inkorrekte Änderungen. Wechsle zur letzten geprüften Version.
Was du brauchst
-
Dieser Schritt ist noch nicht übersetzt. Hilf mit, ihn zu übersetzen!
-
Begin by prying off the black cover surrounding the screen by wedging the the iFixit opening tool underneath it. Work your way down until you reach the hinge cover.
-
Insert iFixit opening tool in to the hinge cover as pictured and begin slowly prying it off.
-
Remove the black cover.
-
-
-
Dieser Schritt ist noch nicht übersetzt. Hilf mit, ihn zu übersetzen!
-
Using the Phillips #1 screwdriver, remove the four 3mm screws securing the screen, and put them on the magnetic mat so you will not misplace them.
-
Gently lift the screen out and place it facing down on the keyboard.
-
-
Dieser Schritt ist noch nicht übersetzt. Hilf mit, ihn zu übersetzen!
-
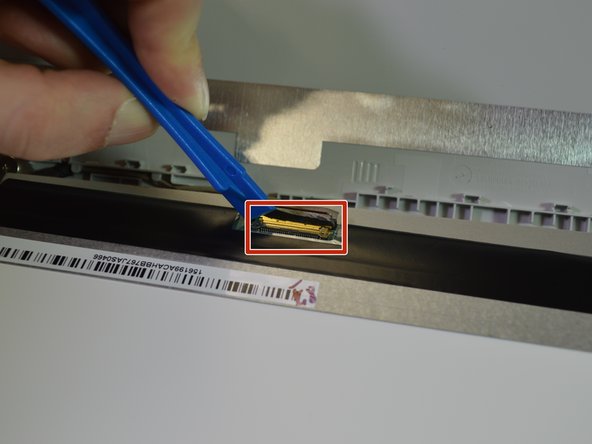
Carefully flip the hinge securing the connector up with the opening tool.
-
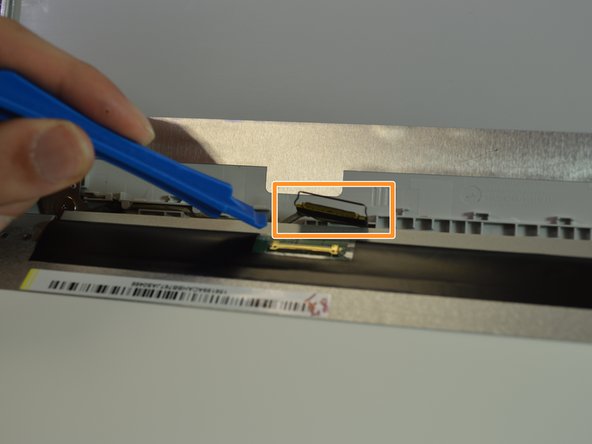
Slowly work the plug out of the connector.
-
Insert the plug from the replacement screen in to the connector. Make sure the connection is secure before flipping the hinge back down.
-


Rückgängig: Ich habe diese Anleitung nicht absolviert.
3 weitere Nutzer:innen haben diese Anleitung absolviert.
Team

Purdue University Northwest, Team S1-G5, Hingst Fall 2018 Mitglied von Purdue University Northwest, Team S1-G5, Hingst Fall 2018
PNW-HINGST-F18S1G5
4 Mitglieder
19 Anleitungen geschrieben