Zum Hauptinhalt wechseln

Lenovo Ideapad S415 Touch Hard Drive Replacement

Was du brauchst

  1. Lenovo Ideapad S415 Touch Hard Drive Replacement, Battery: Schritt 1, Bild 1 von 1
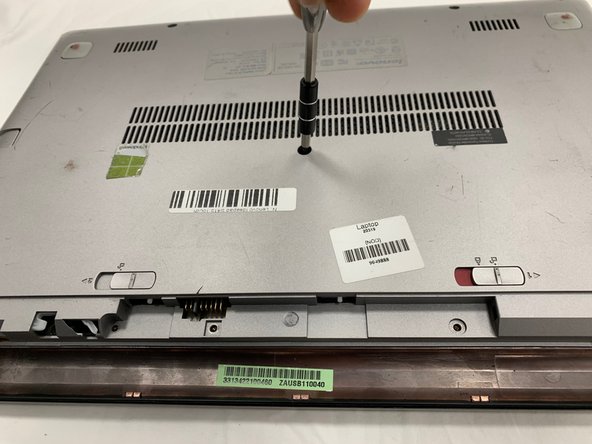
    • Flip laptop over bottom side up.

    • Locate the two battery release switches.

  2. Lenovo Ideapad S415 Touch Hard Drive Replacement: Schritt 2, Bild 1 von 1
    • Use your finger to push the battery release switch labeled "1." The red indicates that the switch is unlocked.

  3. Lenovo Ideapad S415 Touch Hard Drive Replacement: Schritt 3, Bild 1 von 1
    • Use your finger to push the battery switch labeled "2."

  4. Lenovo Ideapad S415 Touch Hard Drive Replacement: Schritt 4, Bild 1 von 1
    • Once both switches are unlocked, the battery will release.

  5. Lenovo Ideapad S415 Touch Hard Drive Replacement: Schritt 5, Bild 1 von 1
    • When replacing the battery make sure the two protruding holes line up with the slot.

    • Carefully remove the battery.

  6. Lenovo Ideapad S415 Touch Hard Drive Replacement, Hard Drive: Schritt 6, Bild 1 von 2 Lenovo Ideapad S415 Touch Hard Drive Replacement, Hard Drive: Schritt 6, Bild 2 von 2
    • Locate the five black screws on the back.

    • Use a Phillips #0 screwdriver to remove all five black 6 mm screws.

  7. Lenovo Ideapad S415 Touch Hard Drive Replacement: Schritt 7, Bild 1 von 2 Lenovo Ideapad S415 Touch Hard Drive Replacement: Schritt 7, Bild 2 von 2
    • Locate the three silver screws underneath the battery.

    • Use the Phillips #0 screwdriver to remove all three 4 mm screws.

  8. Lenovo Ideapad S415 Touch Hard Drive Replacement: Schritt 8, Bild 1 von 3 Lenovo Ideapad S415 Touch Hard Drive Replacement: Schritt 8, Bild 2 von 3 Lenovo Ideapad S415 Touch Hard Drive Replacement: Schritt 8, Bild 3 von 3
    • Locate the four rubber stoppers near each corner of the laptop.

    • Open up the stopper with your hands.

    • Use the Phillips #0 screwdriver to remove the 6 mm screws underneath all four stoppers.

  9. Lenovo Ideapad S415 Touch Hard Drive Replacement: Schritt 9, Bild 1 von 1
    • Open the laptop carefully.

  10. Lenovo Ideapad S415 Touch Hard Drive Replacement: Schritt 10, Bild 1 von 2 Lenovo Ideapad S415 Touch Hard Drive Replacement: Schritt 10, Bild 2 von 2
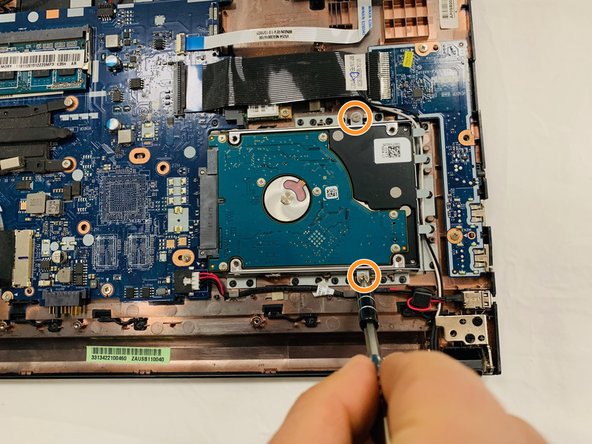
    • Locate the hard drive.

    • Use the Phillips #0 screwdriver to remove the two 4 mm screws that are holding the hard drive in place.

  11. Lenovo Ideapad S415 Touch Hard Drive Replacement: Schritt 11, Bild 1 von 1
    • The hard drive is now removed from the laptop.

  12. Lenovo Ideapad S415 Touch Hard Drive Replacement: Schritt 12, Bild 1 von 2 Lenovo Ideapad S415 Touch Hard Drive Replacement: Schritt 12, Bild 2 von 2
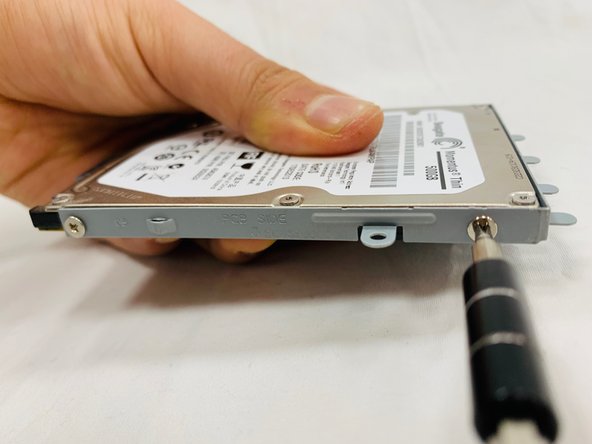
    • Once the hard drive is removed, locate the four screws that hold the metal frame to the hard drive.

    • Use the Phillips #0 screwdriver to remove the 4 mm silver screws on all sides.

Abschluss

To reassemble your device, follow these instructions in reverse order.

Casey Zhang

Mitglied seit: 02/06/19

315 Reputation

2 Anleitungen geschrieben

Team

UC Davis, Team S20-G5, Lore Winter 2019 Mitglied von UC Davis, Team S20-G5, Lore Winter 2019

UCD-LORE-W19S20G5

3 Mitglieder

4 Anleitungen geschrieben

0 Kommentare

Kommentar hinzufügen

Seitenaufrufe:

Letzte 24 Stunden: 1

Letzte 7 Tage: 4

Letzte 30 Tage: 11

Insgesamt: 469