Diese Anleitung enthält neuere Änderungen. Wechsel zur neuesten unüberprüften Version.
Was du brauchst
-
-
Gently insert a spudger into one of the bottom corners between the screen and body case.
-
Slide the spudger along the inside of the crack in order to pry the case open.
-
-
-
After removing the cover, remove the M1.6 x 2 mm screw from the battery cable with the JIS J000 screwdriver.
-
Remove the tape by gently scraping the edges up with the spudger.
-
-
-
Gently lift the flaps on the four ZIF connectors to disconnect the cables.
-
Use the plastic card to gently pry the battery from the device.
-
-
-
-
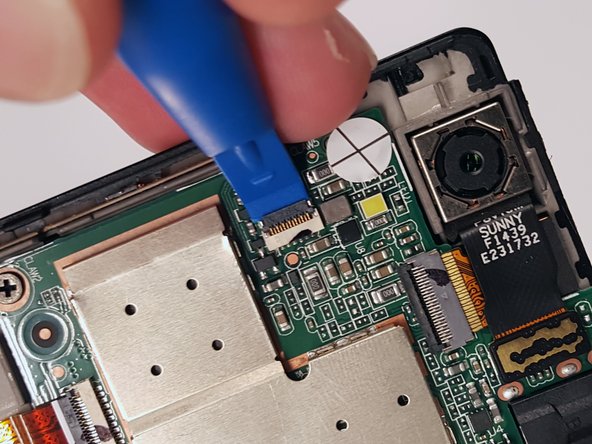
Remove the the ribbon cable located under the camera. Take a plastic opening tool and gently lift the black flap on the ribbon cable connection.
-
-
-
Remove the black ribbon cable located next to the camera by using the plastic opening tool to gently pry it up. It should pop up easily.
-
Remove the ribbon cable by flipping the small black bar up and sliding the ribbon cable out.
-
-
-
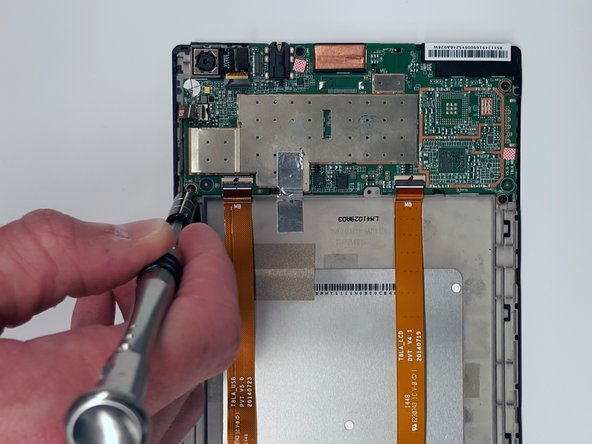
Remove each of the five M1.6 x 2mm screws to free the motherboard from the device.
-
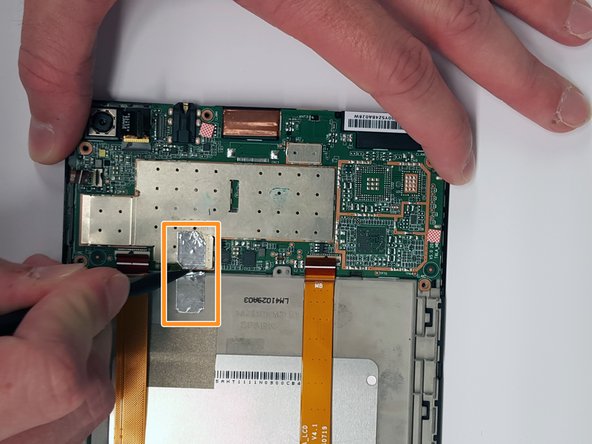
The piece of of silver tape will need to be cut or removed to remove the motherboard from the device frame.
-
-
-
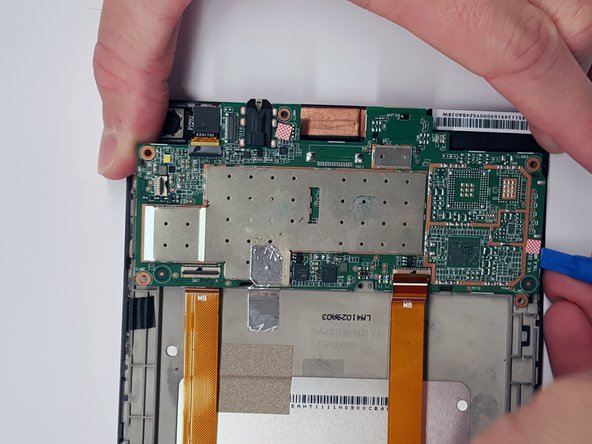
Use a plastic opening tool to gently pry the motherboard out of the frame from each side.
-


To reassemble your device, follow these instructions in reverse order.
To reassemble your device, follow these instructions in reverse order.
Rückgängig: Ich habe diese Anleitung nicht absolviert.
6 weitere Nutzer:innen haben diese Anleitung absolviert.
Team

USF Tampa, Team 3-6, Eyestone Fall 2015 Mitglied von USF Tampa, Team 3-6, Eyestone Fall 2015
USFT-EYESTONE-F15S3G6
3 Mitglieder
11 Anleitungen geschrieben