Diese Version enthält möglicherweise inkorrekte Änderungen. Wechsle zur letzten geprüften Version.
Was du brauchst
-
Dieser Schritt ist noch nicht übersetzt. Hilf mit, ihn zu übersetzen!
-
Remove the 8 screws that hold down the back panel using the Phillips #000 screwdriver.
-
-
Dieser Schritt ist noch nicht übersetzt. Hilf mit, ihn zu übersetzen!
-
Remove the two M2 x 3 mm, wafer-head, nylon-coated screws that hold down the hard drive assembly using the Phillips #0 screwdriver.
-
-
Dieser Schritt ist noch nicht übersetzt. Hilf mit, ihn zu übersetzen!
-
Pull the hard drive assembly out with backside up.
-
-
-
Dieser Schritt ist noch nicht übersetzt. Hilf mit, ihn zu übersetzen!
-
Remove the four M3 x 3 mm, flat-head, nylon-coated screws on the side of the hard drive assembly using the Phillips #0 screwdriver.
-
-
Dieser Schritt ist noch nicht übersetzt. Hilf mit, ihn zu übersetzen!
-
Gently, remove the plastic cover with the blue strips.
-
-
Dieser Schritt ist noch nicht übersetzt. Hilf mit, ihn zu übersetzen!
-
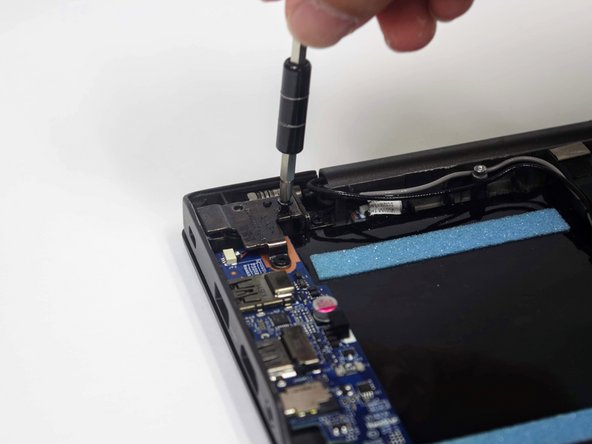
Remove the 3 screws holding down the T shaped cover using the Phillips head #1. Two of the screws are M2.5x 4 wafer head. The other is a M2x4MM.
-
-
Dieser Schritt ist noch nicht übersetzt. Hilf mit, ihn zu übersetzen!
-
Use the opening tool to lift up the T shaped cover.
-
Remove the M2x3MM wafer head screw.
-
-
Dieser Schritt ist noch nicht übersetzt. Hilf mit, ihn zu übersetzen!
-
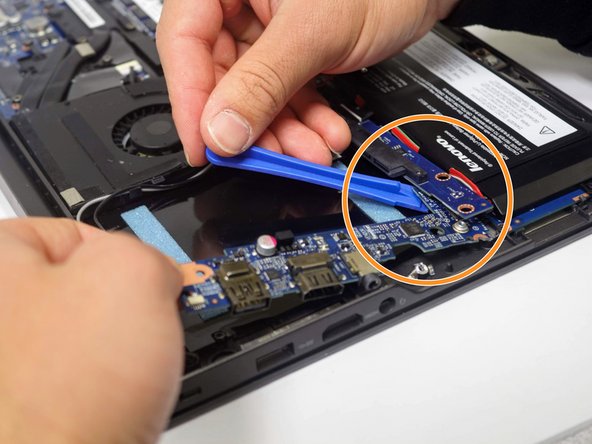
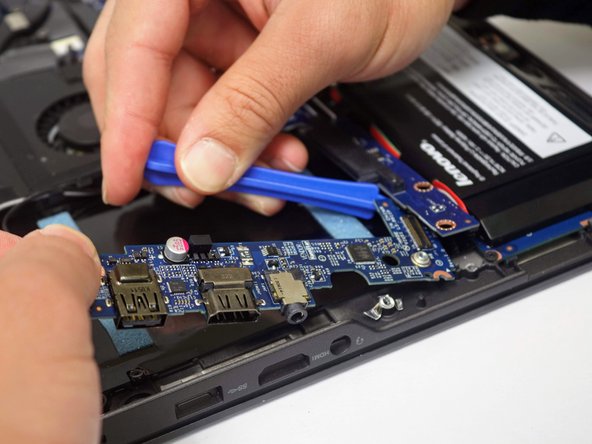
Take off the 2 M2x3MM wafered screws holding down the chip top of assembly.
-
Lift the chip to release the HDMI-USB jack assembly
-


Team

Linn Benton Community College, Team S2-G2, Johnson Spring 2018 Mitglied von Linn Benton Community College, Team S2-G2, Johnson Spring 2018
LBCC-JOHNSON-S18S2G2
4 Mitglieder
7 Anleitungen geschrieben