Was du brauchst
-
-
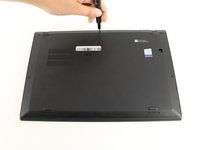
Use a Phillips #0 screwdriver to unscrew the five screws that secure the back cover to the laptop.
-
-
-
Use a Jimmy to lift the cover directly up off of the locating pins.
-
Remove the back cover.
-
-
-
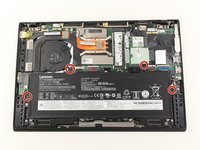
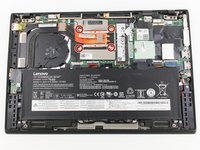
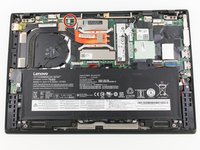
Use the Phillips #0 screwdriver to remove the four 5 mm screws that secure the battery to the laptop frame.
-
-
-
Take out the battery by lifting it from the top edge of the laptop, and then pulling away from the motherboard.
-
-
-
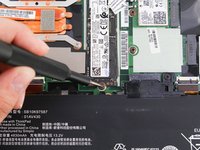
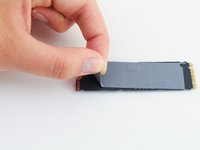
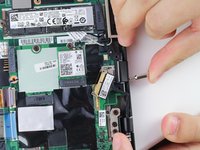
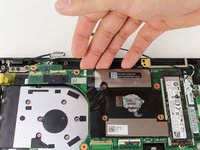
Use a Phillips #0 screwdriver to remove the single screw that secures the SSD to the motherboard.
-
-
-
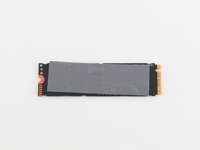
Carefully remove the SSD by lifting it and pulling it out of the pins towards the battery of the laptop.
-
-
-
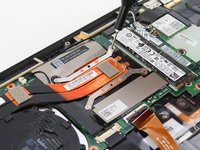
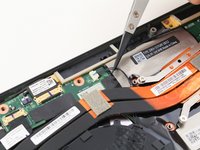
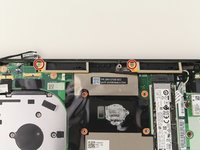
Use a Phillips #0 screwdriver to loosen the four screws that secure the fan to the motherboard.
-
-
In diesem Schritt verwendetes Werkzeug:Nylon Tipped Tweezers$4.99
-
Use nylon tipped tweezers, or your fingers, to gently pull the fan's power cable towards the SSD, disconnecting it from the pins.
-
-
-
-
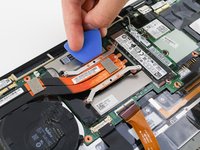
Use a plastic opening pick to lift the fan mount.
-
Use your fingers to gently pull the fan diagonally away from where it is connected.
-
-
-
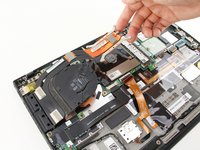
Turn the fan over to expose the interior.
-
If necessary, clean out the fan or wipe away and replace the thermal paste.
-
-
-
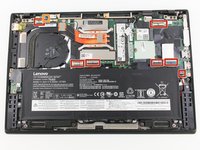
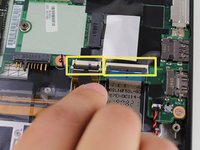
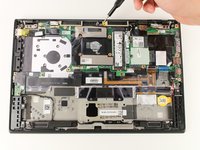
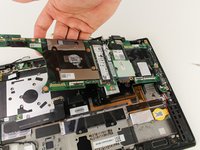
Remove each of the 7 main ribbon cables that connect the motherboard to the rest of the laptop.
-
Detach the last ribbon cable in the same way as before.
-
For the red and orange cables, use a spudger to lift the black plastic bar.
-
-
In diesem Schritt verwendetes Werkzeug:Tweezers$4.99
-
Place a spudger under the cables to disconnect them from the WLAN card.
-
-
-
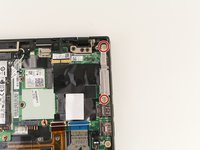
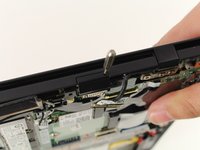
Use a Phillips #00 screwdriver to remove the two 3mm screws that secure the IO bracket.
-
-
-
Lift from the location of the screw towards you. Then pull towards the screw side to remove the bracket.
-
-
-
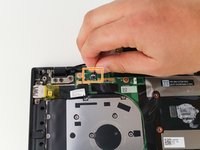
Lift the white and black wires from their press on connections. Make sure to grab the connector head, not the wire itself
-
-
-
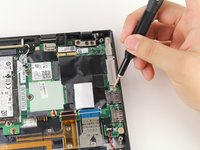
Using an iFixit SIM card screw head tip, apply pressure to the hole to disconnect the SD card slot from the device.
-
-
-
Use a Phillips #00 screwdriver to remove each of the four remaining 3mm screws securing the motherboard to the device.
-
-
-
Lift from the top of the motherboard towards you.
-
Pull away from the IO port side to remove the motherboard.
-
-
-
Use a PH0 screwdriver to remove the three 2mm screws holding the daughterboard in place.
-
-
-
Use a PH0 screwdriver to remove the two 2mm screws holding the USB port in place.
-
-
-
Carefully push the keyboard from the front, starting at the edge (Left edge is depicted).
-


![Lenovo ThinkPad X1 Carbon 6th Gen Keyboard Replacement, Daughterboard [AUX]: Schritt 22, Bild 1 von 1](https://guide-images.cdn.ifixit.com/igi/mx5Oo4ArkK5GZZhS.medium)


To reassemble your device, follow these instructions in reverse order.
To reassemble your device, follow these instructions in reverse order.
Rückgängig: Ich habe diese Anleitung nicht absolviert.
7 weitere Personen haben diese Anleitung absolviert.

Team

The Citadel Military College of South Carolina, Team 1-8, Eggleston Fall 2022 Mitglied von The Citadel Military College of South Carolina, Team 1-8, Eggleston Fall 2022
CMCSC-EGGLESTON-F22S1G8
3 Mitglieder
4 Anleitungen geschrieben
2 Kommentare
Thanks for posting that. What a project!
Excelente Pagina muy buen aporte