Einleitung
This guide will be most useful when the laptop has trouble opening smoothly due to its use over time. To access the hinges one must remove the motherboard and battery. Other guides are provided to complete this and warnings associated with those parts.
Was du brauchst
-
-
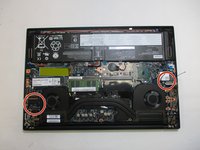
Orient the laptop so that it is bottom up, and the trackpad is closest to you.
-
Unscrew the seven captive screws with a Phillips #00 screwdriver.
-
Slide a blue opening pick in the gap between the bottom panel and chassis, and pry off the one clip on each side.
-
Remove the back cover from the device.
-
-
-
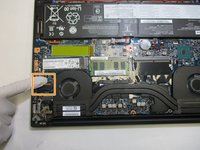
Use a Phillips #00 head screwdriver to remove the four 4 mm screws above the battery.
-
-
-
Lift the speaker modules on either side of the battery out of its pegs, and unwind the cable from the front of the battery.
-
Set the speaker modules out of the way.
-
-
-
In diesem Schritt verwendetes Werkzeug:Tweezers$4.99
-
Use tweezers to peel the plastic cover off the connector.
-
Use a spudger or your fingernail to pry up the battery straight up from the motherboard.
-
-
-
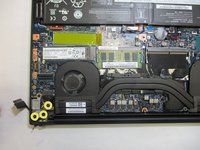
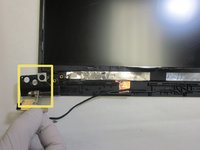
Remove back panel and locate the connecting wires.
-
Disconnect the display connections on the motherboard.
-
Use a Phillips #00 screwdriver to remove the six screws (three on each hinge) securing the hinges to the main chassis.
-
-
-
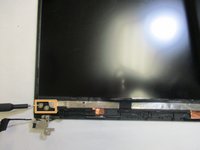
Flip the display face up, then wedge a Jimmy between the display and the bezel, sliding and prying around the perimeter until the bezel releases.
-
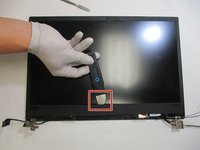
Unscrew the first two exposed 1.2 mm screws with a Phillips #1 screwdriver, then peel back the adhesive to find and remove the third screw.
-
Lift the hinges up and off the display.
-


To reassemble your device, follow these instructions in reverse order.
To reassemble your device, follow these instructions in reverse order.
Team

The Citadel Military College of South Carolina, Team 2-14, Eggleston Spring 2022 Mitglied von The Citadel Military College of South Carolina, Team 2-14, Eggleston Spring 2022
CMCSC-EGGLESTON-S22S2G14
3 Mitglieder
3 Anleitungen geschrieben